本文我们首先要说到什么是etcd,为什么kubernetes要使用etcd ,然后实践下二进制安装部署etcd集群。
一、Etcd组件简介
Etcd是一个高可用的键值存储系统,快速地保存和提供对关键数据的访问。它通过分布式锁定,领导者选举和写入障碍实现可靠的分布式协调。etcd集群旨在实现高可用性和永久数据存储和检索。主要用于共享配置和服务发现,它通过Raft一致性算法处理日志复制以保证强一致性,我们可以理解它为一个高可用强一致性的服务发现存储仓库。Etcd主要解决的是分布式系统中数据一致性的问题,而分布式系统中的数据分为控制数据和应用数据,etcd处理的数据类型为控制数据,对于很少量的应用数据也可以进行处理。
Etcd和Zookeeper的比较:
1.zk相比部署维护复杂复杂,使用也复杂,学习成本较高。而etcd部署简单,使用HTTP作为接口使用简单,使用Raft算法保证强一致性让用户易于理解。
2.zk使用Java编写,需要jvm才能运行,会引入大量的依赖,相对偏于中性应用。
3.zk发展缓慢。而etcd被k8s作为默认存储系统,升级迭代迅速。
4.etcd更安全,支持SSL客户端安全认证。
二、K8S和ETCD的关系
kubernetes官方默认使用etcd组件作为自己的高可用强一致性的服务发现存储仓库,在kubernetes集群中etcd主要用于配置数据共享和服务发现,把关键数据都存放在etcd键值存储中,这使得kubernetes的整体结构变得非常简单。在kubernetes中由于数据是随时发生变化的,提交了新任务、增加了新的Node、Node宕机了、容器死掉了等,都会触发状态数据的变更。集群状态数据变更之后,Master上的kube-scheduler和kube-controller-manager,就会重新安排工作,它们的工作安排结果也是数据。由于集群内状态数据变化都需要及时地通知给每一个组件,刚好etcd有一个特别好的特性,可以调用它的api监听其中的数据,一旦数据发生变化了就会收到通知。有了这个特性之后kubernetes中的每个组件只需要监听etcd中数据,就可以知道自己应该做什么。kube-scheduler和kube-controller-manager也只需要把最新的工作安排写入到etcd中就可以了,不用自己去逐个通知了。还有就是etcd使用raft协议实现一致性,是一个分布式锁可以用来做选举。如果在kubernetes中部署了多个kube-schdeuler,那么同一时刻只能有一个kube-scheduler在工作,要保证只有一个kube-schduler在工作呢就通过etcd选举出一个leader来实现。
三、二进制部署etcd集群
官网地址:https://etcd.io/
文档地址:https://etcd.io/docs/
项目地址:https://github.com/etcd-io/etcd
下载地址:https://github.com/etcd-io/etcd/releases
1.下载etcd二进制安装包
本文使用最新版本3.4.3,下载适合自己硬件平台的,本文使用:etcd-v3.4.3-linux-amd64.tar.gz
2.解压etcd二进制安装包
tar -zxvf etcd-v3.4.3-linux-amd64.tar.gz
3.安装二进制程序
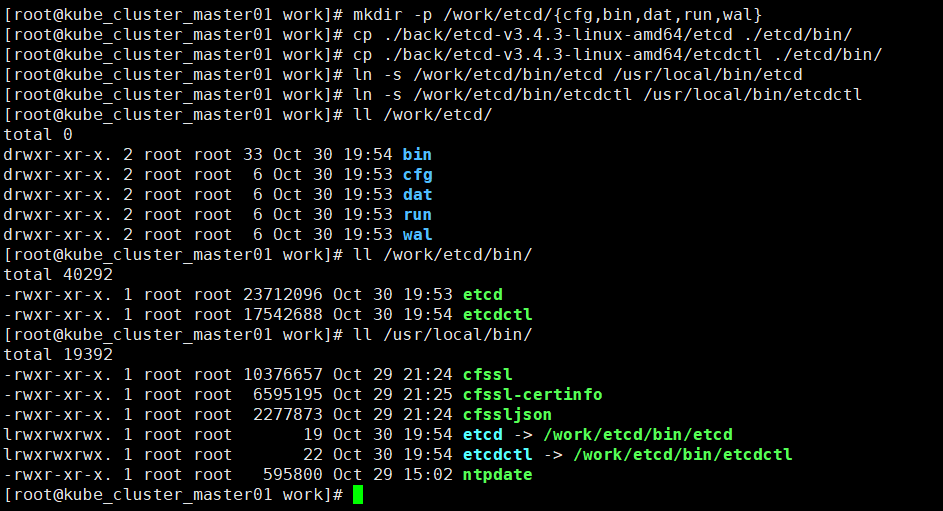
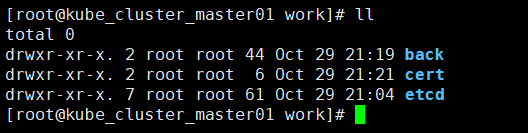
mkdir -p /work/etcd/{cfg,bin,dat,run,wal}
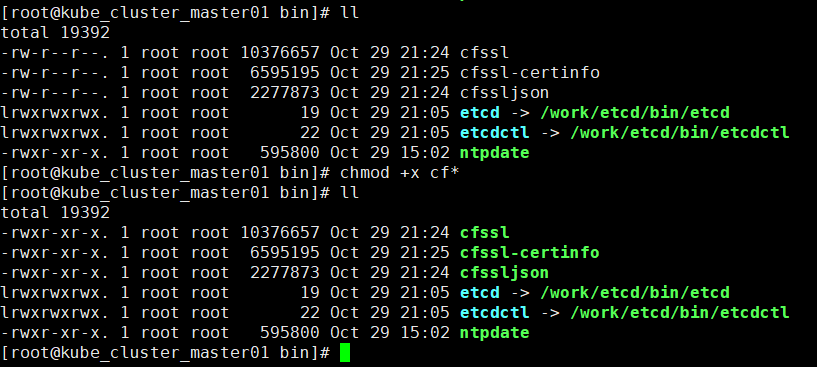
将etcd和etcdctl文件复制到/work/etcd/bin/目录下
创建软连接:
ln -s /work/etcd/bin/etcd /usr/local/bin/etcd
ln -s /work/etcd/bin/etcdctl /usr/local/bin/etcdctl
4.编写注册系统服务文件
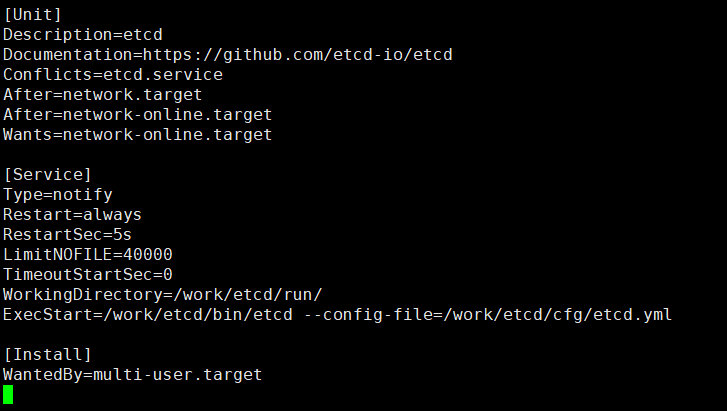
vi /usr/lib/systemd/system/etcd.service 如下:
[Unit]
Description=etcd
Documentation=https://github.com/etcd-io/etcd
Conflicts=etcd.service
After=network.target
After=network-online.target
Wants=network-online.target

[Service]
Type=notify
Restart=always
RestartSec=5s
LimitNOFILE=40000
TimeoutStartSec=0
WorkingDirectory=/work/etcd/run/
ExecStart=/work/etcd/bin/etcd --config-file=/work/etcd/cfg/etcd.yml

[Install]
WantedBy=multi-user.target
5.生成Etcd服务需要的证书
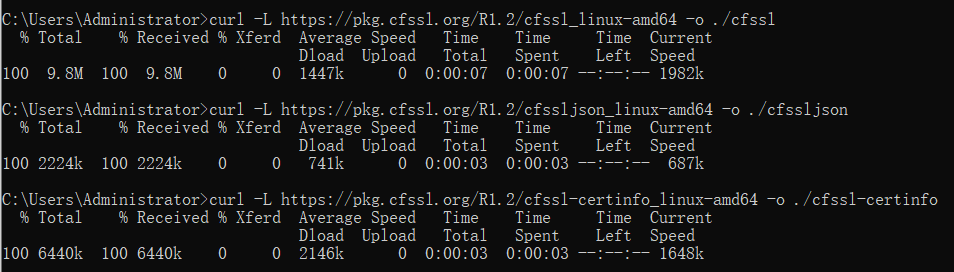
准备证书生成工具
curl -L https://pkg.cfssl.org/R1.2/cfssl_linux-amd64 -o ./cfssl
curl -L https://pkg.cfssl.org/R1.2/cfssljson_linux-amd64 -o ./cfssljson
curl -L https://pkg.cfssl.org/R1.2/cfssl-certinfo_linux-amd64 -o ./cfssl-certinfo
注意:本文在模拟内网环境下二进制安装,所以下载完成后传到机器上的/usr/local/bin
创建全局证书目录mkdir cert
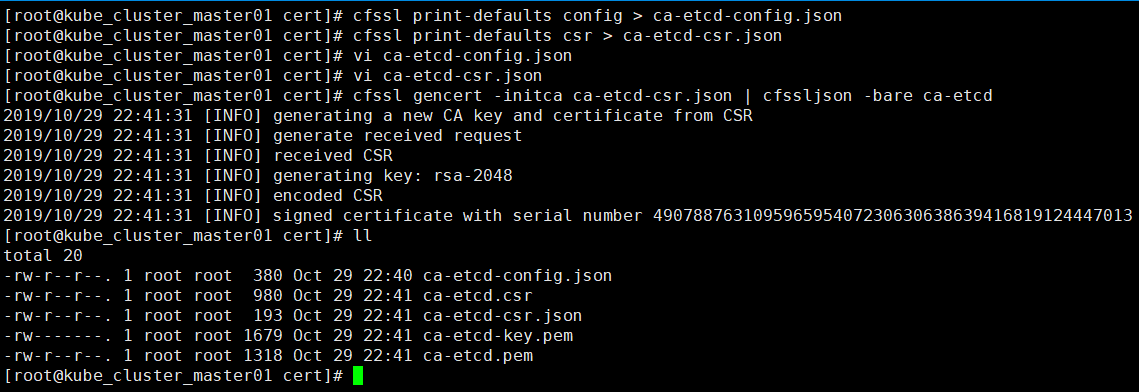
创建认证中心(CA)
cfssl print-defaults config > ca-etcd-config.json # 默认证书生产策略配置模板
cfssl print-defaults csr > ca-etcd-csr.json #默认csr请求模板
修改模板自定义内容vi ca-etcd-config.json 如下:
{
    "signing": {
        "default": {
            "expiry": "87600h"
        },
        "profiles": {
            "etcd": {
                "expiry": "87600h",
                "usages": [
                    "signing",
                    "key encipherment",
                    "server auth",
                    "client auth"
                ]
            }
        }
    }
}
注意:
ca-config.json:可以定义多个 profiles,分别指定不同的过期时间、使用场景等参数;后续在签名证书时可以指定使用某个 profile;此实例只有一个etcd。
signing:表示该证书可用于签名其它证书;生成的 ca-etcd.pem 证书中 CA=TRUE;
server auth:表示client可以用该 CA 对server提供的证书进行验证;
client auth:表示server可以用该CA对client提供的证书进行验证;
修改模板自定义内容ca-etcd-csr.json 如下:
{
  "CN": "etcd",
  "key": {
    "algo": "rsa",
    "size": 2048
  },
  "names": [
    {
      "C": "CN",
      "ST": "SH",
      "L": "BS",
      "O": "etcd",
      "OU": "System"
    }
  ]
}
生成证书(ca-etcd-key.pem)和秘钥(ca-etcd.pem)
cfssl gencert -initca ca-etcd-csr.json | cfssljson -bare ca-etcd
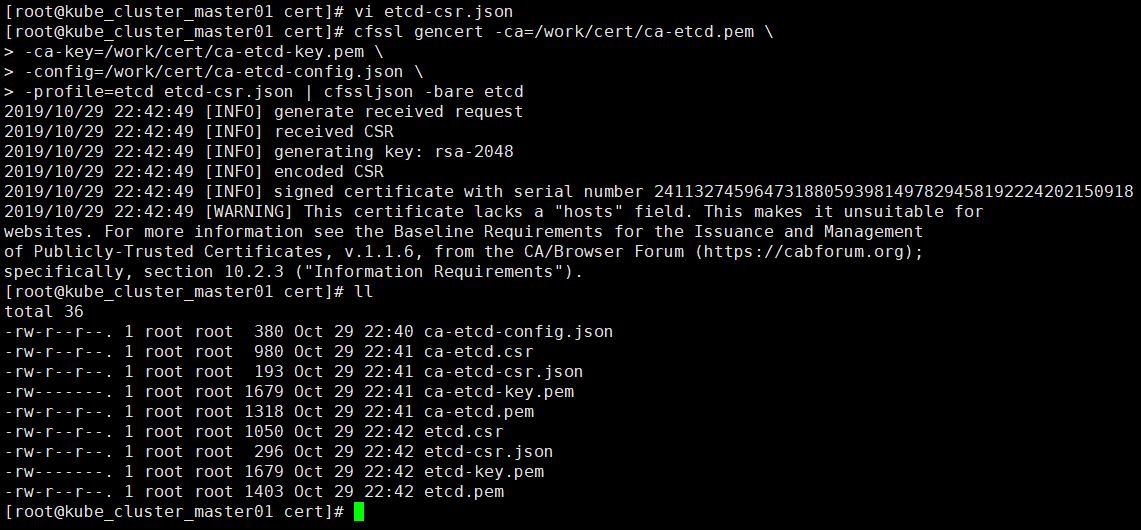
创建etcd证书签名请求, vi etcd-csr.json 如下:
{
  "CN": "etcd",
  "hosts": [
    "127.0.0.1",
    "192.168.100.111",
    "192.168.100.112",
    "192.168.100.113",
    "kube-cluster-master01",
    "kube-cluster-master02",
    "kube-cluster-master03"
  ],
  "key": {
    "algo": "rsa",
    "size": 2048
  },
  "names": [
    {
      "C": "CN",
      "ST": "SH",
      "L": "BS",
      "O": "etcd",
      "OU": "System"
    }
  ]
}
生成etcd证书
cfssl gencert -ca=/work/cert/ca-etcd.pem \
-ca-key=/work/cert/ca-etcd-key.pem \
-config=/work/cert/ca-etcd-config.json \
-profile=etcd etcd-csr.json | cfssljson -bare etcd
生成的如下文件:etcd.csr etcd-key.pem etcd.pem 将三个证书拷贝到其他两个节点上
6.编写Etcd服务配置文件
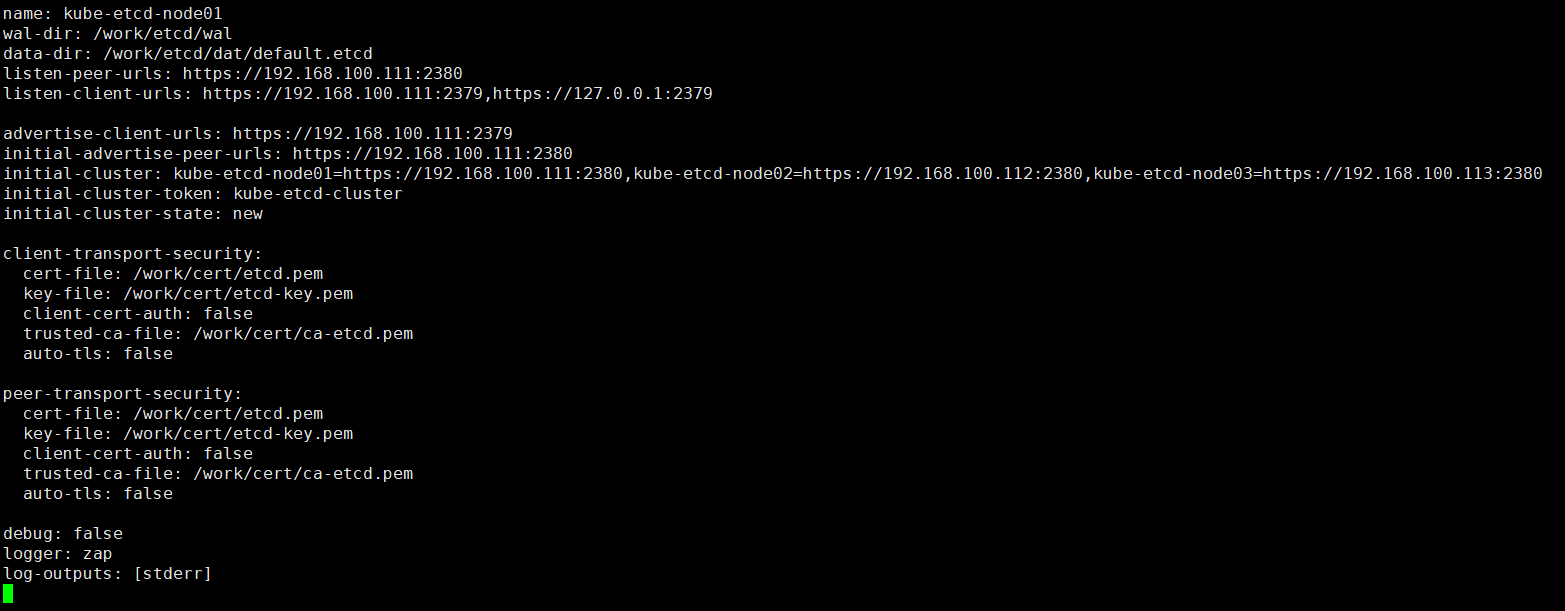
节点1配置文件:vi /work/etcd/cfg/etcd.yml
name: kube-etcd-node01
wal-dir: /work/etcd/wal
data-dir: /work/etcd/dat/default.etcd
listen-peer-urls: https://192.168.100.111:2380
listen-client-urls: https://192.168.100.111:2379,https://127.0.0.1:2379

advertise-client-urls: https://192.168.100.111:2379
initial-advertise-peer-urls: https://192.168.100.111:2380
initial-cluster: kube-etcd-node01=https://192.168.100.111:2380,kube-etcd-node02=https://192.168.100.112:2380,kube-etcd-node03=https://192.168.100.113:2380
initial-cluster-token: kube-etcd-cluster
initial-cluster-state: new

client-transport-security:
  cert-file: /work/cert/etcd.pem
  key-file: /work/cert/etcd-key.pem
  client-cert-auth: false
  trusted-ca-file: /work/cert/ca-etcd.pem
  auto-tls: false

peer-transport-security:
  cert-file: /work/cert/etcd.pem
  key-file: /work/cert/etcd-key.pem
  client-cert-auth: false
  trusted-ca-file: /work/cert/ca-etcd.pem
  auto-tls: false

debug: false
logger: zap
log-outputs: [stderr]
节点2配置文件:vim /work/etcd/cfg/etcd.yml
name: kube-etcd-node02
wal-dir: /work/etcd/wal
data-dir: /work/etcd/dat/default.etcd
listen-peer-urls: https://192.168.100.112:2380
listen-client-urls: https://192.168.100.112:2379,https://127.0.0.1:2379

advertise-client-urls: https://192.168.100.112:2379
initial-advertise-peer-urls: https://192.168.100.112:2380
initial-cluster: kube-etcd-node01=https://192.168.100.111:2380,kube-etcd-node02=https://192.168.100.112:2380,kube-etcd-node03=https://192.168.100.113:2380
initial-cluster-token: kube-etcd-cluster
initial-cluster-state: new

client-transport-security:
  cert-file: /work/cert/etcd.pem
  key-file: /work/cert/etcd-key.pem
  client-cert-auth: false
  trusted-ca-file: /work/cert/ca-etcd.pem
  auto-tls: false

peer-transport-security:
  cert-file: /work/cert/etcd.pem
  key-file: /work/cert/etcd-key.pem
  client-cert-auth: false
  trusted-ca-file: /work/cert/ca-etcd.pem
  auto-tls: false

debug: false
logger: zap
log-outputs: [stderr]

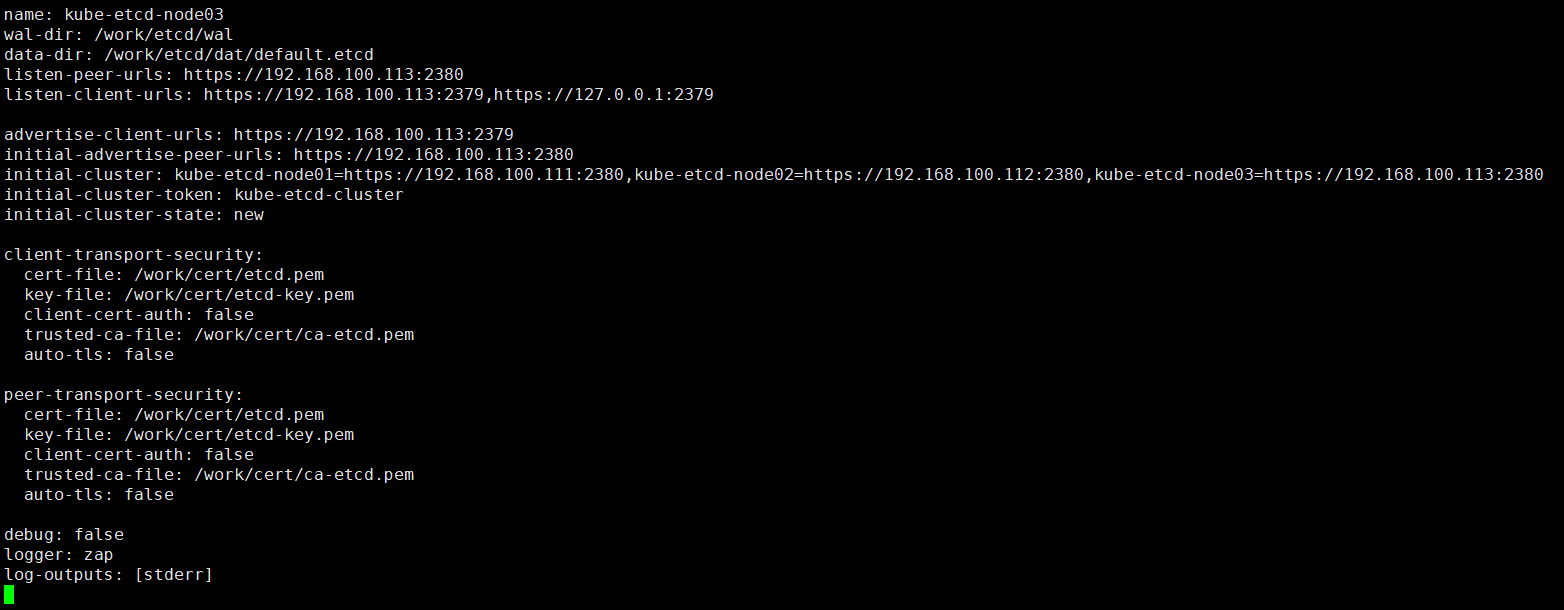
节点3配置文件:vi /work/etcd/cfg/etcd.conf
name: kube-etcd-node03
wal-dir: /work/etcd/wal
data-dir: /work/etcd/dat/default.etcd
listen-peer-urls: https://192.168.100.113:2380
listen-client-urls: https://192.168.100.113:2379,https://127.0.0.1:2379

advertise-client-urls: https://192.168.100.113:2379
initial-advertise-peer-urls: https://192.168.100.113:2380
initial-cluster: kube-etcd-node01=https://192.168.100.111:2380,kube-etcd-node02=https://192.168.100.112:2380,kube-etcd-node03=https://192.168.100.113:2380
initial-cluster-token: kube-etcd-cluster
initial-cluster-state: new

client-transport-security:
  cert-file: /work/cert/etcd.pem
  key-file: /work/cert/etcd-key.pem
  client-cert-auth: false
  trusted-ca-file: /work/cert/ca-etcd.pem
  auto-tls: false

peer-transport-security:
  cert-file: /work/cert/etcd.pem
  key-file: /work/cert/etcd-key.pem
  client-cert-auth: false
  trusted-ca-file: /work/cert/ca-etcd.pem
  auto-tls: false

debug: false
logger: zap
log-outputs: [stderr]
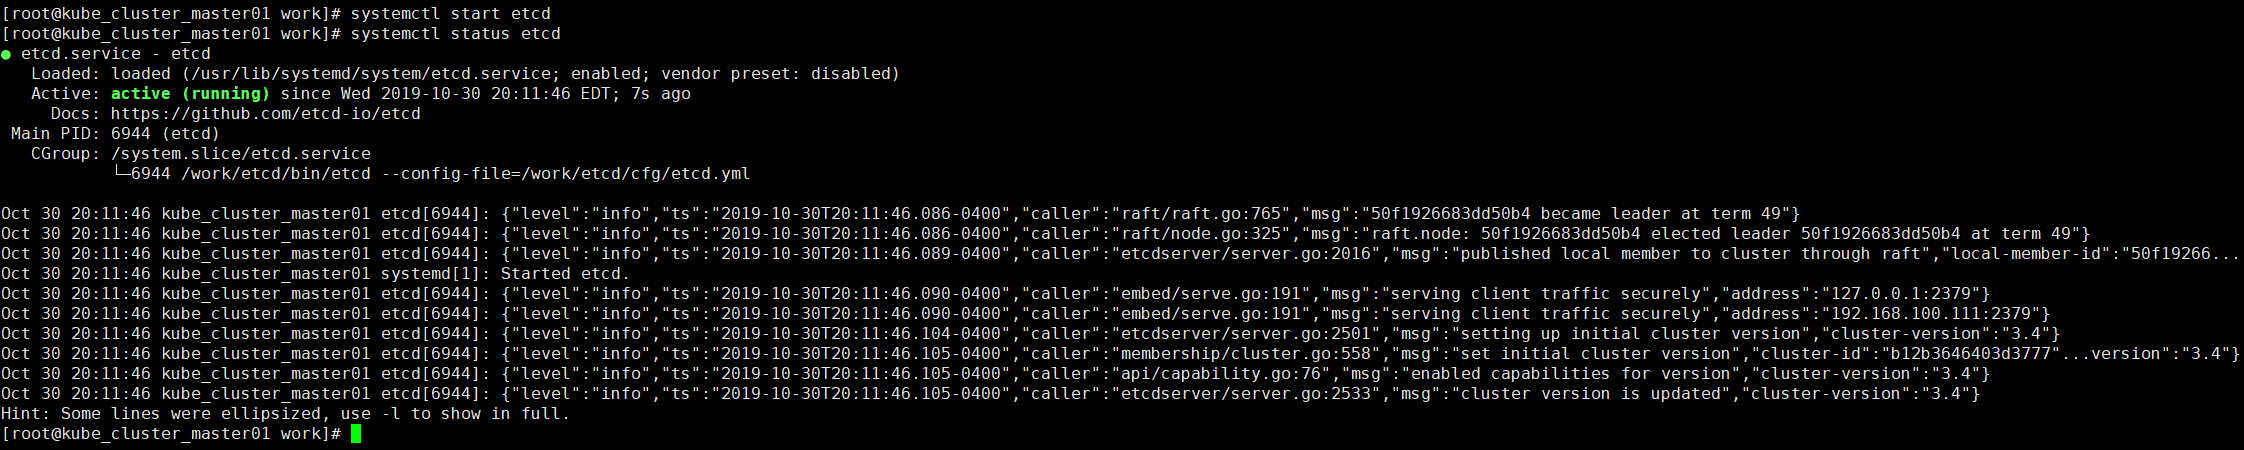
7.启动ETCD服务
以上步骤在三个节点上都操作完成后,分别在三个节点上执行以下操作:
systemctl daemon-reload
systemctl enable etcd
systemctl start etcd


8.验证ETCD服务
etcdctl --cacert=/work/cert/ca-etcd.pem \
 --cert=/work/cert/etcd.pem \
 --key=/work/cert/etcd-key.pem \
 --endpoints=https://192.168.100.111:2379,https://192.168.100.112:2379,https://192.168.100.113:2379 endpoint health

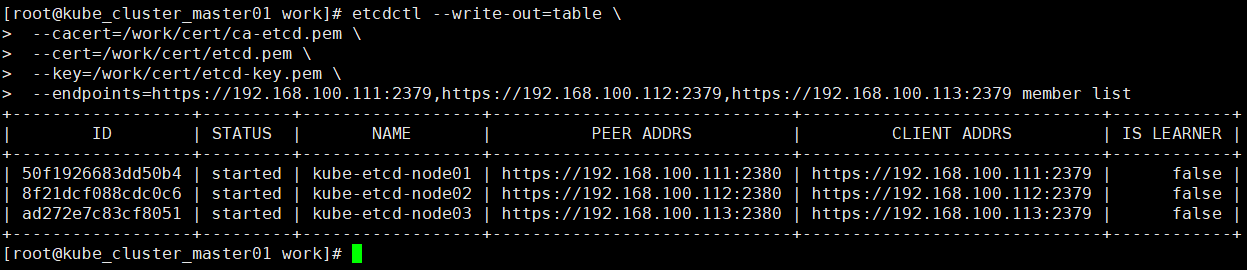
etcdctl --write-out=table \
 --cacert=/work/cert/ca-etcd.pem \
 --cert=/work/cert/etcd.pem \
 --key=/work/cert/etcd-key.pem \
 --endpoints=https://192.168.100.111:2379,https://192.168.100.112:2379,https://192.168.100.113:2379 endpoint status

etcdctl --write-out=table \
 --cacert=/work/cert/ca-etcd.pem \
 --cert=/work/cert/etcd.pem \
 --key=/work/cert/etcd-key.pem \
 --endpoints=https://192.168.100.111:2379,https://192.168.100.112:2379,https://192.168.100.113:2379 member list