前言
在上一篇博客中已经实现了单聊和群聊的功能,并且做了详细讲解。不过上次还缺少灵活性,就是当前用户信息的问题,本篇中 t-io 的部分较少。并且为了实现快速登录,thymeleaf和Shiro我也只是做了简单使用,不过就做个学习记录吧。
thymeleaf模板
网上的博客有很多,我就不在误人子弟了。简单的介绍下我使用的部分。首先我下载了基于layui的一个社区模板。下载地址:http://git.oschina.net/sentsin/fly,所以暂时就拿了他的布局和登录页面做登录功能。
下载的模板里面有个common文件夹,里面已经提取出了 footer.html 和 header.html.我们先在resources文件夹下新建templates文件夹。然后新建 header,footer两个模板文件。分别代码如下:
<!DOCTYPE html> <html xmlns:th="http://www.thymeleaf.org"> <body> <header th:fragment="header"> <div class="header"> <!--具体的header的HTML--> </div> </header> </body> </html>
<!DOCTYPE html> <html xmlns:th="http://www.thymeleaf.org"> <body> <footer th:fragment="footer"> <div class="footer"> <!--具体的footer相关HTML--> </div> </footer> </body> </html>
然后在新建一个 layout 模板文件,引用上 header 和 footer。
<!DOCTYPE html> <html xmlns:th="http://www.thymeleaf.org" xmlns:layout="http://www.w3.org/1999/xhtml"> <head th:fragment="htmlhead"> <!--一些公共的JS,Css引用和meta等信息--> </head> <body> <!--替换成header的内容--> <div th:replace="fragments/header :: header">Header</div> <!--针对具体页面的内容部分--> <div layout:fragment="content" id="content" ></div> <!--替换成footer的内容--> <div th:replace="fragments/footer :: footer">footer</div> </body> </html>
比如,我把登录的页面内容套进去:
<!DOCTYPE html> <!--layout:decorator="layout" 这句代码可不能丢,要不然就没法渲染content内容了--> <html xmlns:th="http://www.thymeleaf.org" xmlns:layout="http://www.w3.org/1999/xhtml" layout:decorator="layout"> <head th:include="layout :: htmlhead" th:with="title='LayIM'"></head> <body> <scetion layout:fragment="content"> <div class="main layui-clear"> <!--登录窗体HTML--> </div> </scetion> </body> </html>
OK。页面布局就结束了,当然,我只是参照其他博客照猫画虎。目的就是快速搭建出架子,然后继续做核心部分。相关参考资料:https://www.cnblogs.com/ityouknow/p/5833560.html
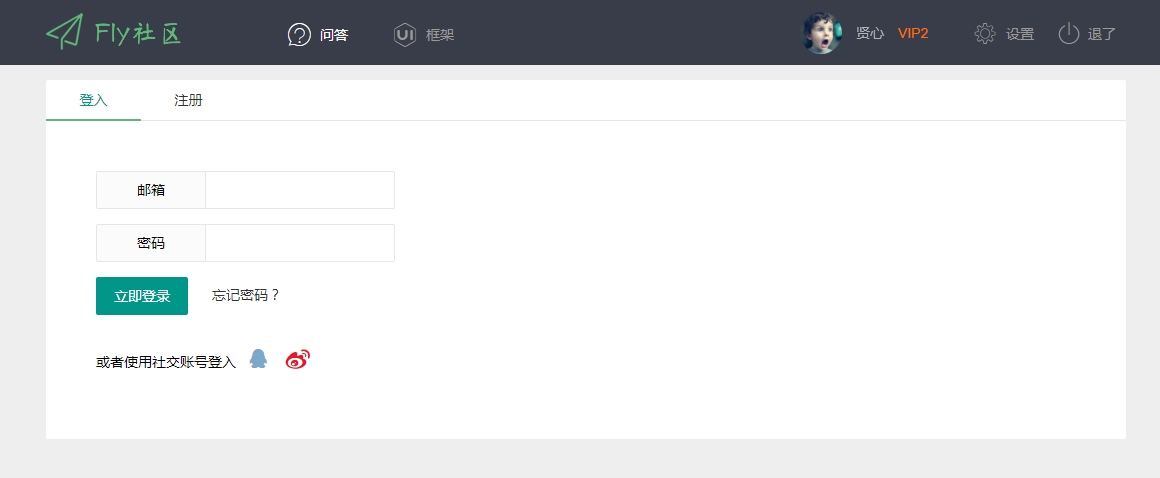
运行效果如下:
Shiro
这个东东我也是用了很浅的一部分,不过在运行过程中,可以看到他已经做了很多授权,登录等相关的功能,这个我也就不多做介绍了。
相关参考资料:http://blog.csdn.net/ityouknow/article/details/73836159
关于登录步骤不多说,无非登录验证然后跳转到首页。在这我只是介绍一下我所遇到的坑:
//我 x,加上static 还不行,还得具体的路径。之前加上 /static/css/** 不可以,所以直接改为访问路径 filterChainDefinitionMap.put("/css/**", "anon"); filterChainDefinitionMap.put("/js/**", "anon"); filterChainDefinitionMap.put("/images/**", "anon"); filterChainDefinitionMap.put("/html/**", "anon");
看我的注释就知道,刚开始我加了 static 路径下可以匿名访问,结果还是被拦截了,后来发现,需要写在浏览器中的路径(或者有其他原因?)
登录成功之后就会跳转到首页(index).如果登录不成功,配合 thymeleaf 语法显示不同的信息即可。这里呢我用了session存储错误信息,然后登录之后清空。登录部分代码如下:
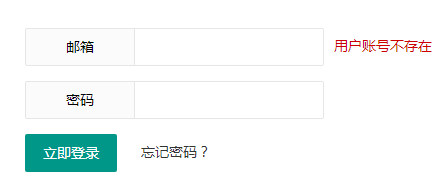
/** * 代码参考:http://www.ityouknow.com/springboot/2017/06/26/springboot-shiro.html * */ @RequestMapping(value = "/login",method = RequestMethod.POST) public String login(HttpServletRequest request) throws Exception{ request.getSession().removeAttribute("login_msg"); // 登录失败从request中获取shiro处理的异常信息。 // shiroLoginFailure:就是shiro异常类的全类名. String exception = (String) request.getAttribute("shiroLoginFailure"); System.out.println("exception=" + exception); String msg = ""; if (exception != null) { if (UnknownAccountException.class.getName().equals(exception)) { msg = "account"; } else if (IncorrectCredentialsException.class.getName().equals(exception)) { msg = "pwd"; } else if ("kaptchaValidateFailed".equals(exception)) { msg = "code"; } else { msg = "other"; } request.getSession().setAttribute("login_msg",msg); } // 此方法不处理登录成功,由shiro进行处理 return "/account/login"; }
然后前端用到了 th:if 语法,判断错误消息是否显示。
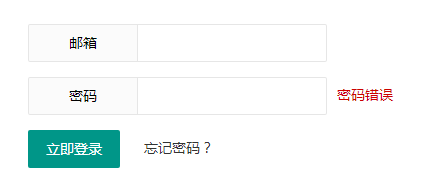
<form th:action="@{/account/login}" th:method="post"> <!--其他代码--> <!--判断session中的login_msg是否==pwd--> <div class="layui-form-mid" th:if="${session.login_msg}=='pwd'"> <span style="color: #c00;">密码错误</span> </div> </form>
运行效果如下:
不细讲的原因是我自己用的比较粗浅,而且网上博客比较多,我这里只列举我用到了有坑的地方。或许坑也是我自己挖的。
登录后的业务处理
登录成功之后可以通过Shiro的Subject 拿到当前的用户ID,后来我以为在t-io服务端(LayimMsgHandler)也能拿到,后来发现too young too simple,因为他两个一个是端口8080,另外一个是端口8081,所以,Shiro的Session没有拿到。不过这个也有点类似SSO了, 后边打算用redis处理登录的用户ID问题。不过这里,我先用了生成token的方式,然后在连接服务器的时候,将token传过去,然后进行验证,在获取用户信息赋值给ContextUser,最后进行用户绑定和群组绑定。
/** * 用 @Autowired 注解UserService 不起作用(原因我不是很清楚) * 解析客户端的token,获取用户信息转化为ContextUser对象 * 将ContextUser对象,以UserId为Key,ContextUser为value存入ChannelContext的Attribute中,方便后续使用当前用户信息 * 获取用户群组,遍历调用 Aio.bindGroup方法加入群组 * */ private HttpResponse handleHandshakeUserInfo(HttpRequest httpRequest, HttpResponse httpResponse, ChannelContext channelContext) { UserService userService = (UserService) SpringUtil.getBean("userService"); //增加token验证方法 String path = httpRequest.getRequestLine().getPath(); String token = path.substring(1); String userId = UserToken.IsValid(token); if (userId == null) { //没有token 未授权 httpResponse.setStatus(HttpResponseStatus.C401); } else { //解析token LayimContextUserInfo userInfo = userService.getContextUserInfo(Long.parseLong(userId)); if (userInfo == null) { //没有找到用户 httpResponse.setStatus(HttpResponseStatus.C404); } else { channelContext.setAttribute(userId, userInfo.getContextUser()); //绑定用户ID Aio.bindUser(channelContext, userId); //绑定用户群组 List<String> groupIds = userInfo.getGroupIds(); //绑定用户群信息 if (groupIds != null) { groupIds.forEach((String groupId) -> Aio.bindGroup(channelContext, groupId)); } } } return httpResponse; }
UserToken.IsValid就是验证token的合法性。通过url传过来。所以,前端稍微改一下,还要在UserController中增加一个生成token的接口。那么连接websocket服务器的时候就要先获取token。
$.get('/layim/token',function (res) { if(res.code>0) { return; } socket.config({ log:true, server:'ws://127.0.0.1:8888/'+res.data }); //其他监听代码 })
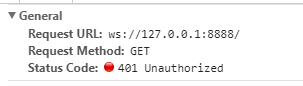
所以在运行时候是酱紫的:
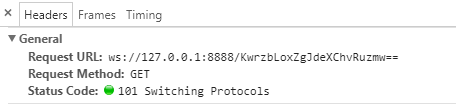
如果不加token或者token无效的话,会返回401
总结
本文内容零零散散的介绍了一些,主要是完成了登录的流程和服务端的对接。按理说,web端应该是和 websocket端分开的,只不过当时一心想合并到一起去。后来开发过程中发现完全是相当于两个项目之间的一些交互。当然这些都是我的个人理解。
在后续的博客中将会讲到LayIM的一些常用接口的使用和t-io的一些接口的探索使用。比如,用户在线情况,各种提示等。拜~
代码已经同步到:https://github.com/fanpan26/SpringBootLayIM

