SpringBoot admin+Eureka+钉钉通知
一、效果
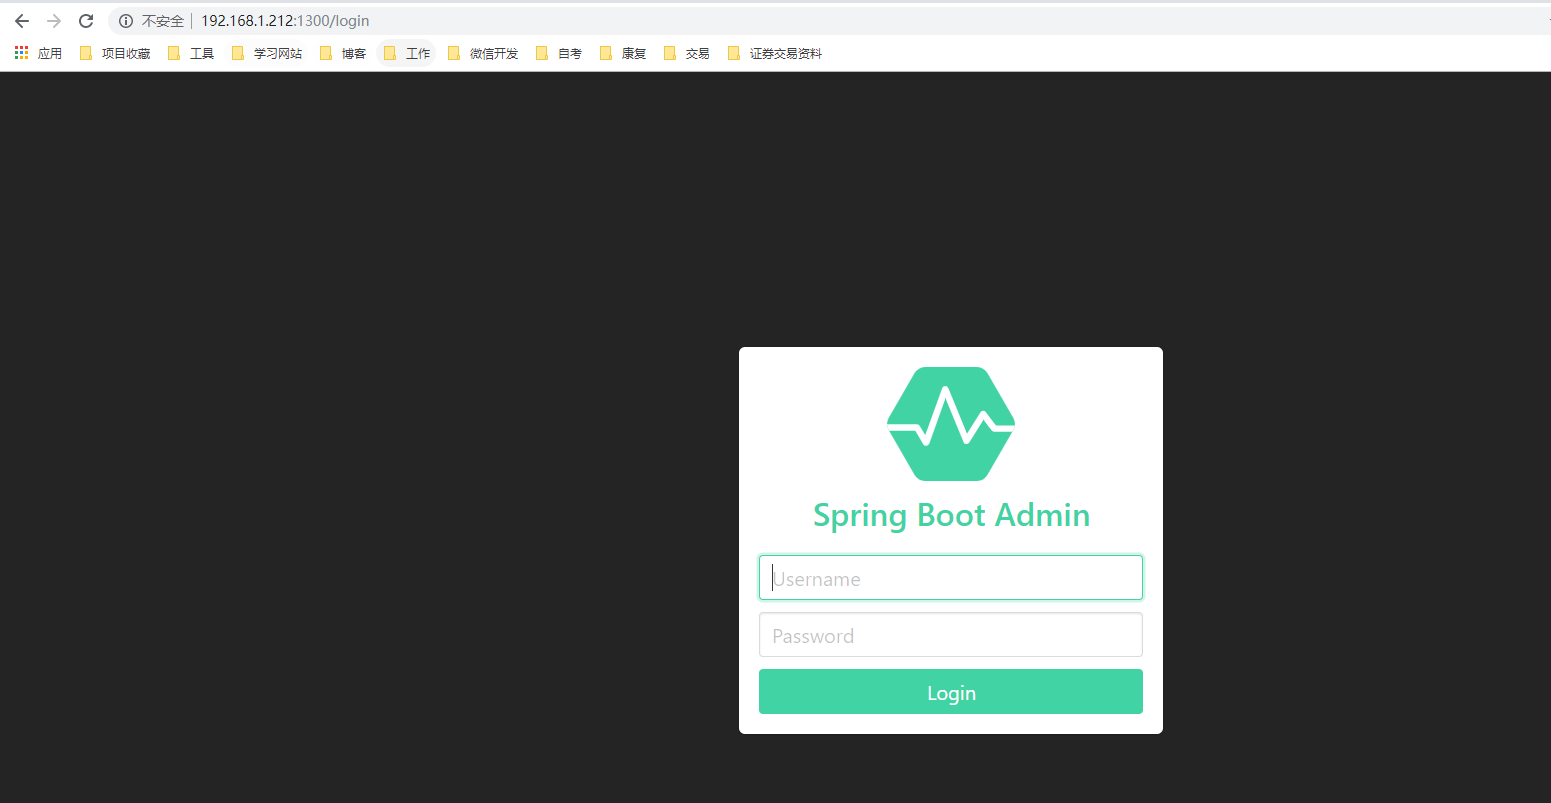
登录账号+密码
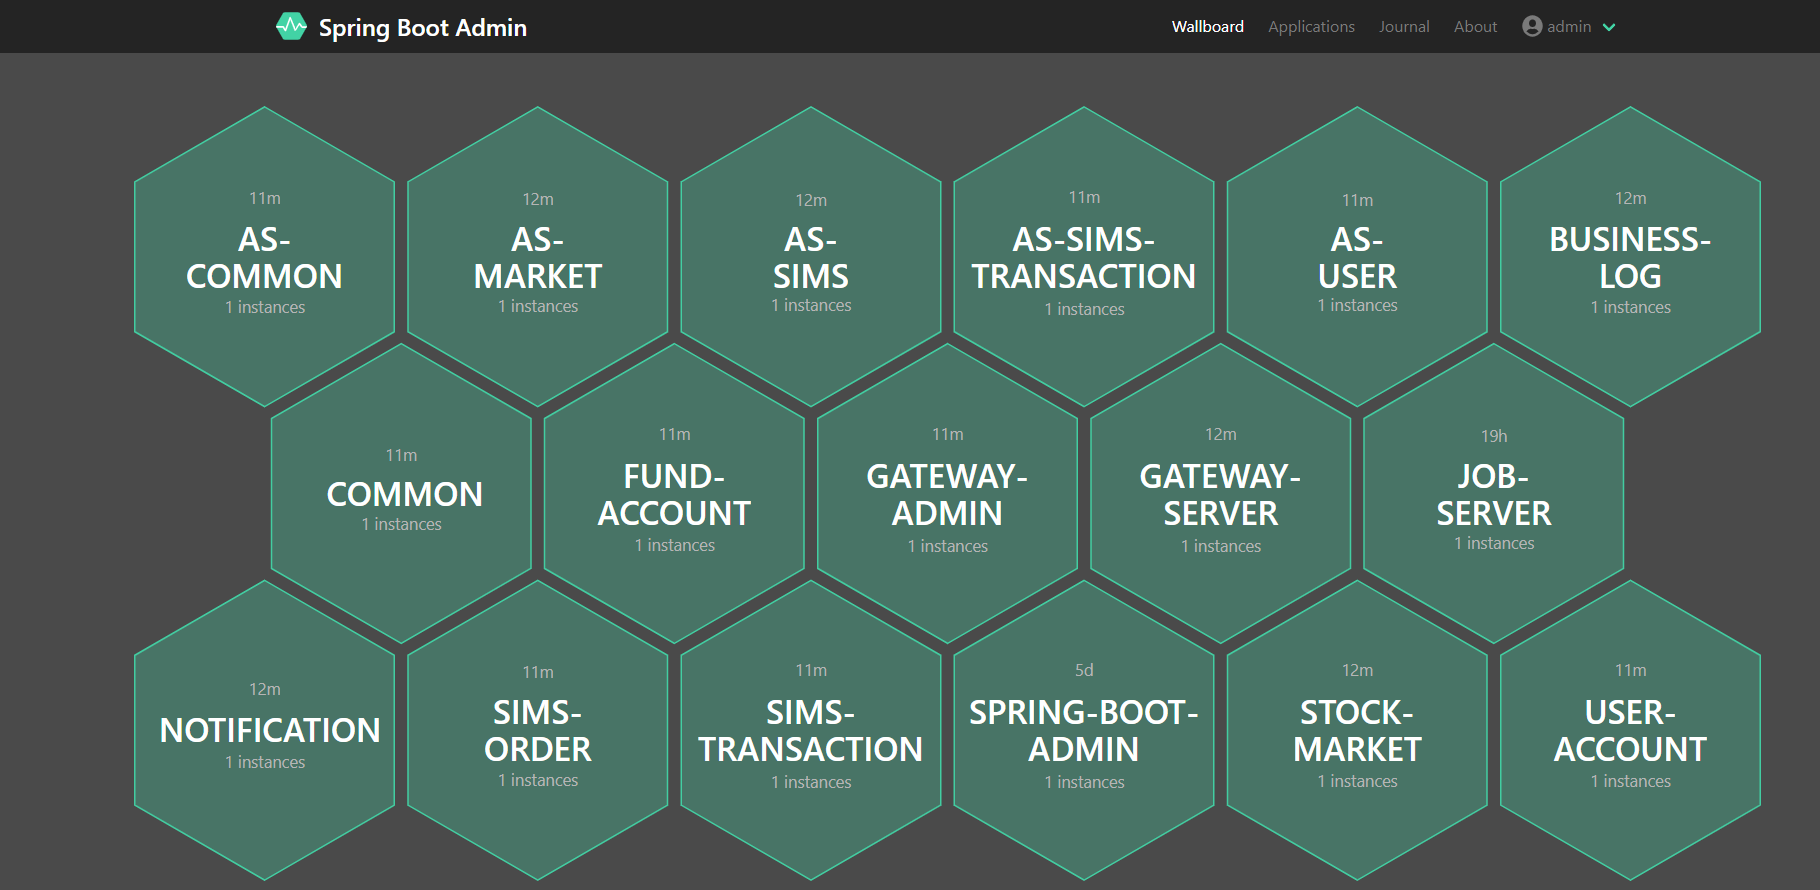
监控服务
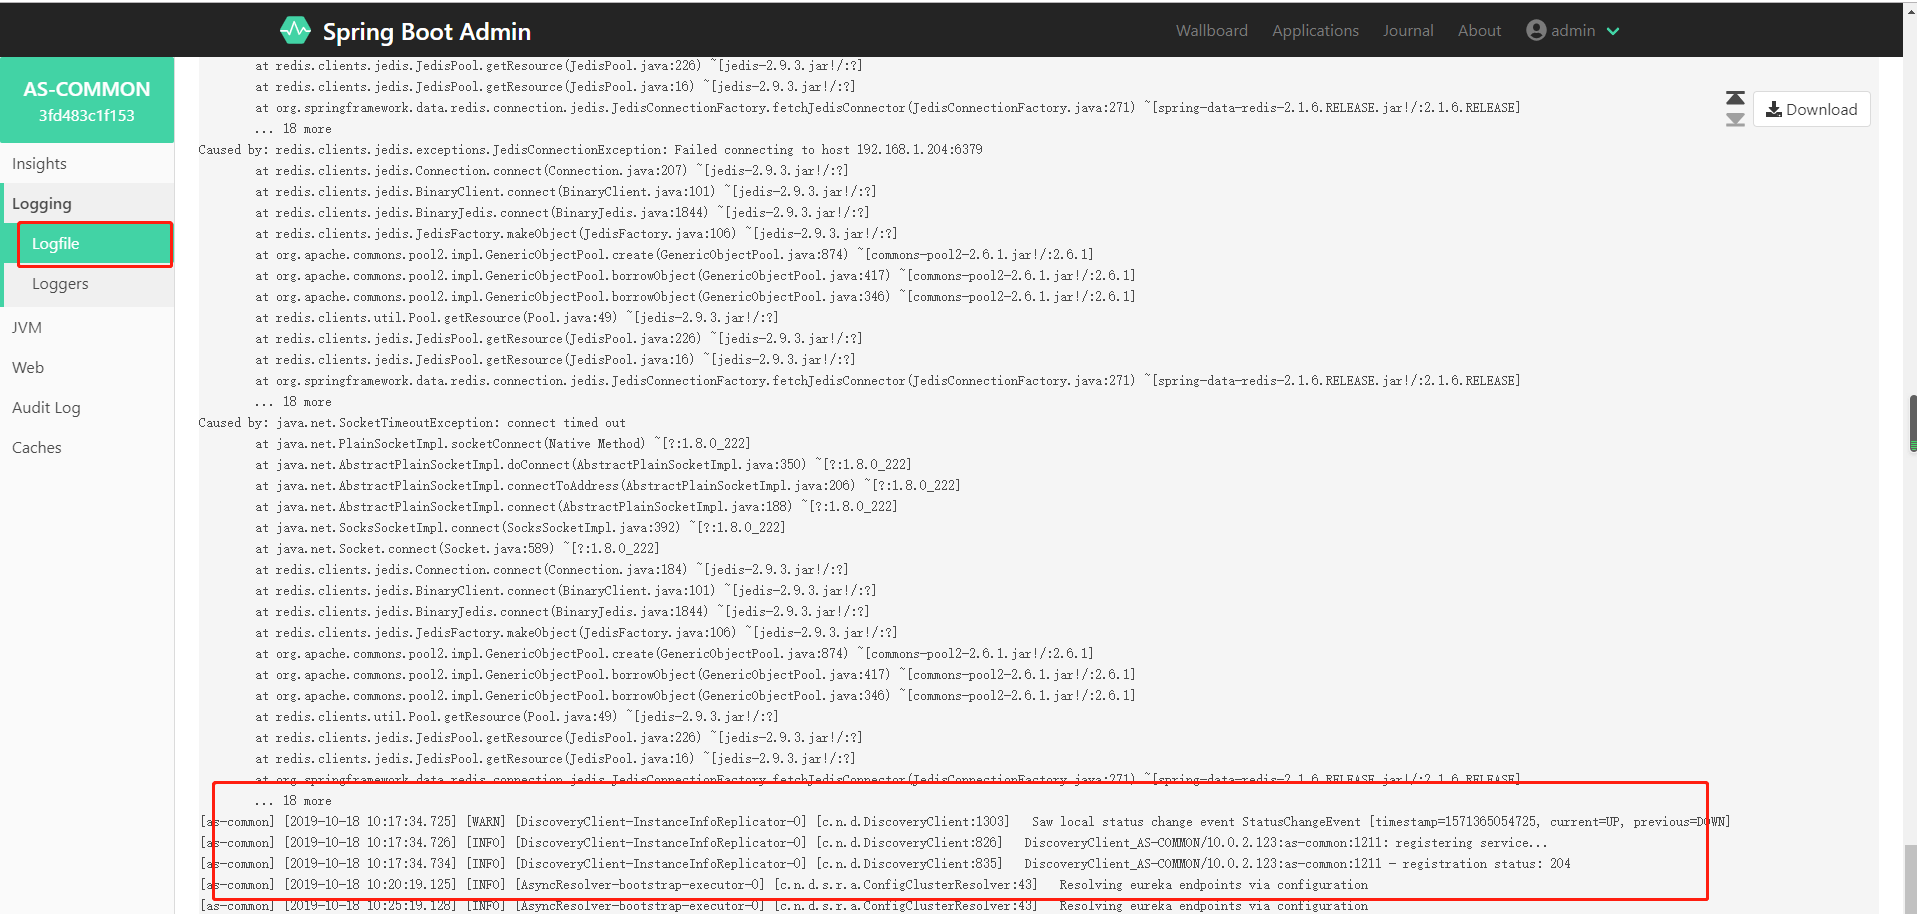
查看实时日志
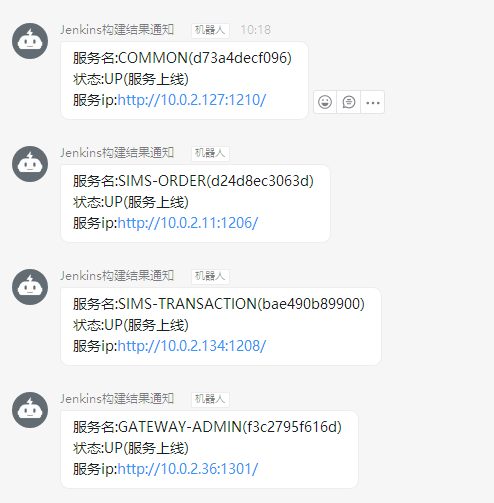
钉钉通知
二、什么是Spring Boot Admin ?
Spring Boot Admin是一个开源社区项目,用于管理和监控SpringBoot应用程序。 应用程序作为Spring Boot Admin Client向为Spring Boot Admin Server注册(通过HTTP)或使用SpringCloud注册中心(例如Eureka,Consul)发现。 UI是的Vue.js应用程序,展示Spring Boot Admin Client的Actuator端点上的一些监控。服务端采用Spring WebFlux + Netty的方式。Spring Boot Admin为注册的应用程序提供以下功能:
-
显示健康状况
-
显示详细信息,例如
-
JVM和内存指标
-
micrometer.io指标
-
数据源指标
-
缓存指标
-
显示构建信息编号
-
关注并下载日志文件
-
查看jvm system-和environment-properties
-
查看Spring Boot配置属性
-
支持Spring Cloud的postable / env-和/ refresh-endpoint
-
轻松的日志级管理
-
与JMX-beans交互
-
查看线程转储
-
查看http-traces
-
查看auditevents
-
查看http-endpoints
-
查看计划任务
-
查看和删除活动会话(使用spring-session)
-
查看Flyway / Liquibase数据库迁移
-
下载heapdump
-
状态变更通知(通过电子邮件,Slack,Hipchat,......)
-
状态更改的事件日志(非持久性)
三、原理
使用 Spring Boot Actuator 监控应用
四、集成 Eureka注册中心
1. 创建 eureka-server,自行google
2. 创建 spring-boot-admin
这是一个 Spring Boot Admin Server端。
pom.xml
<!--?xml version="1.0" encoding="UTF-8"?-->
<project xmlns="http://maven.apache.org/POM/4.0.0" xmlns:xsi="http://www.w3.org/2001/XMLSchema-instance" xsi:schemalocation="http://maven.apache.org/POM/4.0.0 http://maven.apache.org/xsd/maven-4.0.0.xsd">
    <modelversion>4.0.0</modelversion>
    <parent>
        <groupid>org.springframework.boot</groupid>
        <artifactid>spring-boot-starter-parent</artifactid>
        <version>2.1.6.RELEASE</version>
        <relativepath /> <!-- lookup parent from repository -->
    </parent>
    <packaging>jar</packaging>
    <artifactid>spring-boot-admin</artifactid>
    <name>spring-boot-admin</name>
    <description>Spring Boot Admin Server端</description>

     <properties>
        <java.version>1.8</java.version>
        <spring-boot-admin.version>2.1.6</spring-boot-admin.version>
        <spring-cloud.version>Greenwich.RELEASE</spring-cloud.version>
    </properties>

    <dependencies>
        <dependency>
            <groupid>org.springframework.boot</groupid>
            <artifactid>spring-boot-starter-web</artifactid>
        </dependency>
        <dependency>
            <groupid>de.codecentric</groupid>
            <artifactid>spring-boot-admin-starter-server</artifactid>
        </dependency>
        <dependency>
            <groupid>org.springframework.cloud</groupid>
            <artifactid>spring-cloud-starter-netflix-eureka-client</artifactid>
        </dependency>

        <dependency>
            <groupid>org.springframework.boot</groupid>
            <artifactid>spring-boot-starter-test</artifactid>
            <scope>test</scope>
        </dependency>
        <dependency>
            <groupid>org.springframework.boot</groupid>
            <artifactid>spring-boot-starter-security</artifactid>
        </dependency>
        <dependency>
            <groupid>org.jolokia</groupid>
            <artifactid>jolokia-core</artifactid>
        </dependency>
    </dependencies>

    <dependencymanagement>
        <dependencies>
            <dependency>
                <groupid>org.springframework.cloud</groupid>
                <artifactid>spring-cloud-dependencies</artifactid>
                <version>${spring-cloud.version}</version>
                <type>pom</type>
                <scope>import</scope>
            </dependency>
            <dependency>
                <groupid>de.codecentric</groupid>
                <artifactid>spring-boot-admin-dependencies</artifactid>
                <version>${spring-boot-admin.version}</version>
                <type>pom</type>
                <scope>import</scope>
            </dependency>
        </dependencies>
    </dependencymanagement>

    <build>
        <plugins>
            <plugin>
                <groupid>org.springframework.boot</groupid>
                <artifactid>spring-boot-maven-plugin</artifactid>
            </plugin>
        </plugins>
    </build>

</project>
application.yml
spring:
  application:
    name: admin-server
server:
  port: 1300
eureka:
  client:
    registryFetchIntervalSeconds: 5
    service-url:
      defaultZone: ${EUREKA_SERVICE_URL:http://localhost:8761}/eureka/
  instance:
    leaseRenewalIntervalInSeconds: 10
    health-check-url-path: /actuator/health

management:
  endpoints:
    web:
      exposure:
        include: "*"
  endpoint:
    health:
      show-details: ALWAYS
启动类 SpringbootAdminServerApplication
@SpringBootApplication
@EnableAdminServer
@EnableEurekaClient
public class ScAdminServerApplication {

    public static void main(String[] args) {
        SpringApplication.run( ScAdminServerApplication.class, args );
    }

}
3. 被监控端
被监控端需要放开端点
application.yml
spring:
  application:
    name: admin-client
eureka:
  instance:
    leaseRenewalIntervalInSeconds: 10
    health-check-url-path: /actuator/health

  client:
    registryFetchIntervalSeconds: 5
    service-url:
      defaultZone: ${EUREKA_SERVICE_URL:http://localhost:8761}/eureka/
management:
  endpoints:
    web:
      exposure:
        include: "*"
  endpoint:
    health:
      show-details: ALWAYS
server:
  port: 8762
admin 会自己拉取 Eureka 上注册的信息,主动去注册。
五、集成 Spring Security
Web应用程序中的身份验证和授权有多种方法,因此Spring Boot Admin不提供默认方法。默认情况下,spring-boot-admin-server-ui提供登录页面和注销按钮。我们结合 Spring Security 实现需要用户名和密码登录的安全认证。
springboot-admin工程的pom文件需要增加以下的依赖:
<dependency>
    <groupid>org.springframework.boot</groupid>
    <artifactid>spring-boot-starter-security</artifactid>
</dependency>
在 spirngboot-admin工的配置文件 application.yml 中配置 spring security 的用户名和密码,这时需要在服务注册时带上 metadata-map 的信息,如下:
spring:
  security:
    user:
      name: "admin"
      password: "admin"

eureka:
  instance:
    metadata-map:
      user.name: ${spring.security.user.name}
      user.password: ${spring.security.user.password}
      startup: ${random.int}    #needed to trigger info and endpoint update after restart
写一个配置类SecuritySecureConfig继承WebSecurityConfigurerAdapter,配置如下:
/**
 * security配置
 * @author wangjiafang
 * @date 2019/10/10
 */
@Configuration
public class SecuritySecureConfig extends WebSecurityConfigurerAdapter {

    private final String adminContextPath;

    public SecuritySecureConfig(AdminServerProperties adminServerProperties) {
        this.adminContextPath = adminServerProperties.getContextPath();
    }


    @Override
    protected void configure(HttpSecurity http) throws Exception {
        // @formatter:off
        SavedRequestAwareAuthenticationSuccessHandler successHandler = new SavedRequestAwareAuthenticationSuccessHandler();
        successHandler.setTargetUrlParameter("redirectTo");
        successHandler.setDefaultTargetUrl(adminContextPath + "/");

        http.authorizeRequests()
                .antMatchers(adminContextPath + "/assets/**").permitAll()
                .antMatchers(adminContextPath + "/login").permitAll()
                .anyRequest().authenticated()
                .and()
                .formLogin().loginPage(adminContextPath + "/login").successHandler(successHandler).and()
                .logout().logoutUrl(adminContextPath + "/logout").and()
                .httpBasic().and()
                .csrf()
                .csrfTokenRepository(CookieCsrfTokenRepository.withHttpOnlyFalse())
                .ignoringRequestMatchers(
                        new AntPathRequestMatcher(adminContextPath + "/instances", HttpMethod.POST.toString()),
                        new AntPathRequestMatcher(adminContextPath + "/instances/*", HttpMethod.DELETE.toString()),
                        new AntPathRequestMatcher(adminContextPath + "/actuator/**")
                );
        // @formatter:on
    }
}
重新访问 http:localhost:1300 会出现登录界面,密码是配置文件中配置好的,账号 admin 密码 admin
六、通知
自定义通知+钉钉通知
1、创建钉钉机器人,拿到token,怎么创建钉钉机器人,请自行google
2、下载sdk
钉钉官方提供了统一的SDK,使用SDK可以便捷的调用服务端API,但没有放到公共maven仓库中,需要自行下载后导入到项目,或者上传到自己的搭建的nexus私服中
3、自定义的通知器
通过扩展 AbstractEventNotifier或AbstractStatusChangeNotifier。在springboot-admin-server工程中编写一个自定义的通知器:
import com.dingtalk.api.DefaultDingTalkClient;
import com.dingtalk.api.DingTalkClient;
import com.dingtalk.api.request.OapiRobotSendRequest;
import com.taobao.api.ApiException;
import de.codecentric.boot.admin.server.domain.entities.Instance;
import de.codecentric.boot.admin.server.domain.entities.InstanceRepository;
import de.codecentric.boot.admin.server.domain.events.InstanceEvent;
import de.codecentric.boot.admin.server.domain.events.InstanceStatusChangedEvent;
import de.codecentric.boot.admin.server.notify.AbstractEventNotifier;
import lombok.extern.slf4j.Slf4j;
import org.springframework.beans.factory.annotation.Value;
import org.springframework.stereotype.Component;
import reactor.core.publisher.Mono;
/**
* 钉钉通知
* @author wangjiafang
* @date 2019/10/10
*/
@Component
@Slf4j
public class CustomNotifier extends AbstractEventNotifier {
/**
* 消息模板
*/
private static final String template = "服务名:%s(%s) \n状态:%s(%s) \n服务ip:%s";
@Value("${spring.admin.ding-talk-token}")
private String dingTalkToken;
public CustomNotifier(InstanceRepository repository) {
super(repository);
}
@Override
protected Mono<void> doNotify(InstanceEvent event, Instance instance) {
return Mono.fromRunnable(() -> {
if (event instanceof InstanceStatusChangedEvent) {
log.info("Instance {} ({}) is {}", instance.getRegistration().getName(), event.getInstance(),
((InstanceStatusChangedEvent) event).getStatusInfo().getStatus());
String status = ((InstanceStatusChangedEvent) event).getStatusInfo().getStatus();
String messageText = null;
switch (status) {
// 健康检查没通过
case "DOWN":
log.info("发送 健康检查没通过 的通知!");
messageText = String.format(template, instance.getRegistration().getName(),event.getInstance(), ((InstanceStatusChangedEvent) event).getStatusInfo().getStatus(),"健康检查没通过",instance.getRegistration().getServiceUrl());
this.sendMessage(messageText);
break;
// 服务离线
case "OFFLINE":
log.info("发送 服务离线 的通知!");
messageText = String.format(template, instance.getRegistration().getName(),event.getInstance(), ((InstanceStatusChangedEvent) event).getStatusInfo().getStatus(),"服务离线",instance.getRegistration().getServiceUrl());
this.sendMessage(messageText);
break;
//服务上线
case "UP":
log.info("发送 服务上线 的通知!");
messageText = String.format(template, instance.getRegistration().getName(),event.getInstance(), ((InstanceStatusChangedEvent) event).getStatusInfo().getStatus(),"服务上线",instance.getRegistration().getServiceUrl());
this.sendMessage(messageText);
break;
// 服务未知异常
case "UNKNOWN":
log.info("发送 服务未知异常 的通知!");
messageText = String.format(template, instance.getRegistration().getName(),event.getInstance(), ((InstanceStatusChangedEvent) event).getStatusInfo().getStatus(),"服务未知异常",instance.getRegistration().getServiceUrl());
this.sendMessage(messageText);
break;
default:
break;
}
} else {
log.info("Instance {} ({}) {}", instance.getRegistration().getName(), event.getInstance(),
event.getType());
}
});
}
/**
* 发送消息
* @param messageText
*/
private void sendMessage(String messageText){
DingTalkClient client = new DefaultDingTalkClient("https://oapi.dingtalk.com/robot/send?access_token="+dingTalkToken);
OapiRobotSendRequest request = new OapiRobotSendRequest();
request.setMsgtype("text");
OapiRobotSendRequest.Text text = new OapiRobotSendRequest.Text();
text.setContent(messageText);
request.setText(text);
try {
client.execute(request);
} catch (ApiException e) {
log.info("[ERROR] sendMessage", e);
}
}
}
七 查看实时日志
要在springbootadmin面板中查看实时日志,需要指定项目中日志输出的地址,比如我的日志是在/logs/项目名称/项目名称-info.log下
logging:
  file: /logs/${spring.application.name}/${spring.application.name}-info.log

