6.配置web服务(基于LAMP)
英文文档比较丰富:https://wiki.archlinux.org/index.php/Apache_HTTP_Server
6.1 先安装Apache、PHP
pacman -Sy php php-apache php-gd
【上面命令会自动安装Apache、PHP】
先启动一下Apache看报什么错误
[root@alarm alarm]# apachectl AH00558: httpd: Could not reliably determine the server's fully qualified domain name, using fe80::ba27:ebff:fe34:38d5. Set the 'ServerName' directive globally to suppress this message
配置apache:
vi /etc/httpd/conf/httpd.conf
查找ServerName,会看到#ServerName www.example.com:80。把前面的注释#去掉,然后改成你自己的主机名,如果是本机可以改成:
SeverName localhost:80
https://wiki.archlinux.org/index.php/Apache_HTTP_Server
在 /etc/httpd/conf/httpd.conf中找到下面这行,并注释掉:
#LoadModule mpm_event_module modules/mod_mpm_event.so
找到下面这行,把前面的#去掉。
LoadModule mpm_prefork_module modules/mod_mpm_prefork.so
To enable PHP, add these lines to /etc/httpd/conf/httpd.conf:
在 LoadModule 列表末尾加上下面两句(我的是在185行后面,不同版本的配置文件不同,自己看):
LoadModule php7_module modules/libphp7.so AddHandler php7-script .php
在 Include列表末尾加上下面这句:
Include conf/extra/php7_module.conf
sytemctl重启 httpd.service 服务.
sytemctl httpd.service restart
测试PHP的配置: 在你的Apache DocumentRoot 目录 (譬如 /srv/http/ or ~/public_html) 中创建test.php 文件,内容如下:
<?php phpinfo(); ?>
可以通过如下命令直接创建
echo "<?php phpinfo(); ?>" /srv/http/test.php
注意目录的文件权限属性
sudo chmod +x -R /srv/http/
浏览器中输入:
http://localhost/test.php or http://localhost/~myname/test.php
6.2 安装mysql(官方默认mariadb)
具体配置见:https://wiki.archlinux.org/index.php/MySQL
pacman -Sy mariadb
安装完mariadb后,先别急着启动mariadb.service服务,先运行如下命令:
mysql_install_db --user=mysql --basedir=/usr --datadir=/var/lib/mysql
现在可以启动mariadb.service服务了。
systemctl start mysqld
然后需要将MySQL设置开机启动:
systemctl enable mysqld
接下来给mariadb进行安全设置
mysql_secure_installation
先回车,然后一路y下去,期间两次需要输入root的密码
新增普通用户
$ mysql -u root -p
MariaDB> CREATE USER 'monty'@'localhost' IDENTIFIED BY 'some_pass'; MariaDB> GRANT ALL PRIVILEGES ON mydb.* TO 'monty'@'localhost'; MariaDB> FLUSH PRIVILEGES; MariaDB> quit
6.3设置PHP支持mariadb
在 /etc/php/php.ini文件中取消其注释(删掉行首的;号即可):
extension=pdo_mysql.so extension=mysqli.so
注意: mysql.so 在 PHP 7.0中已经被移除了.
测试php是否连接mariadb。
vi /srv/html/conn.php #新建一个conn.php文件
把下面的内容输入conn.php文件中。
<?php $db = new mysqli('localhost', 'root', 'admin', 'test'); if (mysqli_connect_errno()) { echo '<p>' . 'Connect DB error'; exit; } else{ echo 'successful'; } ?>
curl http://192.168.31.146/conn.php #其中192.168.31.146为你本机的ip,请自行更改
不出意外的话,那么你会看到页面输入successful
如果需要通过上面这种方式(终端curl命令)查看php的版本号
更改上面的conn.php的内容为
<? phpinfo(); ?> 或者使用phpversion()函数 <? echo phpversion(); ?>
其他配置参考官方文档。下面从官方文档摘选一部分。
6.4 Configuration files
MariaDB configuration options are read from the following files in the given order (according to mysqld --help --verbose output):
/etc/my.cnf /etc/mysql/my.cnf ~/.my.cnf
Depending on the scope of the changes you want to make (system-wide, user-only...), use the corresponding file. See this entry of the KnowledgeBase for more information.
Grant remote access
Warning: This is not considered as best practice and may cause security issues. Consider using Secure Shell, VNC or VPN, if you want to maintain the MySQL-server outside and/or inside your LAN.
If you want to access your MySQL server from other LAN hosts, you have to edit the following lines in /etc/mysql/my.cnf:
[mysqld] ... #skip-networking bind-address = <some ip-address> ...
Grant any MySQL user remote access (example for root):
$ mysql -u root -p
Check current users with remote access privileged:
SELECT User, Host FROM mysql.user WHERE Host <> 'localhost';
Now grant remote access for your user (here root)::
GRANT ALL PRIVILEGES ON *.* TO 'root'@'192.168.1.%' IDENTIFIED BY 'my_optional_remote_password' WITH GRANT OPTION;
You can change the '%' wildcard to a specific host if you like. The password can be different from user's main password.
Disable remote access
The MySQL server is accessible from the network by default. If MySQL is only needed for the localhost, you can improve security by not listening on TCP port 3306. To refuse remote connections, uncomment the following line in /etc/mysql/my.cnf:
skip-networking
You will still be able to log in from the localhost.
安装samba--搭建NAS
安装samba
sudo pacman -S samba
查看samba的状态
[bysu@centos-rpi3 ~]$ sudo systemctl status samba
samba服务设为开机启动
systemctl enable smb systemctl start smb #启动samba服务 systemctl restart smb #重启samba服务 systemctl stop smb #停止samba服务
使用testparm测试samba配置是否正确
testparm
在Linux上测试
smbclient -L localhost #root账户不用密码
创建samba用户,可以使用Linux原本的用户
smbpasswd -a bysu
创建共享目录
[root@base samba]# mkdir -p /smb/{guest,bysu} [root@base samba]# chown nobody:nobody /media/samba/guest/ [root@base samba]# chown bysu:bysu /media/samba/bysu/ 注意设置属性,不然访问不了。
配置samba的配置文件
sudo vi /etc/samba/smb.conf
aria2的下载安装、配置
sudo pacman -S aria2
创建aria2.conf和aria2.session
sudo vi /etc/aria2.conf sudo vi /etc/aria2.session
编辑文件aria2.con,写入如下内容
# dir=/data/download #下载文件保存目录,建议挂载移动硬盘,SD卡经不住这么玩儿 #因为我们是以 pi 用户执行的aria2c 进程,所以这里此目录的读写权限 # sudo chown -R pi:pi /data/download #打开rpc的目的是为了给web管理端用 #configuration file for aria2c enable-rpc=true rpc-allow-origin-all=true rpc-listen-all=true #rpc-listen-port=6800 file-allocation=none disable-ipv6=true disk-cache=32M plit=3 max-concurrent-downloads=3 max-connection-per-server=3 max-file-not-found=3 ## 最大重试次数,0代表可以无限次重试 max-tries=5 retry-wait=3 continue=true check-integrity=true log-level=error log=/var/log/aria2.log input-file=/etc/aria2/aria2.session save-session=/etc/aria2/aria2.session dir=/media/pi/bysu
创建aria2.service文件(开机启动文件)
sudo vi /usr/lib/systemd/system/aria2.service #加入如下内容 [Unit] Description=Aria2 Service After=network.target [Service] ExecStart=/usr/bin/aria2c --enable-rpc --rpc-listen-all --rpc-allow-origin-all --save-session /etc/aria2/aria2.session --input-file /etc/aria2/aria2.session --conf-path=/etc/aria2/aria2.conf #ExecStart=/usr/bin/aria2c --enable-rpc --rpc-listen-all --rpc-allow-origin-all --save-session %h/.config/aria2/session.lock --input-file %h/.config/aria2/session.lock --conf-path=%h/.config/aria2/aria2.conf [Install] WantedBy=default.target
启动aria2服务
sudo systemctl start aria2 #设为开机启动 sudo sytemctl enable aria2
- 终端输入:
-
aria2c --enable-rpc --rpc-listen-all #启用监听RPC
安装aria2的页面端webui
cd /srv/html git clone https://github.com/ziahamza/webui-aria2.git
用浏览器访问 http://pi的IP地址或主机名 即可看到webui的界面,在此界面添加下载任务测试即可
- 在电脑上的chrome浏览器上安装『百度云导出到aria2』插件,以方便在电脑上直接将百度云盘上的文件添加至aria2,插件下载地址为:
https://github.com/acgotaku/BaiduExporter
初次安装完成后需要配置aria2 PRC地址,一般来说是
http://192.168.31.42/webui-aria2/index.html
完成后使用导出按钮来测试效果: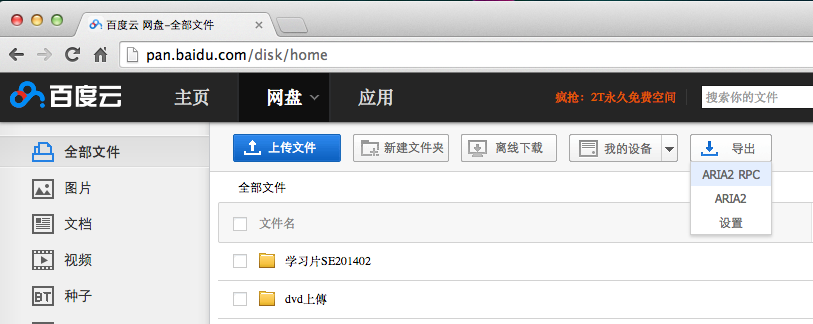
- 添加定时下载的脚本
cd /etc/aria2 wget https://github.com/bostoneboy/raspberry_pi_stuff/raw/master/aria2/aria2_auto.py crontab -e * * * * /usr/bin/python2 /etc/aria2/aria2_auto.py
此脚本的作用是每天晚上6时暂停所有正在下载的任务,每天凌晨3时开始所有的下载任务,即上班时候和凌晨才会开启脱机下载功能,脚本里面的时候可以根据需要自己来修改。


