相信很多人选择Spring Boot主要是考虑到它既能兼顾Spring的强大功能,还能实现快速开发的便捷。我们在Spring Boot使用过程中,最直观的感受就是没有了原来自己整合Spring应用时繁多的XML配置内容,替代它的是在pom.xml中引入模块化的Starter POMs,其中各个模块都有自己的默认配置,所以如果不是特殊应用场景,就只需要在application.properties中完成一些属性配置就能开启各模块的应用。
配置文件
pom包里面添加相关包引用
<!-- Web 依赖 --> <dependency> <groupId>org.springframework.boot</groupId> <artifactId>spring-boot-starter-web</artifactId> </dependency> <!-- 单元测试依赖 --> <dependency> <groupId>org.springframework.boot</groupId> <artifactId>spring-boot-starter-test</artifactId> <scope>test</scope> </dependency>
在之前的各篇文章中都有提及关于application.properties的使用,主要用来配置数据库连接、日志相关配置等。除了这些配置内容之外,本文将具体介绍一些在application.properties配置中的其他特性和使用方法。
然后通过@Value("${属性名}")注解来加载对应的配置属性,具体如下:
@RestController public class UserController { @Value("${user.desc}") private String desc; @RequestMapping(value = "/user",method = RequestMethod.GET) public String getDesc(){ return desc; } }
@RestController public class HelloController { @RequestMapping(value = "/", method = RequestMethod.GET) public String index(){ return "Welcome Spring Boot Properties!!!"; } @Autowired HomeProperties homeProperties; @RequestMapping(value = "/home",method = RequestMethod.GET) public String getDesc(){ return homeProperties.getDesc(); } }
参数间的引用
在application.properties中的各个参数之间也可以直接引用来使用,就像下面的设置:
## 家乡属性 Dev home.province=ZheJiang home.city=WenLing home.desc=dev: I'm living in ${home.province} ${home.city}. ###个人属性 user.name=ilimhumar user.age=25 user.job=Java Programmer user.weight = 70kg user.height=180cm user.desc= My name's ${user.name} ${user.age} ${user.job} ${user.weight} ${user.height}
多环境配置
我们在开发Spring Boot应用时,通常同一套程序会被应用和安装到几个不同的环境,比如:开发、测试、生产等。其中每个环境的数据库地址、服务器端口等等配置都会不同,如果在为不同环境打包时都要频繁修改配置文件的话,那必将是个非常繁琐且容易发生错误的事。
对于多环境的配置,各种项目构建工具或是框架的基本思路是一致的,通过配置多份不同环境的配置文件,再通过打包命令指定需要打包的内容之后进行区分打包,Spring Boot也不例外,或者说更加简单。
在Spring Boot中多环境配置文件名需要满足application-{profile}.properties的格式,其中{profile}对应你的环境标识,比如:
application-dev.properties:开发环境application-test.properties:测试环境application-prod.properties:生产环境
至于哪个具体的配置文件会被加载,需要在application.properties文件中通过spring.profiles.active属性来设置,其值对应{profile}值。
如:spring.profiles.active=test就会加载application-test.properties配置文件内容
下面,以不同环境配置不同的服务端口为例,进行样例实验。
-
针对各环境新建不同的配置文件application-dev.properties、application-test.properties、application-prod.properties
-
在这三个文件均都设置不同的server.port属性,如:dev环境设置为1111,test环境设置为2222,prod环境设置为3333
-
application.properties中设置spring.profiles.active=dev,就是说默认以dev环境设置
-
测试不同配置的加载
application.properties 配置文件
# 多环境配置文件激活属性 spring.profiles.active=dev
application-dev.properties 配置文件
# 服务端口 server.port=1111 ## 家乡属性 Dev home.province=ZheJiang home.city=WenLing home.desc=dev: I'm living in ${home.province} ${home.city}. ###个人属性 user.name=ilimhumar user.age=25 user.job=Java Programmer user.weight = 70kg user.height=180cm user.desc= My name's ${user.name} ${user.age} ${user.job} ${user.weight} ${user.height}
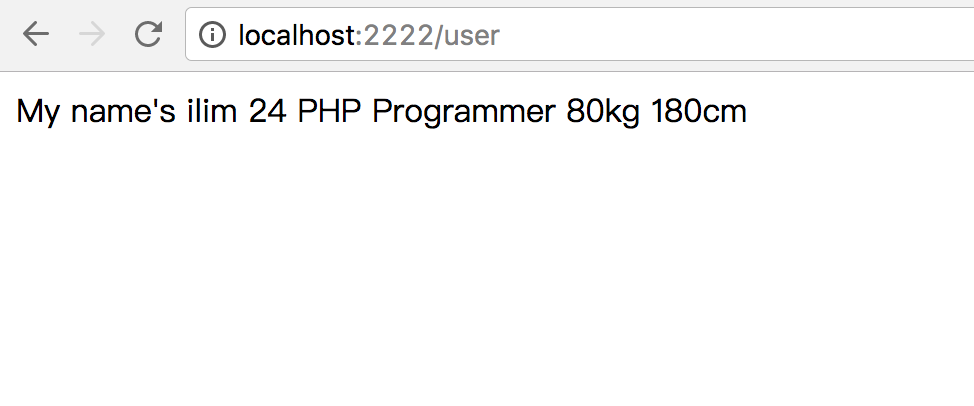
application-prod.properties 配置文件
# 服务端口 server.port=2222 ## 家乡属性 Prod home.province=guangdong home.city=shenzhen home.desc=prod: I'm living in ${home.province} ${home.city}. ###个人属性 user.name=bilzat user.age=24 user.job=PHP Programmer user.weight = 80kg user.height=180cm user.desc= My name's ${user.name} ${user.age} ${user.job} ${user.weight} ${user.height}
application-test.properties 配置文件
# 服务端口 server.port=3333 ## 家乡属性 Prod home.province=jiangsu home.city=hangzhou home.desc=test: I'm living in ${home.province} ${home.city}. ###个人属性 user.name=elzat user.age=26 user.job=C++ Programmer user.weight = 75kg user.height=180cm user.desc= My name's ${user.name} ${user.age} ${user.job} ${user.weight} ${user.height}
运行效果

github

