想了想有必要把控制器的一些内容放在系列里一起写一下,虽然之前springMVC的博文中已经介绍了很多有关Controller的东西,但是现在既然希望大家全面使用springboot,所以把这部分内容也放在本系列中总结概括一下吧。
控制器:接收和处理客户端的请求,spring通过注解控制器类,加载特定的控制器。
控制器相关注解
注解有三种:
| @Controller | 处理http请求 |
| @RestController | spring4之后新加的注解,原来返回json需要@ResponseBody配合@Controller |
| @RequestMapping | 配置url映射(从请求url(可能还包括请求方法、参数(pathvariable或parameter)等到控制器及对应方法的映射)) |
@RestController和@Controller
上一篇文章中我们直接使用的是@RestController,从表面上看,控制器各个方法返回的String值都被作为页面内容返回给客户端,实际操作可以等价于@Controller和@Response共同注解的结果。
如果单用@Controller注解该类,我们会发现访问url将不能返回正常结果:
例如我们再新建一个新的控制器类,用@Controller注解。
package com.happybks.pets; import org.springframework.beans.factory.annotation.Autowired; import org.springframework.stereotype.Controller; import org.springframework.web.bind.annotation.RequestMapping; import org.springframework.web.bind.annotation.RequestMethod; @Controller public class MyController { @Autowired PetProperties petProperties; @RequestMapping(value = "/handle",method = RequestMethod.GET) public String handle(){ return "handlepage";//petProperties.toString(); } }
然后启动访问http://localhost:8689/happybks/handle
但是提示404。
真实的原因是没有提供配置模板。响应给用户的可视化的页面,一般通过一定的模板页面给用户。无论是原装的JSP,还是后来的velcity、freemarker等模板都是传统的后端程序员必备的技术之一。但是在当今互联网,或者说如今的技术大背景下,这些模板技术的风光不再,因为大方向是前后端分离,后端开发者只需要提供restful风格的接口给前端开发者,由前端开发者来负责数据的展示与交互。性能原因是,模板技术一般性能比较吃力,耗费资源。
但是,作为一个纯粹的、脱离了前端低级趣味的后端开发人:),有必要了解至少一种模板技术以备不时之需,也能给自己的技术池拼接完整。
今天我想介绍spring自己的一个模板技术thymeleaf。关于这个模板技术与别的有啥改进和优点,请参考:
http://www.infoq.com/cn/news/2011/08/thymeleaf-1.0.0-template-engine
我们首先需要引入thymeleaf的jar,在pom文件中加入依赖坐标:
<dependency> <groupId>org.springframework.boot</groupId> <artifactId>spring-boot-starter-thymeleaf</artifactId> <version>1.5.10.RELEASE</version> </dependency>
(本文出自oschina博主happyBKs的博文:https://my.oschina.net/happyBKs/blog/1622412)
然后在项目的resources目录下新建一个templates目录存放存放加入模板。(在mvn项目中,resources目录不仅存放配置文件,还存放模板)idea在新建springboot init项目时已经为我们把templates文件夹都建好了。
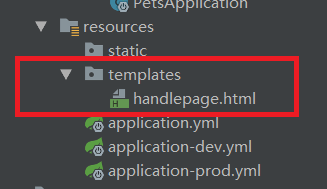
handlepage.html的内容如下:
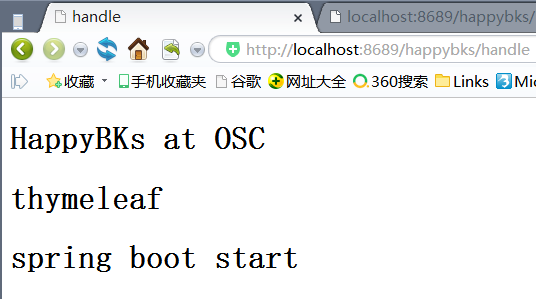
<!DOCTYPE html> <html> <head> <meta charset="UTF-8" /> <title>handle</title> </head> <body> <h1>HappyBKs at OSC</h1> <h1>thymeleaf</h1> <h1>spring boot start</h1> </body> </html>
注意,刚才控制器类的handle方法的返回值是String,值为handlepage,即模板的名称。
我们运行后,得到结果。
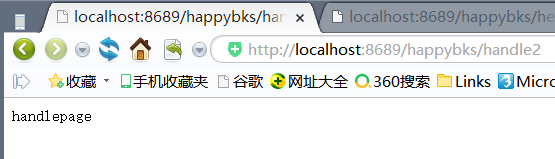
如果我们在方法上添加一个注解@ResponseBody,那么返回的字符串会作为相应内容返回。如果注解在方法上,对方法的返回值有效,方法的返回值将作为相应内容返回给客户端。如果@ResponseBody注解在类上,对该控制器类的所有方法有效,所有方法的返回值作为模板名称,由spring分发转给对应的模板页面并返回给客户端。
package com.happybks.pets; import org.springframework.beans.factory.annotation.Autowired; import org.springframework.stereotype.Controller; import org.springframework.web.bind.annotation.RequestMapping; import org.springframework.web.bind.annotation.RequestMethod; import org.springframework.web.bind.annotation.ResponseBody; @Controller public class MyController { @Autowired PetProperties petProperties; @RequestMapping(value = "/handle",method = RequestMethod.GET) public String handle(){ return "handlepage";//petProperties.toString(); } @RequestMapping(value = "/handle2",method = RequestMethod.GET) @ResponseBody public String handle2(){ return "handlepage";//petProperties.toString(); } }
访问:http://localhost:8689/happybks/handle2
注解在控制器类上也可:
package com.happybks.pets; import org.springframework.beans.factory.annotation.Autowired; import org.springframework.stereotype.Controller; import org.springframework.web.bind.annotation.RequestMapping; import org.springframework.web.bind.annotation.RequestMethod; import org.springframework.web.bind.annotation.ResponseBody; @Controller @ResponseBody public class MyController { @Autowired PetProperties petProperties; @RequestMapping(value = "/handle2",method = RequestMethod.GET) public String handle2(){ return "handlepage";//petProperties.toString(); } }
@RequestMapping的知识点
@RequestMapping的知识点有以下几个:
1、控制器类 及 其方法都可以注解@RequestMapping,访问请求的URL为控制器类与下属方法的注解值路径的拼接路径
2、@RequestMapping注解可路径、方法、参数等。
public @interface RequestMapping { java.lang.String name() default ""; @org.springframework.core.annotation.AliasFor("path") java.lang.String[] value() default {}; @org.springframework.core.annotation.AliasFor("value") java.lang.String[] path() default {}; org.springframework.web.bind.annotation.RequestMethod[] method() default {}; java.lang.String[] params() default {}; java.lang.String[] headers() default {}; java.lang.String[] consumes() default {}; java.lang.String[] produces() default {}; }
3、@RequestMapping注解支持映射多个路径为其值。
从上面的@RequestMapping注解的定义也可以看出,value或path对应的是一个String数组,这也说明了@RequestMapping注解可以将一个控制器类的一个方法映射到多个路径上。
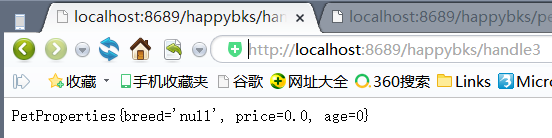
@RequestMapping(value = {"/handle3","/petProperties"},method = RequestMethod.GET) @ResponseBody public String handle3(){ return petProperties.toString(); }
运行请求http://localhost:8689/happybks/handle3和http://localhost:8689/happybks/petProperties
结果都是一样的:

Post请求响应
处理一般键值对表单参数
处理一般键值对表单参数,实际接收的是一个k1=v1&k2=v2的String类型的参数。
新添加一个控制器,在@RequestMapping注解的method的属性指定RequestMethod类型为POST
@RequestMapping(value = "/handle4",method = RequestMethod.POST) @ResponseBody public String handle4(@RequestBody String formkvs){ String[] kvs = formkvs.split("&"); final HashMap<String, String> formkvsMap=new HashMap<>(); for(String itemKV:kvs){ String[] fields = itemKV.split("="); final String key = fields[0]; final String value = fields[1]; formkvsMap.put(key, value); } return formkvsMap.get("username") + "buy a " + formkvsMap.get("product"); }
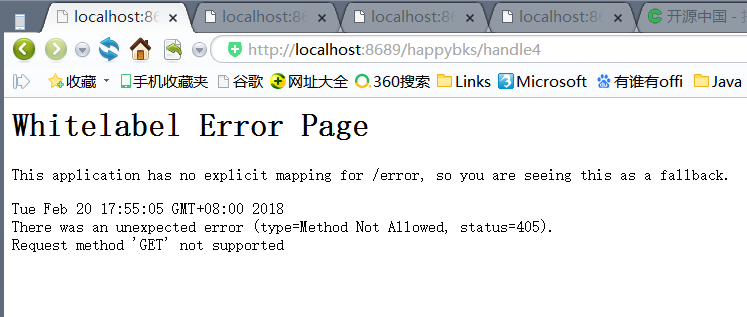
如果此时运行,我们直接浏览器访问http://localhost:8689/happybks/handle4,因为是GET请求,所以请求方法错误报错405。
我们使用postman来实验
注意,post请求参数是在requestbody中。一般的键值对表单参数,默认使用x-www-form-urlencoded。
在spring中,控制器处理表单参数使用的@RequestBody,注解到对应的方法形参上,String类型的形参对应于表单中的各个键通过k1=v1&k2=v2的拼接形式传递。
在postman中,我们填写两个参数,然后我们发出请求,可以看到response返回的结果

关于表单类型,附加一个说明如下:
form元素有个enctype属性,可以指定数据编码方式,有如下三种:
1. application/x-www-form-urlencoded: 表单数据编码为键值对,&分隔
2. multipart/form-data: 表单数据编码为一条消息,每个控件对应消息的一部分
3. text/plain: 表单数据以纯文本形式进行编码
详细说明:
form的enctype的编码方式,常用有两种:
application/x-www-form-urlencoded和multipart/form-data
其中 application/x-www-form-urlencoded为默认编码方式。
在form的action为get时,浏览器用x-www-form-urlencoded的编码方式,将表单数据编码为(name1=value1&name2=value2...),然后把这个字符串append到url后面,用?分隔,跳转到这个新的url
当form的action为post时,浏览器将form数据封装到http body中,然后发送到server。
在没有type=file时候,用默认的 application/x-www-form-urlencoded 就行。
在有 Content-type=file 时候,要用multipart/form-data编码方式。浏览器会把表单以控件为单位分割,并且为每个部分加上Content-Dispositon(form-data或file)、Content-Type(默认text/plain)、name(控件name)等信息,并加上分割符(boundary)。
postman的参考文章:http://blog.csdn.net/wangjun5159/article/details/47781443
处理json参数的请求
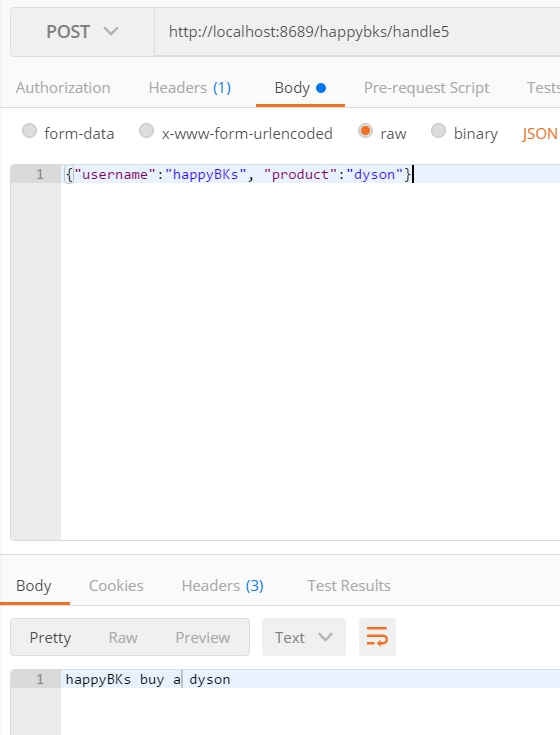
@RequestMapping(value = "/handle5",method = RequestMethod.POST) @ResponseBody public String handle5(@RequestBody TradeItem tradeItem){ return tradeItem.getUsername() + " buy a " + tradeItem.getProduct(); }
然后运行,用postman请求
http://localhost:8689/happybks/handle5
这时候我们的配置方式要注意一下
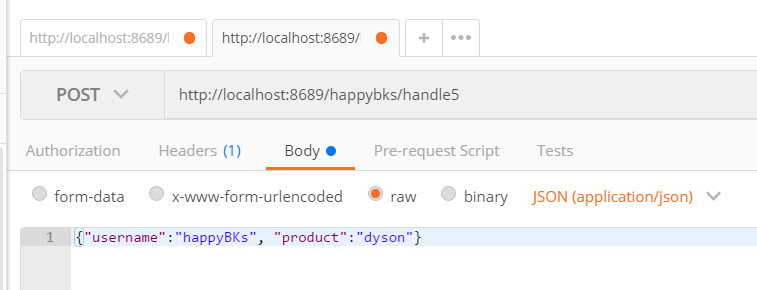
一般键值对表单可以使用request的默认content-ype类型,但是json参数的请求必须使用application/json。
具体方法是,在Body中选择raw(原始body文本编辑方式),然后右侧会多出一个下拉选择框,选择JSON(application/json),然后在下方直接编辑一个json字符串。注意http request中的json需要用双引号,别跟Python代码的dict弄混了。
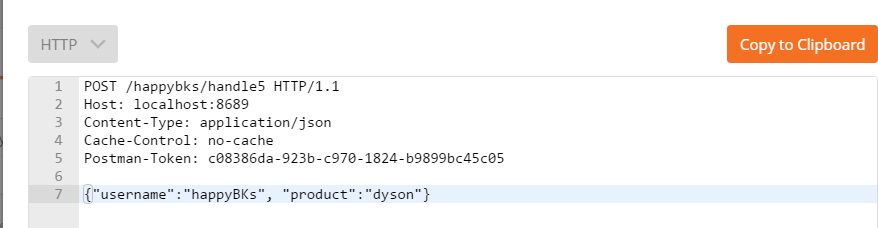
如果你从Body标签切换到Header标签,可以看到:

点击postman的Code,可以看到你浏览器调试http请求的代码。

运行send:
其他注意知识点:
如果@RequestMapping没有指定method属性的值,那么无论get还是post类型的请求都会被该控制器方法响应处理。但是不推荐这种不指定的做法。
参数注解
前面我们使用@RequestBody注解处理request的请求参数。
实际上@RequestBody针对的是整个request的body数据,不仅仅限制于请求参数。
@RequestBody注解String方法形参,形参的值为k1=v1&k2=v2字符串,content-ype类型为默认application/x-www-form-urlencoded;
@RequestBody注解bean类型形参,则处理的是content-ype类型为application/json的json为body内容的请求。
处理请求参数,其实还有更为方便的注解——@RequestParameter,具体我们放在后面再细说。
有关请求参数处理有以下几个注解:
| @PathVariable | 获取截断出url路径中的数据 |
| @RequestParam | 获取请求参数的值 |
| @GetMapping | 组合注解 |
@PathVariable注解
@RequestMapping(value = "/handle6/{username}/{articleId}",method = RequestMethod.GET) @ResponseBody public String handle6(@PathVariable String username, @PathVariable("articleId") String aid){ return username + " write an article, id is " + aid; }
住的注意的是,形参的名称可以与url请求中的路径中的表达式{}参数名称不同,但是需要在形参注解上标注对应的url路径参数名称;不标注的话,默认按照形参名称寻找url中对应的{}参数值。
请求http://localhost:8689/happybks/handle6/happybks/1234

@RequestParam
@RequestParam是一个专门面向参数处理的注解,而之前提到的@RequestBody是处理请求body的注解。@RequestParam会直接把请求中的参数封装好取出,无论是get请求url参数还是post请求的表单参数都支持@RequestParam注解获取。
get方式示例:
@RequestMapping(value = "/handle7",method = RequestMethod.GET) @ResponseBody public String handle7(@RequestParam String username, @RequestParam String product){ return username+ " buy a " + product; }
运行请求http://localhost:8689/happybks/handle7?username=happybks&product=house

post请求方式:
@RequestMapping(value = "/handle7",method = RequestMethod.POST) @ResponseBody public String handle7(@RequestParam String username, @RequestParam String product){ return username+ " buy a " + product; }
运行后,请求http://localhost:8689/happybks/handle7,post表单参数设置如下:
响应结果如下:
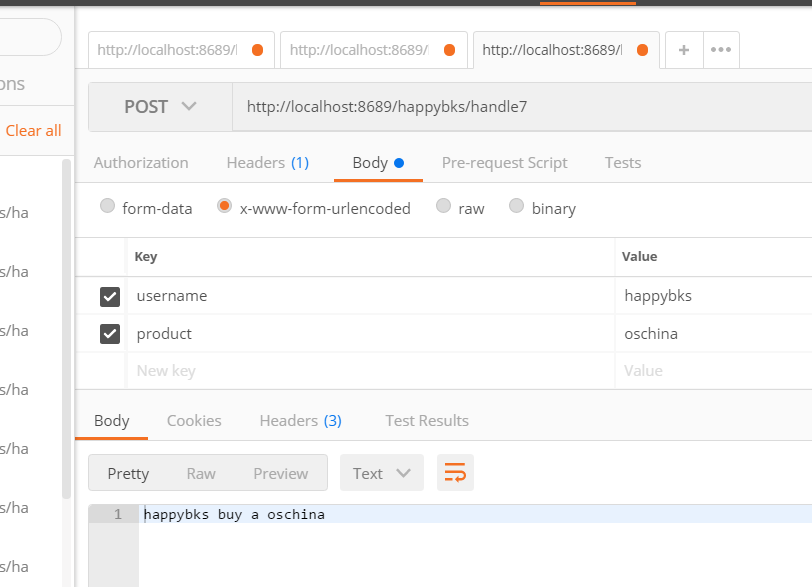
参数缺失情况
我们还是看get请求参数的示例:
@RequestMapping(value = "/handle8",method = RequestMethod.GET) @ResponseBody public String handle8(@RequestParam String username, @RequestParam String product){ return username+ " buy a " + product; }

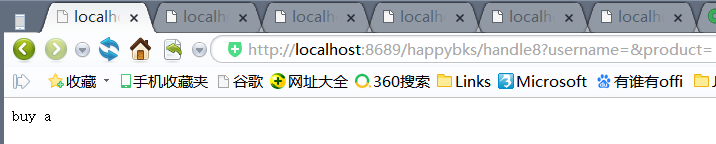
如果参数为空串:
如果参数缺失:
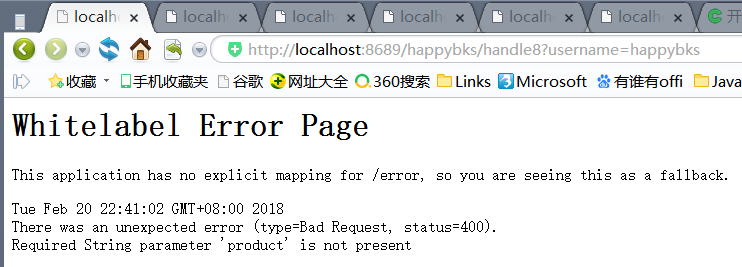
啊呀,报错了,这个可不行,我们需要兼容这种参数可以缺失的情况。
请求http://localhost:8689/happybks/handle8?username=happybks

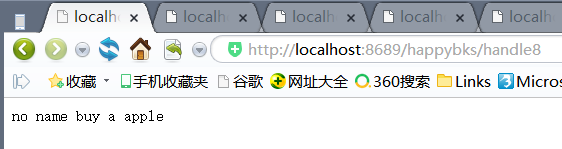
请求http://localhost:8689/happybks/handle8
这里另外提一下,参数可以不只是String类型,还可以直接用int或Integer类型。
但是需要注意,defaultValue设置数值时,需要是加双引号。
运行:

@GetMapping注解和@PostMapping注解
@GetMapping注解等价于@RequestMapping(value = "",method = RequestMethod.GET)
例如:
@GetMapping(value = "/handle10") @ResponseBody public String handle10(){ return "OK"; }
运行:

最后,我把整个类列出来,方便大家调试:
package com.happybks.pets; import org.springframework.beans.factory.annotation.Autowired; import org.springframework.stereotype.Controller; import org.springframework.web.bind.annotation.*; import java.util.HashMap; @Controller public class MyController { @Autowired PetProperties petProperties; @RequestMapping(value = "/handle",method = RequestMethod.GET) public String handle(){ return "handlepage";//petProperties.toString(); } @RequestMapping(value = "/handle2",method = RequestMethod.GET) @ResponseBody public String handle2(){ return "handlepage";//petProperties.toString(); } @RequestMapping(value = {"/handle3","/petProperties"},method = RequestMethod.GET) @ResponseBody public String handle3(){ return petProperties.toString(); } @RequestMapping(value = "/handle4",method = RequestMethod.POST) @ResponseBody public String handle4(@RequestBody String formkvs){ String[] kvs = formkvs.split("&"); final HashMap<String, String> formkvsMap=new HashMap<>(); for(String itemKV:kvs){ String[] fields = itemKV.split("="); final String key = fields[0]; final String value = fields[1]; formkvsMap.put(key, value); } return formkvsMap.get("username") + " buy a " + formkvsMap.get("product"); } @RequestMapping(value = "/handle5",method = RequestMethod.POST) @ResponseBody public String handle5(@RequestBody TradeItem tradeItem){ return tradeItem.getUsername() + " buy a " + tradeItem.getProduct(); } @RequestMapping(value = "/handle6/{username}/{articleId}",method = RequestMethod.GET) @ResponseBody public String handle6(@PathVariable String username, @PathVariable("articleId") String aid){ return username + " write an article, id is " + aid; } @RequestMapping(value = "/handle7",method = RequestMethod.POST) @ResponseBody public String handle7(@RequestParam String username, @RequestParam String product){ return username+ " buy a " + product; } @RequestMapping(value = "/handle8",method = RequestMethod.GET) @ResponseBody public String handle8(@RequestParam(value="username", required = false, defaultValue = "no name") String user, @RequestParam(required = false, defaultValue = "apple") String product){ return user+ " buy a " + product; } @RequestMapping(value = "/handle9",method = RequestMethod.GET) @ResponseBody public String handle9(@RequestParam(value="number", required = false, defaultValue = "6") int num){ return "the number is "+num; } @GetMapping(value = "/handle10") @ResponseBody public String handle10(){ return "OK"; } }

