第十九章 Linux监控平台搭建
19.1 Linux监控平台介绍
常见开源监控软件
cacti、nagios、zabbix、smokeping、open-falcon等等。
cacti、smokeping偏向于基础监控,成图漂亮。
cacti、nagios、zabbix服务端监控中心,需要php环境支持,其中zabbix和cacti都需要mysql作为数据存储,nagios不用存储历史数据,注重服务或者监控项的状态;zabbix会获取服务或者监控项目的数据从而可以成图,zabbix把数据记录到数据库里,支持历史数据查询,而且zabbix可以非常方便的自定义监控项目。
open-falcon为小米公司开发,开源后受到诸多大公司和运维工程师的追捧,适合大企业,滴滴、360、新浪微博、京东等大公司在使用这款监控软件,值得研究。
本节学习以zabbix为例。
19.2 zabbix监控介绍
zabbix基于C++开发,是C/S(client/server)架构,即分为客户端和服务端,单个服务端节点可以支持上万台客户端,监控中心支持web UI(web界面)配置和管理。
查看zabbix官方文档:https://www.zabbix.com/manuals 是学习zabbix的最好途径。
zabbix组件
zabbix整个体系架构中有以下5个主要角色:
- zabbix-server
zabbix-server是整个监控体系中最核心的组件,它负责接收客户端发送的报告信息,所有配置、统计数据及操作数据都由它组织。 - 数据存储(如:mysql)
监控过程中收集的所有信息都存储在这里。 - web界面
web界面,即GUI。这是zabbix监控简单易用的原因之一,因为我们可以在web界面中配置、管理各个客户端。运行web界面需要有PHP环境支持。 - zabbix-proxy
zabbix-proxy为可选组件,用于监控节点非常多的分布式环境,它可以代理zabbix-server的功能,减轻zabbix-server的压力。 - zabbix-agent
zabbix-agent为部署在各个客户端上的组件,用于采集各个监控项目的数据,并把采集的数据传输给zabbix-proxy或zabbix-server。
监控流程图

9.3-19.4 安装zabbix
准备工作
两台机器:一台作为server(IP:192.168.230.135),一台作为client(IP:192.168.230.145),均安装zabbix,server上安装数据库(安装方法见:https://my.oschina.net/u/3497124/blog/1488479 )。
可以使用yum安装zabbix,版本是3.2。在此使用zabbix官方提供的对应版本的yum源安装较新版本的zabbix。
在服务端安装zabbix
安装zabbix之前需要先安装其yum源仓库。 下载zabbix的yum源仓库: [root@cham002 ~]# wget http://repo.zabbix.com/zabbix/3.2/rhel/7/x86_64/zabbix-release-3.2-1.el7.noarch.rpm [root@cham002 ~]# cat /etc/yum.repos.d/zabbix.repo [zabbix] name=Zabbix Official Repository - $basearch baseurl=http://repo.zabbix.com/zabbix/3.2/rhel/7/$basearch/ enabled=1 gpgcheck=1 gpgkey=file:///etc/pki/rpm-gpg/RPM-GPG-KEY-ZABBIX-A14FE591 [zabbix-non-supported] name=Zabbix Official Repository non-supported - $basearch baseurl=http://repo.zabbix.com/non-supported/rhel/7/$basearch/ enabled=1 gpgkey=file:///etc/pki/rpm-gpg/RPM-GPG-KEY-ZABBIX gpgcheck=1 [root@cham002 ~]# cat /etc/yum.repos.d/ CentOS-Base.repo CentOS-fasttrack.repo CentOS-Vault.repo zabbix.repo CentOS-CR.repo CentOS-Media.repo epel.repo CentOS-Debuginfo.repo CentOS-Sources.repo epel-testing.repo 安装yum源仓库: [root@cham002 ~]# rpm -ivh zabbix-release-3.2-1.el7.noarch.rpm 警告:zabbix-release-3.2-1.el7.noarch.rpm: 头V4 RSA/SHA512 Signature, 密钥 ID a14fe591: NOKEY 准备中... ################################# [100%] 正在升级/安装... 1:zabbix-release-3.2-1.el7 ################################# [100%] 安装zabbix及其组件: [root@cham002 ~]# yum install -y zabbix-agent zabbix-get zabbix-server-mysql zabbix-web zabbix-web-mysql #zabbix-agent:客户端程序 #zabbix-get:服务端上命令行获取客户端检测项目的工具 #zabbix-server-mysql:zabbix-server MySQL版 #zabbix-web:web界面 #zabbix-web-mysql:web界面MySQL相关 注:该过程会连带安装PHP和http。
•如果mysql之前没有安装的话,需要根据lamp那一章的mysql安装方法安装mysql
检测mysql有没有启动,没有的话启动 [root@cham002 ~]# ps aux |grep mysql root 3512 0.0 0.1 113268 1496 ? S 1月24 0:00 /bin/sh /usr/local/mysql/bin/mysqld_safe --datadir=/data/mysql --pid-file=/data/mysql/cham002.pid mysql 3672 0.1 44.5 1189812 448836 ? Sl 1月24 1:30 /usr/local/mysql/bin/mysqld --basedir=/usr/local/mysql --datadir=/data/mysql --plugin-dir=/usr/local/mysql/lib/plugin --user=mysql --log-error=/data/mysql/cham002.err --pid-file=/data/mysql/cham002.pid --socket=/tmp/mysql.sock root 51627 0.0 0.0 112684 976 pts/2 S+ 01:27 0:00 grep --color=auto mysql
配置
配置server端:
配置mysql:
[root@cham002 ~]# vim /etc/my.cnf # For advice on how to change settings please see # http://dev.mysql.com/doc/refman/5.6/en/server-configuration-defaults.html # *** DO NOT EDIT THIS FILE. It's a template which will be copied to the # *** default location during install, and will be replaced if you # *** upgrade to a newer version of MySQL. [mysqld] character_set_server = utf8 #增加这一行,#设置默认字符集--目的是辅助web界面中文显示 datadir=/data/mysql socket=/tmp/mysql.sock server-id=135 log_bin=chamlinux1 # Remove leading # and set to the amount of RAM for the most important data # cache in MySQL. Start at 70% of total RAM for dedicated server, else 10%. # innodb_buffer_pool_size = 128M # Remove leading # to turn on a very important data integrity option: logging # changes to the binary log between backups. # log_bin # These are commonly set, remove the # and set as required. # basedir = ..... # datadir = ..... # port = ..... # server_id = ..... # socket = ..... # Remove leading # to set options mainly useful for reporting servers. # The server defaults are faster for transactions and fast SELECTs. # Adjust sizes as needed, experiment to find the optimal values. # join_buffer_size = 128M # sort_buffer_size = 2M # read_rnd_buffer_size = 2M sql_mode=NO_ENGINE_SUBSTITUTION,STRICT_TRANS_TABLES :wq 重启mysql [root@cham002 ~]# /etc/init.d/mysqld restart Shutting down MySQL.... SUCCESS!
创建数据库:
[root@cham002 ~]# mysql -uroot -p Enter password: Welcome to the MySQL monitor. Commands end with ; or \g. Your MySQL connection id is 1 Server version: 5.6.35-log MySQL Community Server (GPL) Copyright (c) 2000, 2016, Oracle and/or its affiliates. All rights reserved. Oracle is a registered trademark of Oracle Corporation and/or its affiliates. Other names may be trademarks of their respective owners. Type 'help;' or '\h' for help. Type '\c' to clear the current input statement. mysql> create database zabbix character set utf8; #创建库并指定其字符集 Query OK, 1 row affected (0.00 sec) mysql> grant all on zabbix.* to 'zabbix'@'127.0.0.1' identified by '123456'; Query OK, 0 rows affected (0.00 sec) mysql> quit Bye
向zabbix数据库中导入原始数据:
[root@cham002 ~]# cd /usr/share/doc/zabbix-server-mysql-3.2.11/ [root@cham002 zabbix-server-mysql-3.2.11]# ls AUTHORS ChangeLog COPYING create.sql.gz NEWS README [root@cham002 zabbix-server-mysql-3.2.11]# gzip -d create.sql.gz [root@cham002 zabbix-server-mysql-3.2.11]# ls AUTHORS ChangeLog COPYING create.sql NEWS README [root@cham002 zabbix-server-mysql-3.2.11]# mysql -uroot -pchampin zabbix < create.sql Warning: Using a password on the command line interface can be insecure. #可能数据量比较大,需要等待 [root@cham002 zabbix-server-mysql-3.2.11]#
启动zabbix服务:
[root@cham002 zabbix-server-mysql-3.2.11]# cd [root@cham002 ~]# systemctl start zabbix-server [root@cham002 ~]# start httpd^C 先检查nginx [root@cham002 ~]# netstat -lntp Active Internet connections (only servers) Proto Recv-Q Send-Q Local Address Foreign Address State PID/Program name tcp 0 0 0.0.0.0:111 0.0.0.0:* LISTEN 1/systemd tcp 0 0 0.0.0.0:20048 0.0.0.0:* LISTEN 1995/rpc.mountd tcp 0 0 0.0.0.0:22 0.0.0.0:* LISTEN 2173/sshd tcp 0 0 127.0.0.1:25 0.0.0.0:* LISTEN 2492/master tcp 0 0 0.0.0.0:43998 0.0.0.0:* LISTEN - tcp 0 0 0.0.0.0:2049 0.0.0.0:* LISTEN - tcp 0 0 0.0.0.0:51879 0.0.0.0:* LISTEN 1226/rpc.statd tcp6 0 0 :::3306 :::* LISTEN 51877/mysqld tcp6 0 0 :::33324 :::* LISTEN 1226/rpc.statd tcp6 0 0 :::37486 :::* LISTEN - tcp6 0 0 :::111 :::* LISTEN 1/systemd tcp6 0 0 :::20048 :::* LISTEN 1995/rpc.mountd tcp6 0 0 :::22 :::* LISTEN 2173/sshd tcp6 0 0 ::1:25 :::* LISTEN 2492/master tcp6 0 0 :::2049 :::* LISTEN - [root@cham002 ~]# systemctl start httpd [root@cham002 ~]# netstat -lntp Active Internet connections (only servers) Proto Recv-Q Send-Q Local Address Foreign Address State PID/Program name tcp 0 0 0.0.0.0:111 0.0.0.0:* LISTEN 1/systemd tcp 0 0 0.0.0.0:20048 0.0.0.0:* LISTEN 1995/rpc.mountd tcp 0 0 0.0.0.0:22 0.0.0.0:* LISTEN 2173/sshd tcp 0 0 127.0.0.1:25 0.0.0.0:* LISTEN 2492/master tcp 0 0 0.0.0.0:43998 0.0.0.0:* LISTEN - tcp 0 0 0.0.0.0:2049 0.0.0.0:* LISTEN - tcp 0 0 0.0.0.0:51879 0.0.0.0:* LISTEN 1226/rpc.statd tcp6 0 0 :::3306 :::* LISTEN 51877/mysqld tcp6 0 0 :::33324 :::* LISTEN 1226/rpc.statd tcp6 0 0 :::37486 :::* LISTEN - tcp6 0 0 :::111 :::* LISTEN 1/systemd tcp6 0 0 :::80 :::* LISTEN 52138/httpd tcp6 0 0 :::20048 :::* LISTEN 1995/rpc.mountd tcp6 0 0 :::22 :::* LISTEN 2173/sshd tcp6 0 0 ::1:25 :::* LISTEN 2492/master tcp6 0 0 :::2049 :::* LISTEN - 可以对zabbix、http等服务设置开机启动: [root@cham002 ~]# systemctl enable httpd Created symlink from /etc/systemd/system/multi-user.target.wants/httpd.service to /usr/lib/systemd/system/httpd.service. [root@cham002 ~]# systemctl enable zabbix-server Created symlink from /etc/systemd/system/multi-user.target.wants/zabbix-server.service to /usr/lib/systemd/system/zabbix-server.service. [root@cham002 ~]# systemctl disable nginx [root@cham002 ~]# ps aux |grep zabbix zabbix 51942 0.0 0.3 256080 3460 ? S 01:55 0:00 /usr/sbin/zabbix_server -c /etc/zabbix/zabbix_server.conf root 52251 0.0 0.0 112680 976 pts/2 S+ 02:23 0:00 grep --color=auto zabbix netstat -lntp Active Internet connections (only servers) Proto Recv-Q Send-Q Local Address Foreign Address State PID/Program name tcp 0 0 0.0.0.0:111 0.0.0.0:* LISTEN 1/systemd tcp 0 0 0.0.0.0:20048 0.0.0.0:* LISTEN 1995/rpc.mountd tcp 0 0 0.0.0.0:22 0.0.0.0:* LISTEN 2173/sshd tcp 0 0 127.0.0.1:25 0.0.0.0:* LISTEN 2492/master tcp 0 0 0.0.0.0:43998 0.0.0.0:* LISTEN - tcp 0 0 0.0.0.0:2049 0.0.0.0:* LISTEN - tcp 0 0 0.0.0.0:51879 0.0.0.0:* LISTEN 1226/rpc.statd tcp6 0 0 :::3306 :::* LISTEN 51877/mysqld tcp6 0 0 :::33324 :::* LISTEN 1226/rpc.statd tcp6 0 0 :::37486 :::* LISTEN - tcp6 0 0 :::111 :::* LISTEN 1/systemd tcp6 0 0 :::80 :::* LISTEN 52138/httpd tcp6 0 0 :::20048 :::* LISTEN 1995/rpc.mountd tcp6 0 0 :::22 :::* LISTEN 2173/sshd tcp6 0 0 ::1:25 :::* LISTEN 2492/master tcp6 0 0 :::2049 :::* LISTEN -
至此,检查zabbix服务状态(ps,netstat)发现,服务启动了,但是没有监听端口,状态不正常,进行错误排查:
查看zabbix日志:
[root@cham002 ~]# less /var/log/zabbix/zabbix_server.log 51942:20180125:015502.033 [Z3001] connection to database 'zabbix' failed: [2002] Can't connect to local MySQL server through socket '/var/lib/mysql/mysql.sock' (2)
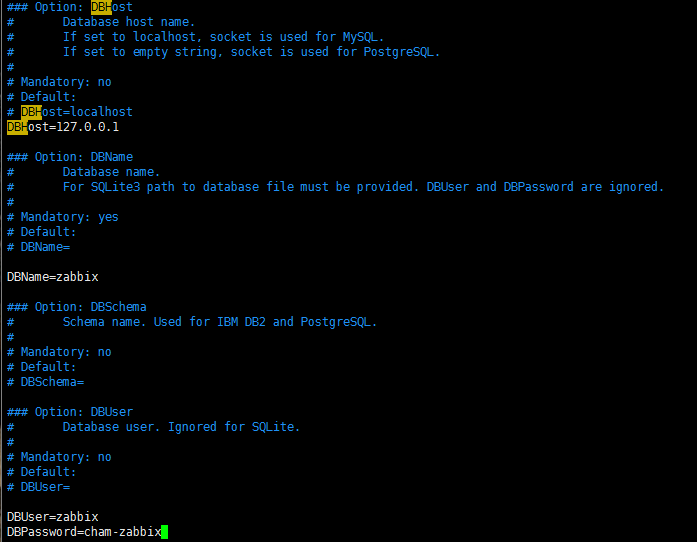
解决办法:
更改zabbix配置文件。
### Option: DBHost # Database host name. # If set to localhost, socket is used for MySQL. # If set to empty string, socket is used for PostgreSQL. # # Mandatory: no # Default: # DBHost=localhost DBHost=127.0.0.1 ### Option: DBName # Database name. # For SQLite3 path to database file must be provided. DBUser and DBPassword are ignored. # # Mandatory: yes # Default: # DBName= DBName=zabbix ### Option: DBSchema # Schema name. Used for IBM DB2 and PostgreSQL. # # Mandatory: no # Default: # DBSchema= ### Option: DBUser # Database user. Ignored for SQLite. # # Mandatory: no # Default: # DBUser= DBUser=zabbix DBPassword=cham-zabbix
[root@cham002 zabbix-server-mysql-3.2.11]# ps aux |grep zabbix zabbix 3981 0.0 0.4 256260 4124 ? S 22:59 0:00 /usr/sbin/zabbix_server -c /etc/zabbix/zabbix_server.conf zabbix 3983 0.0 0.2 256260 2472 ? S 22:59 0:00 /usr/sbin/zabbix_server: configuration syncer [waiting 60 sec for processes] zabbix 3984 0.0 0.2 256260 2680 ? S 22:59 0:00 /usr/sbin/zabbix_server: db watchdog [synced alerts config in 0.001111 sec, idle 60 sec] zabbix 3985 0.0 0.5 363204 5196 ? S 22:59 0:00 /usr/sbin/zabbix_server: poller #1 [got 0 values in 0.000002 sec, idle 5 sec] zabbix 3986 0.0 0.5 363204 5196 ? S 22:59 0:00 /usr/sbin/zabbix_server: poller #2 [got 0 values in 0.000002 sec, idle 5 sec] zabbix 3987 0.0 0.5 363204 5196 ? S 22:59 0:00 /usr/sbin/zabbix_server: poller #3 [got 0 values in 0.000002 sec, idle 5 sec] zabbix 3988 0.0 0.5 363204 5196 ? S 22:59 0:00 /usr/sbin/zabbix_server: poller #4 [got 0 values in 0.000003 sec, idle 5 sec] zabbix 3989 0.0 0.5 363204 5196 ? S 22:59 0:00 /usr/sbin/zabbix_server: poller #5 [got 0 values in 0.000002 sec, idle 5 sec] zabbix 3990 0.0 0.5 363204 5196 ? S 22:59 0:00 /usr/sbin/zabbix_server: unreachable poller #1 [got 0 values in 0.000002 sec, idle 5 sec] zabbix 3991 0.0 0.3 256260 3588 ? S 22:59 0:00 /usr/sbin/zabbix_server: trapper #1 [processed data in 0.000000 sec, waiting for connection] zabbix 3992 0.0 0.3 256260 3588 ? S 22:59 0:00 /usr/sbin/zabbix_server: trapper #2 [processed data in 0.000000 sec, waiting for connection] zabbix 3993 0.0 0.3 256260 3588 ? S 22:59 0:00 /usr/sbin/zabbix_server: trapper #3 [processed data in 0.000000 sec, waiting for connection] zabbix 3994 0.0 0.3 256260 3588 ? S 22:59 0:00 /usr/sbin/zabbix_server: trapper #4 [processed data in 0.000000 sec, waiting for connection] zabbix 3995 0.0 0.3 256260 3536 ? S 22:59 0:00 /usr/sbin/zabbix_server: trapper #5 [processed data in 0.000000 sec, waiting for connection] zabbix 3996 0.0 0.2 258836 2612 ? S 22:59 0:00 /usr/sbin/zabbix_server: icmp pinger #1 [got 0 values in 0.000003 sec, idle 5 sec] zabbix 3997 0.0 0.2 256260 2688 ? S 22:59 0:00 /usr/sbin/zabbix_server: alerter [sent alerts: 0 success, 0 fail in 0.000387 sec, idle 30 sec] zabbix 3998 0.0 0.2 256260 2468 ? S 22:59 0:00 /usr/sbin/zabbix_server: housekeeper [startup idle for 30 minutes] zabbix 3999 0.0 0.2 256340 2920 ? S 22:59 0:00 /usr/sbin/zabbix_server: timer #1 [processed 0 triggers, 0 events in 0.000056 sec, 0 maintenances in 0.000786 sec, idle 30 sec] zabbix 4000 0.0 0.2 256260 2824 ? S 22:59 0:00 /usr/sbin/zabbix_server: http poller #1 [got 0 values in 0.000397 sec, idle 5 sec] zabbix 4001 0.0 0.4 360620 5032 ? S 22:59 0:00 /usr/sbin/zabbix_server: discoverer #1 [processed 0 rules in 0.000294 sec, idle 60 sec] zabbix 4002 0.0 0.2 256260 2812 ? S 22:59 0:00 /usr/sbin/zabbix_server: history syncer #1 [synced 0 items in 0.000001 sec, idle 1 sec] zabbix 4003 0.0 0.2 256260 2812 ? S 22:59 0:00 /usr/sbin/zabbix_server: history syncer #2 [synced 0 items in 0.000001 sec, idle 1 sec] zabbix 4004 0.0 0.2 256260 2812 ? S 22:59 0:00 /usr/sbin/zabbix_server: history syncer #3 [synced 0 items in 0.000001 sec, idle 1 sec] zabbix 4005 0.0 0.2 256260 2812 ? S 22:59 0:00 /usr/sbin/zabbix_server: history syncer #4 [synced 0 items in 0.000001 sec, idle 1 sec] zabbix 4006 0.0 0.3 256260 3768 ? S 22:59 0:00 /usr/sbin/zabbix_server: escalator #1 [processed 0 escalations in 0.000717 sec, idle 3 sec] zabbix 4007 0.0 0.3 256260 3768 ? S 22:59 0:00 /usr/sbin/zabbix_server: proxy poller #1 [exchanged data with 0 proxies in 0.000002 sec, idle 5 sec] zabbix 4008 0.0 0.2 256260 2580 ? S 22:59 0:00 /usr/sbin/zabbix_server: self-monitoring [processed data in 0.000003 sec, idle 1 sec] zabbix 4009 0.0 0.2 256260 2800 ? S 22:59 0:00 /usr/sbin/zabbix_server: task manager [processed 0 task(s) in 0.000322 sec, idle 5 sec] root 4029 0.0 0.0 112684 976 pts/0 S+ 23:00 0:00 grep --color=auto zabbix [root@cham002 zabbix-server-mysql-3.2.11]# [root@cham002 zabbix-server-mysql-3.2.11]# !net netstat -lntp Active Internet connections (only servers) Proto Recv-Q Send-Q Local Address Foreign Address State PID/Program name tcp 0 0 0.0.0.0:47755 0.0.0.0:* LISTEN 2447/rpc.statd tcp 0 0 0.0.0.0:111 0.0.0.0:* LISTEN 1/systemd tcp 0 0 0.0.0.0:20048 0.0.0.0:* LISTEN 2448/rpc.mountd tcp 0 0 0.0.0.0:43862 0.0.0.0:* LISTEN - tcp 0 0 0.0.0.0:22 0.0.0.0:* LISTEN 2443/sshd tcp 0 0 127.0.0.1:25 0.0.0.0:* LISTEN 2646/master tcp 0 0 0.0.0.0:2049 0.0.0.0:* LISTEN - tcp 0 0 0.0.0.0:10051 0.0.0.0:* LISTEN 3981/zabbix_server tcp6 0 0 :::3306 :::* LISTEN 2428/mysqld tcp6 0 0 :::111 :::* LISTEN 1/systemd tcp6 0 0 :::80 :::* LISTEN 1286/httpd tcp6 0 0 :::20048 :::* LISTEN 2448/rpc.mountd tcp6 0 0 :::22 :::* LISTEN 2443/sshd tcp6 0 0 ::1:25 :::* LISTEN 2646/master tcp6 0 0 :::35905 :::* LISTEN - tcp6 0 0 :::2049 :::* LISTEN - tcp6 0 0 :::53154 :::* LISTEN 2447/rpc.statd tcp6 0 0 :::10051 :::* LISTEN 3981/zabbix_server
启动完成后查看其状态(ps、netstat),正常(服务端zabbix默认监听10051端口)!
配置web界面
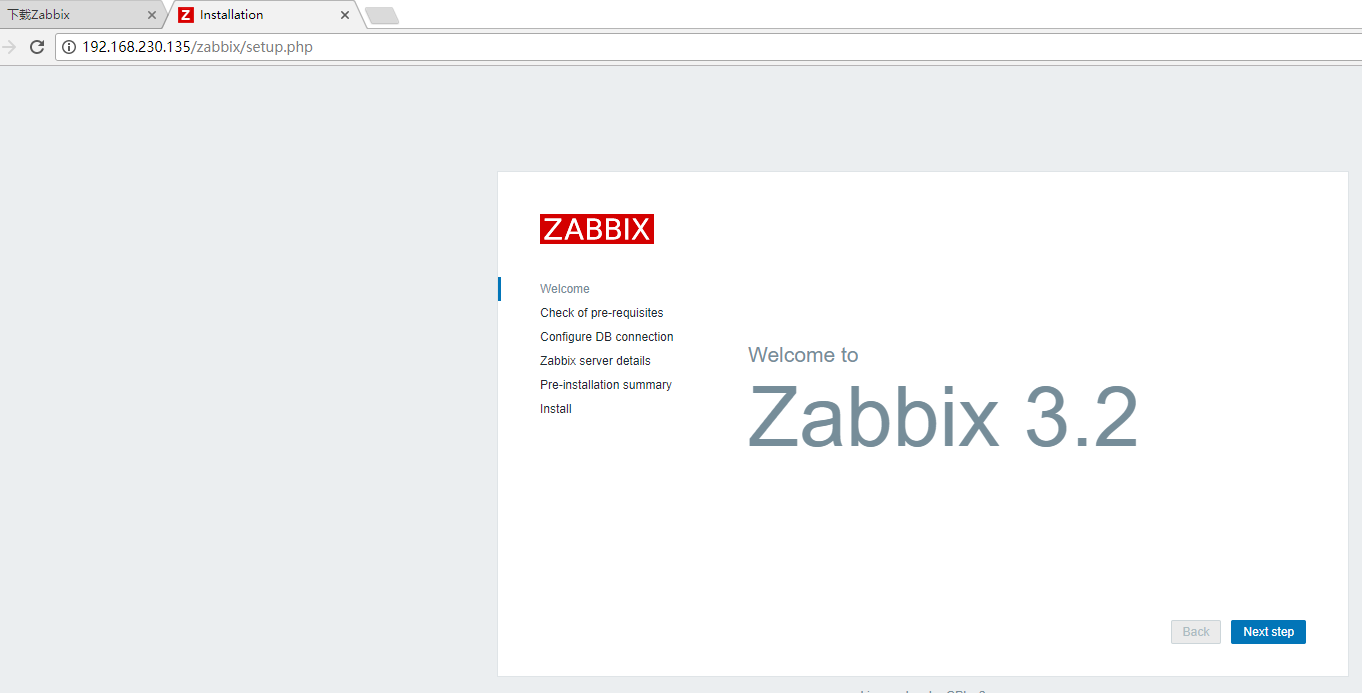
使用浏览器访问server机器上的IP:192.168.230.135/zabbix(进行该操作前保证server已关闭防火墙)进入安装引导界面。
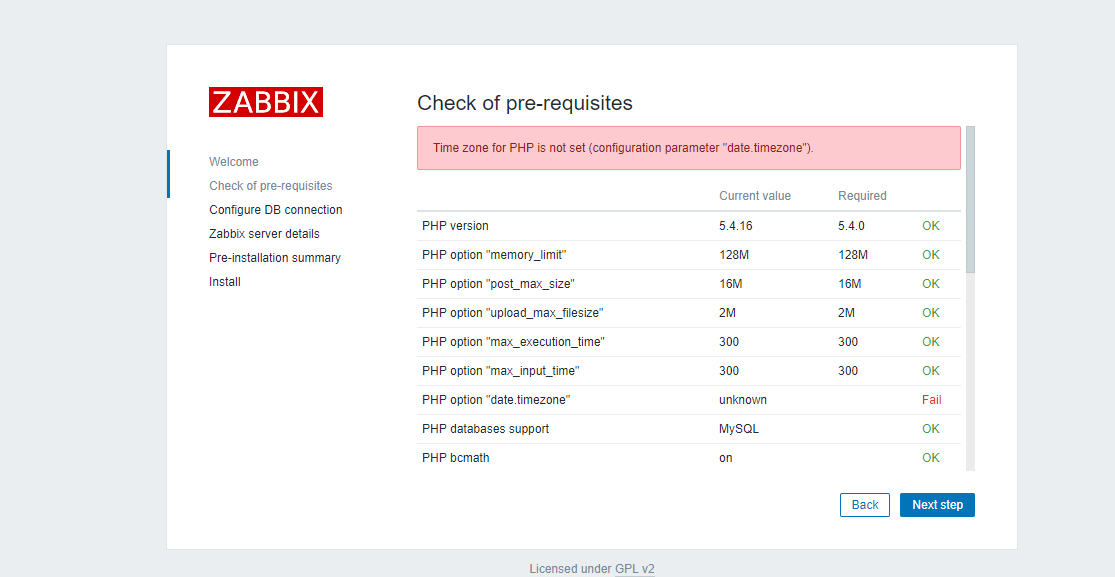
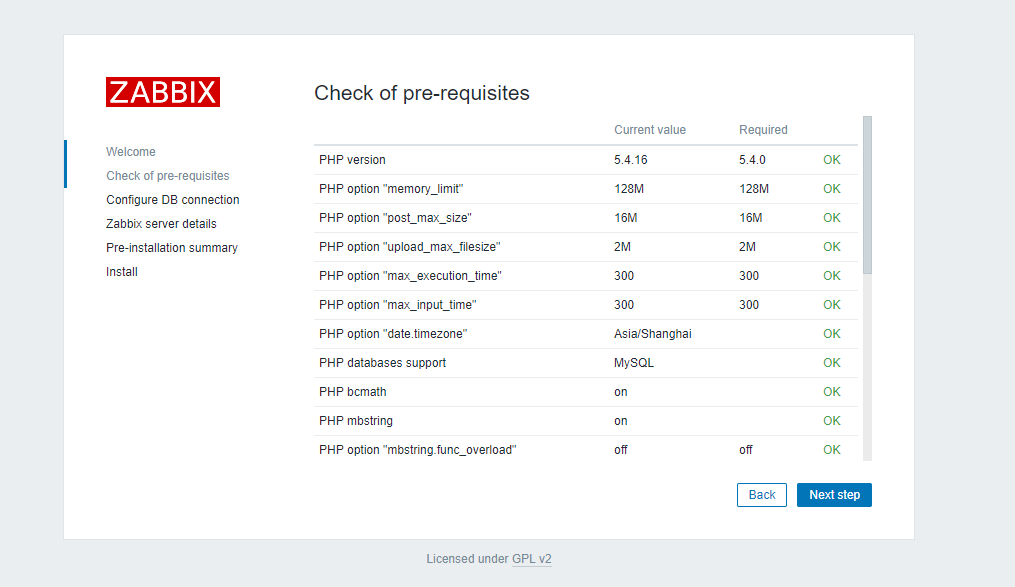
点击“Next step”进入检测界面:
错误: 此处有错误提示,意识是PHP无法识别“data.timezone”(时区)。
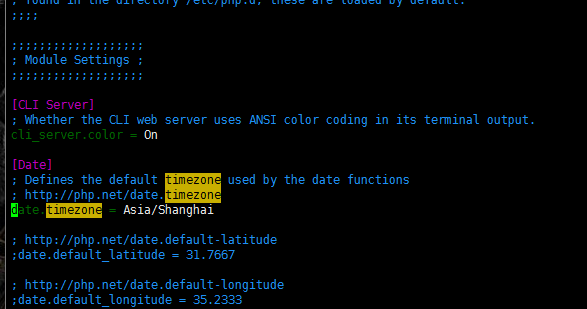
[root@cham002 ~]# vim /etc/php.ini date.timezone = Asia/Shanghai [root@cham002 ~]# systemctl restart httpd
刷新
点击“Next step”

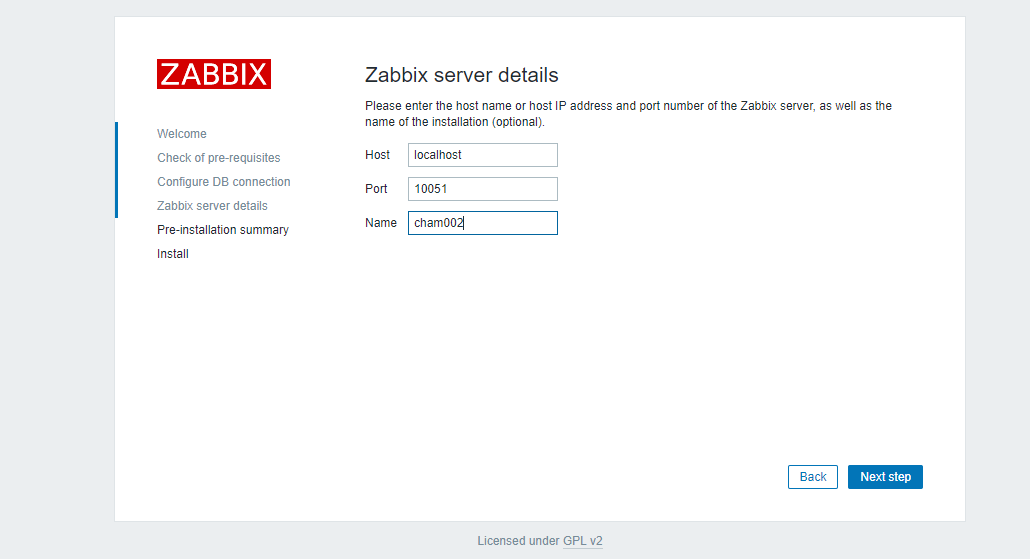
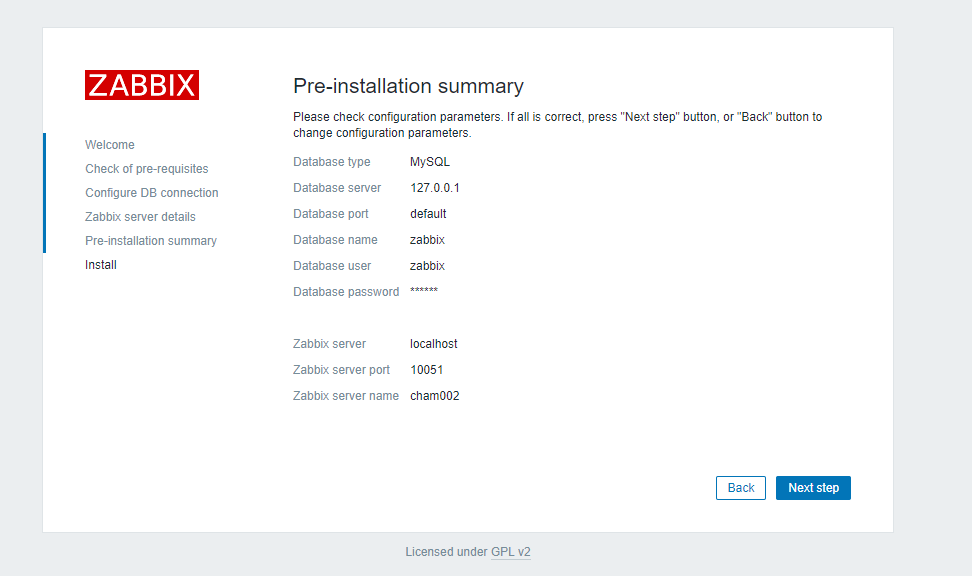
确认信息
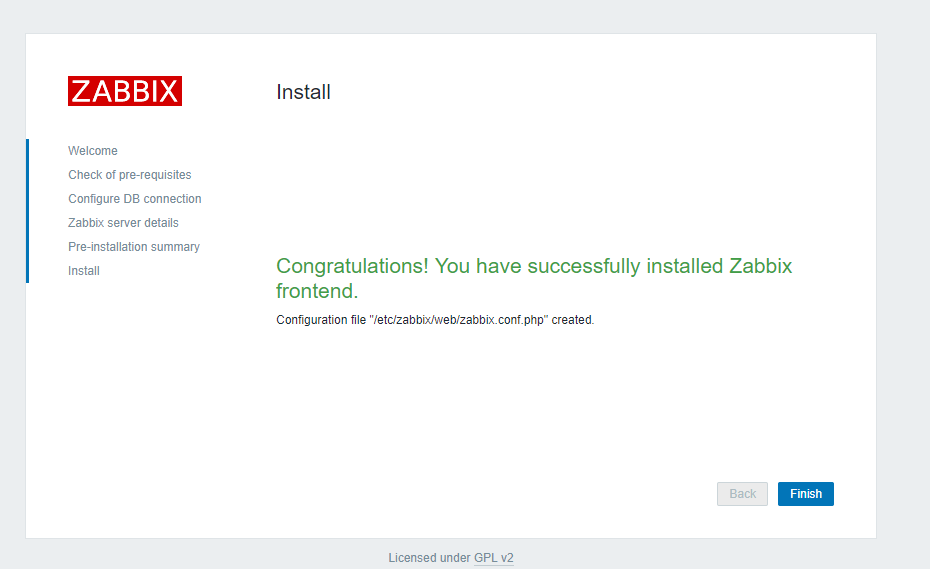
安装成功
admin
zabbix
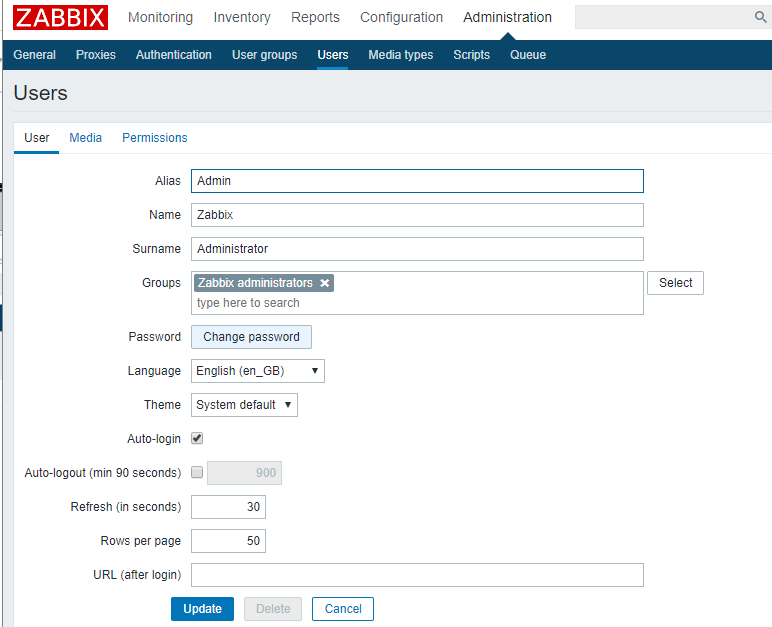
更改密码、Administration/user
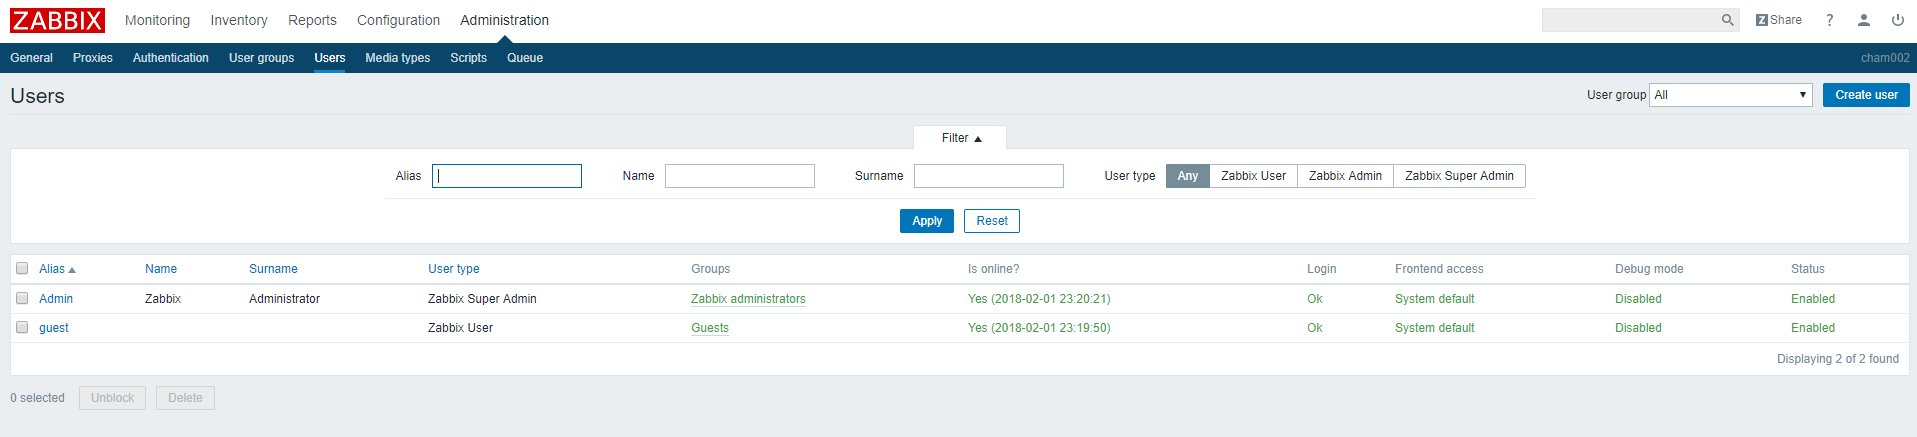
change password 顺带可以改变语言 点击 update
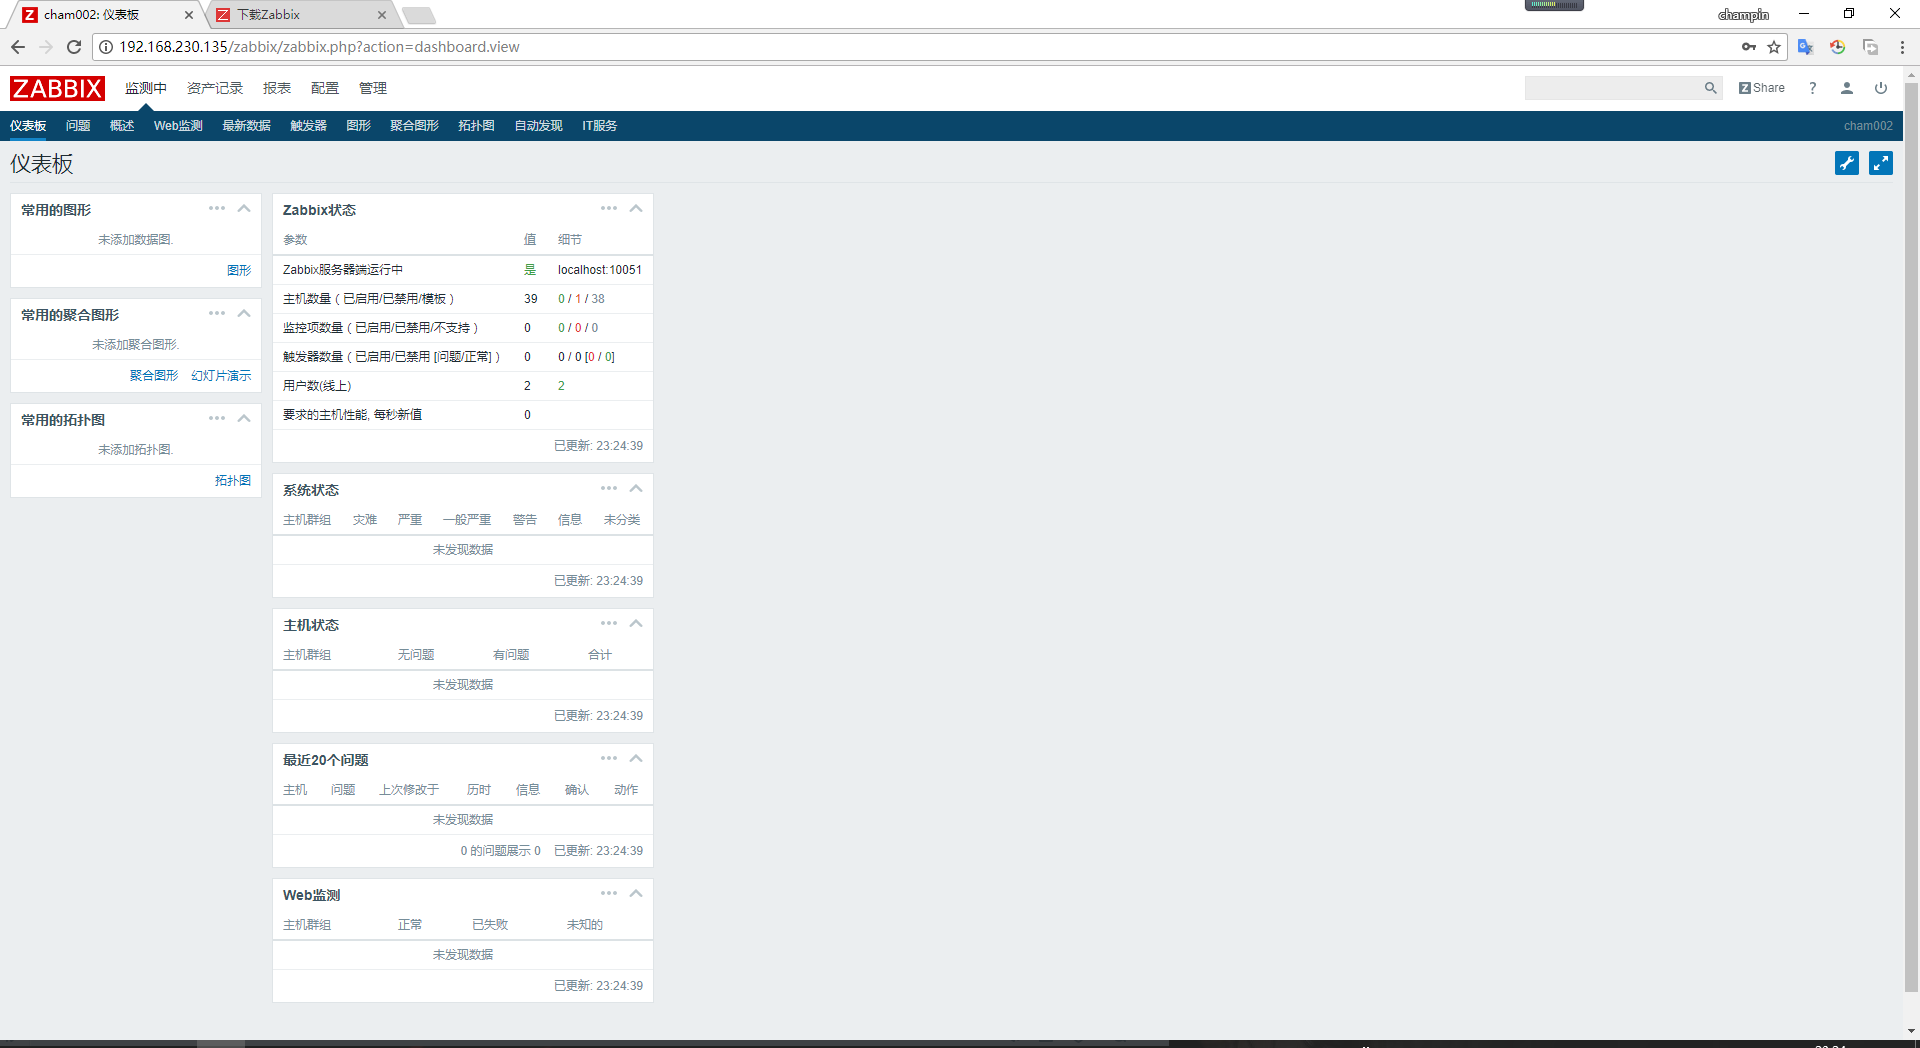
刷新一下就会变成中文了。这个就是zabbix的web界面了
19.5 忘记服务端zabbix管理员密码
如果忘记zabbix(web界面)管理员密码,可通过zabbix服务器的数据库进行密码更改!
[root@cham002 ~]# mysql -uroot -pchampin Warning: Using a password on the command line interface can be insecure. Welcome to the MySQL monitor. Commands end with ; or \g. Your MySQL connection id is 379 Server version: 5.6.35-log MySQL Community Server (GPL) Copyright (c) 2000, 2016, Oracle and/or its affiliates. All rights reserved. Oracle is a registered trademark of Oracle Corporation and/or its affiliates. Other names may be trademarks of their respective owners. Type 'help;' or '\h' for help. Type '\c' to clear the current input statement. mysql> use zabbix Reading table information for completion of table and column names You can turn off this feature to get a quicker startup with -A Database changed mysql> show tables; #看一看里面的表内容太多不复制。 mysql> desc users; +----------------+---------------------+------+-----+---------+-------+ | Field | Type | Null | Key | Default | Extra | +----------------+---------------------+------+-----+---------+-------+ | userid | bigint(20) unsigned | NO | PRI | NULL | | | alias | varchar(100) | NO | UNI | | | | name | varchar(100) | NO | | | | | surname | varchar(100) | NO | | | | | passwd | char(32) | NO | | | | | url | varchar(255) | NO | | | | | autologin | int(11) | NO | | 0 | | | autologout | int(11) | NO | | 900 | | | lang | varchar(5) | NO | | en_GB | | | refresh | int(11) | NO | | 30 | | | type | int(11) | NO | | 1 | | | theme | varchar(128) | NO | | default | | | attempt_failed | int(11) | NO | | 0 | | | attempt_ip | varchar(39) | NO | | | | | attempt_clock | int(11) | NO | | 0 | | | rows_per_page | int(11) | NO | | 50 | | +----------------+---------------------+------+-----+---------+-------+ 16 rows in set (0.02 sec) mysql> update users set passwd=md5('champin1') where alias='Admin'; Query OK, 1 row affected (0.00 sec) Rows matched: 1 Changed: 1 Warnings: 0 mysql> select * from users; +--------+-------+--------+---------------+----------------------------------+-----+-----------+------------+-------+---------+------+---------+----------------+---------------+---------------+---------------+ | userid | alias | name | surname | passwd | url | autologin | autologout | lang | refresh | type | theme | attempt_failed | attempt_ip | attempt_clock | rows_per_page | +--------+-------+--------+---------------+----------------------------------+-----+-----------+------------+-------+---------+------+---------+----------------+---------------+---------------+---------------+ | 1 | Admin | Zabbix | Administrator | f0601ca857f5ec53aa98ea2275fea007 | | 1 | 0 | zh_CN | 30 | 3 | default | 0 | 192.168.230.1 | 1517498390 | 50 | | 2 | guest | | | d41d8cd98f00b204e9800998ecf8427e | | 0 | 900 | en_GB | 30 | 1 | default | 0 | | 0 | 50 | +--------+-------+--------+---------------+----------------------------------+-----+-----------+------------+-------+---------+------+---------+----------------+---------------+---------------+---------------+ 2 rows in set (0.00 sec) mysql> quit Bye 现在就可以用新密码登录zabbix了。
19.6 zabbix客户端配置
在客户端安装zabbix
[root@test ~]# wget http://repo.zabbix.com/zabbix/3.2/rhel/7/x86_64/zabbix-release-3.2-1.el7.noarch.rpm [root@test ~]# rpm -ivh zabbix-release-3.2-1.el7.noarch.rpm [root@test ~]# yum install -y zabbix-agent [root@test ~]# vim /etc/zabbix/zabbix_agentd.conf Server=192.168.230.135 #指定服务端主机IP(设置客户端的监控主机白名单) ServerActive=192.168.230.135 #该参数决定监控的主动/被动模式 #如果只改参数Server,则只能采用被动模式(只能等待服务端来采集信息) #主动模式:客户端主动向服务端发送信息 Hostname=test145 #该参数用于设定客户端主机的名字,用于服务端添加监控服务 #如果服务端所监控的机器和其Hostname不一致,服务端将无法识别该机器 #因为zabbix是通过IP进行监控的,该参数不会对监控造成太大影响 #加上该参数有利于更好的辨别服务端监控是哪台主机的状态 [root@test ~]# systemctl start zabbix-agent [root@test ~]# ps aux |grep zabbix zabbix 54312 0.0 0.1 80592 1276 ? S 23:43 0:00 /usr/sbin/zabbix_agentd -c /etc/zabbix/zabbix_agentd.conf zabbix 54313 0.0 0.1 80592 1292 ? R 23:43 0:00 /usr/sbin/zabbix_agentd: collector [idle 1 sec] zabbix 54314 0.0 0.1 80592 1832 ? S 23:43 0:00 /usr/sbin/zabbix_agentd: listener #1 [waiting for connection] zabbix 54315 0.0 0.1 80592 1836 ? S 23:43 0:00 /usr/sbin/zabbix_agentd: listener #2 [waiting for connection] zabbix 54316 0.0 0.1 80592 1836 ? S 23:43 0:00 /usr/sbin/zabbix_agentd: listener #3 [waiting for connection] zabbix 54317 0.0 0.2 80720 2216 ? S 23:43 0:00 /usr/sbin/zabbix_agentd: active checks #1 [idle 1 sec] root 54320 0.0 0.0 112664 968 pts/1 R+ 23:43 0:00 grep --color=auto zabbix [root@test ~]# netstat -lntp Active Internet connections (only servers) Proto Recv-Q Send-Q Local Address Foreign Address State PID/Program name tcp 0 0 0.0.0.0:22 0.0.0.0:* LISTEN 2355/sshd tcp 0 0 127.0.0.1:25 0.0.0.0:* LISTEN 1994/master tcp 0 0 0.0.0.0:10050 0.0.0.0:* LISTEN 54312/zabbix_agentd tcp6 0 0 :::3306 :::* LISTEN 9547/mysqld tcp6 0 0 :::21 :::* LISTEN 8833/vsftpd tcp6 0 0 :::22 :::* LISTEN 2355/sshd tcp6 0 0 ::1:25 :::* LISTEN 1994/master tcp6 0 0 :::10050 :::* LISTEN 54312/zabbix_agentd 计入开机启动 [root@test ~]# systemctl enable zabbix-agent Created symlink from /etc/systemd/system/multi-user.target.wants/zabbix-agent.service to /usr/lib/systemd/system/zabbix-agent.service.
查看zabbix服务状态(ps、netstat),正常(客户端zabbix默认监听10050端口)!
19.7 主动模式和被动模式
•主动或者被动是相对客户端来讲的
• 被动模式,服务端会主动连接客户端获取监控项目数据,客户端被动地接受连接,并把监控信息传递给服务端
• 主动模式,客户端会主动把监控数据汇报给服务端,服务端只负责接收即可。
• 当客户端数量非常多时,建议使用主动模式,这样可以降低服务端的压力。
• 服务端有公网ip,客户端只有内网ip,但却能连外网,这种场景适合主动模式
主动模式和被动模式所针对的对象是客户端,意思是客户端主动向服务端上报数据和由服务端到客户端采集数据。数据的提交时间在监控中心设置。
配置建议
采用主动模式可以减轻服务器的压力。
当服务端有公网IP,客户端只有内网IP但是可以连接外网(使用iptables的nat表规则实现),这种场景适合使用主动模式
19.8 添加监控主机
该配置在服务端的web界面监控中心进行。
配置选项介绍
登录到管理界面后操作如下:
- 主机群组:在此先创建主机群组,然后再添加要监控的机器到已有群组中。这样做的好处是,在不同的主机群组设置不同监控规则,然后可以把想要使用同样规则的主机添加到指定群组进行管理,避免为每台主机去配置规则。
- 模板:预设的监控项目集合(监控规则末班)
- 主机:在监控中的所有机器
开始配置
创建主机群组
然后再添加主机
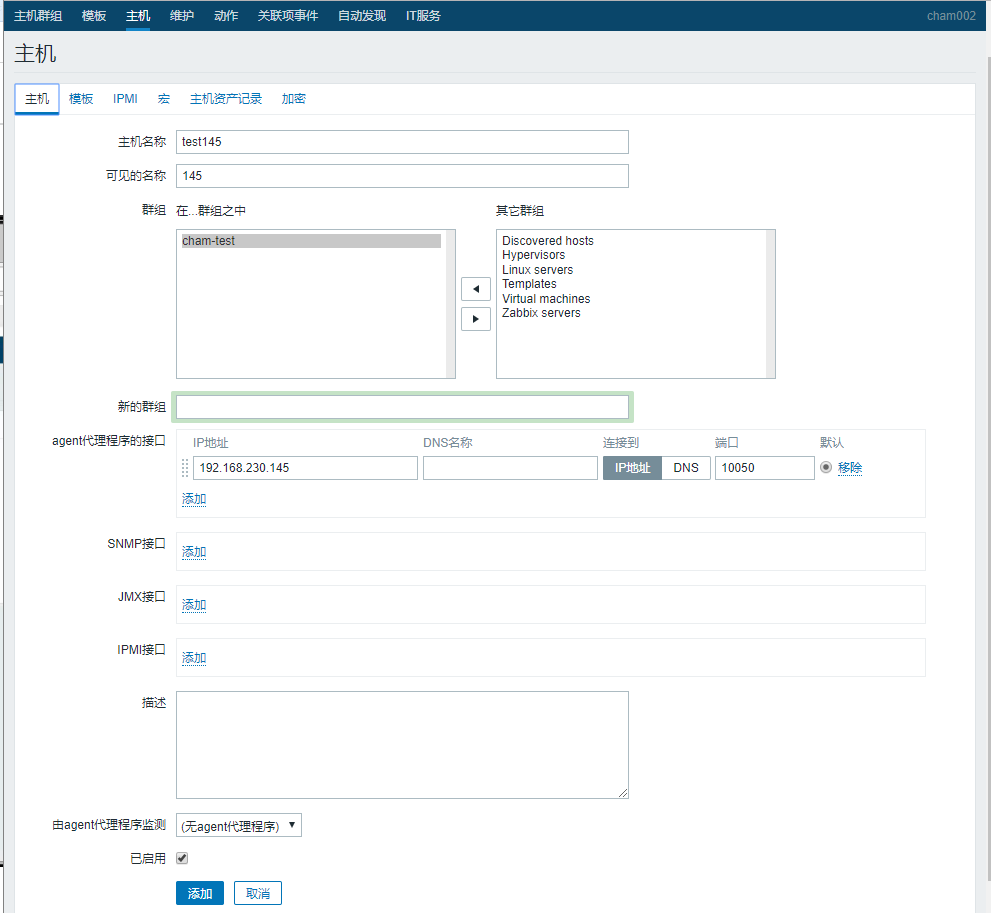
此配置要客户端主机名称(在客户端zabbix配置文件:/etc/zabbix/zabbix_agentd.conf中的Hostname参数),该名称要和客户端配置文件中的名称一致;指定主机群组;指定客户端IP,如果该IP有对应的域名,则需要添加到“DNS名称”中,如果没有可以不填。有需要的话还可以进行模板、IPMI、宏等配置,配置完成后点击“添加”,跳转到主机列表:
参数解析:
- 应用集:监控项目的组集合
- 监控项:所有的监控项目
- 触发器:监控规则(不填规则颜色不同,会体现在首页主机状态中)
- 图形:根据监控历史数据绘制的图标
- 自动发现规则:zabbix自动监控的文件系统的信息、网卡信息(该部分自定义比较繁琐,所以使用自己动发现规则)
- Web场景:在此可设置对主机上的某个站点进行监控
19.9 添加自定义模板
在“模板”中自定义监控规则,然后应用到监控主机中,方便个性化管理。
添加模板的思路:创建模板——指定其所属模板组(也可以链接到其他模板)


添加完成后,在zabbix自带的监控模板template中(此处要对应监控主机系统版本)为自定义模板添加监控项目,点击“监控项目”,选择要监控的项目,然后“复制”到模板“adai”中。
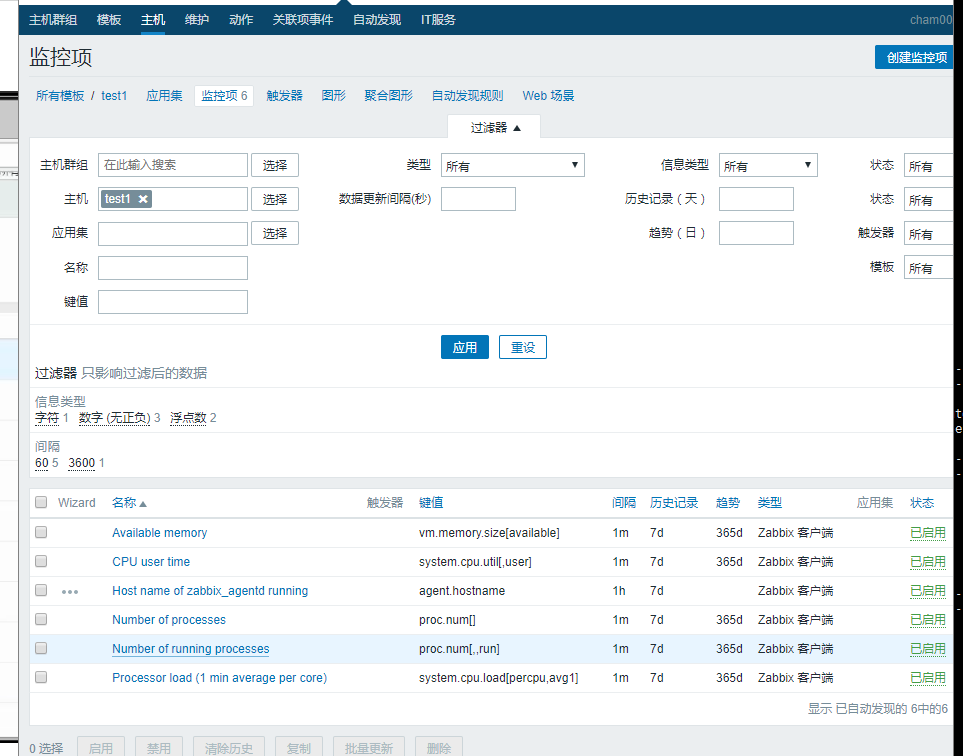
注意: 在此需要选择目标类型!!!
复制完成后查看模板“test1”:
配置“自动发现规则” :
此处没有“复制”选项,那么该如何将该规则添加到自定义模板中呢?方法如下:
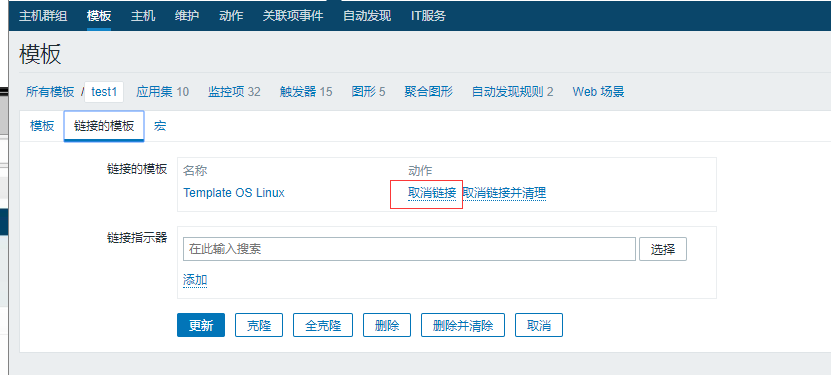
- 删除模板adai中的所有监控项,然后使用“链接的模板”,“选择”要链接到的模板,然后“添加”,添加完成后点“更新”:

更新完成后,所链接的模板的规则就应用到adai中,但是在该模板下不能直接删除监控项目,原因是该项目下所有规则都是链接到template os Linux中的,需要在链接模板选项下设置“取消链接”——“更新”,然后才能对adai中的监控项目等选项进行编辑。
说明: 应用集中包含了所有的监控项,所以只有先删除监控项之后才能删除应用集(应用集列表中监控项数目为0的可以直接删除);触发器是设定的监控项目对应的规则,不能删;图形根据需求删选;这样自动发现规则就添加到自定义模板中。
- 将template os Linux模板导出,在此会生成一个XML文件,然后编辑该文件,编辑完成后再导入模板列表(一定要记得改模板名称)。。。(该方法工作量太大,不建议使用)
模板配置完成后就可以在监控主机中进行引用了,应用后再进行更加细化的配置。
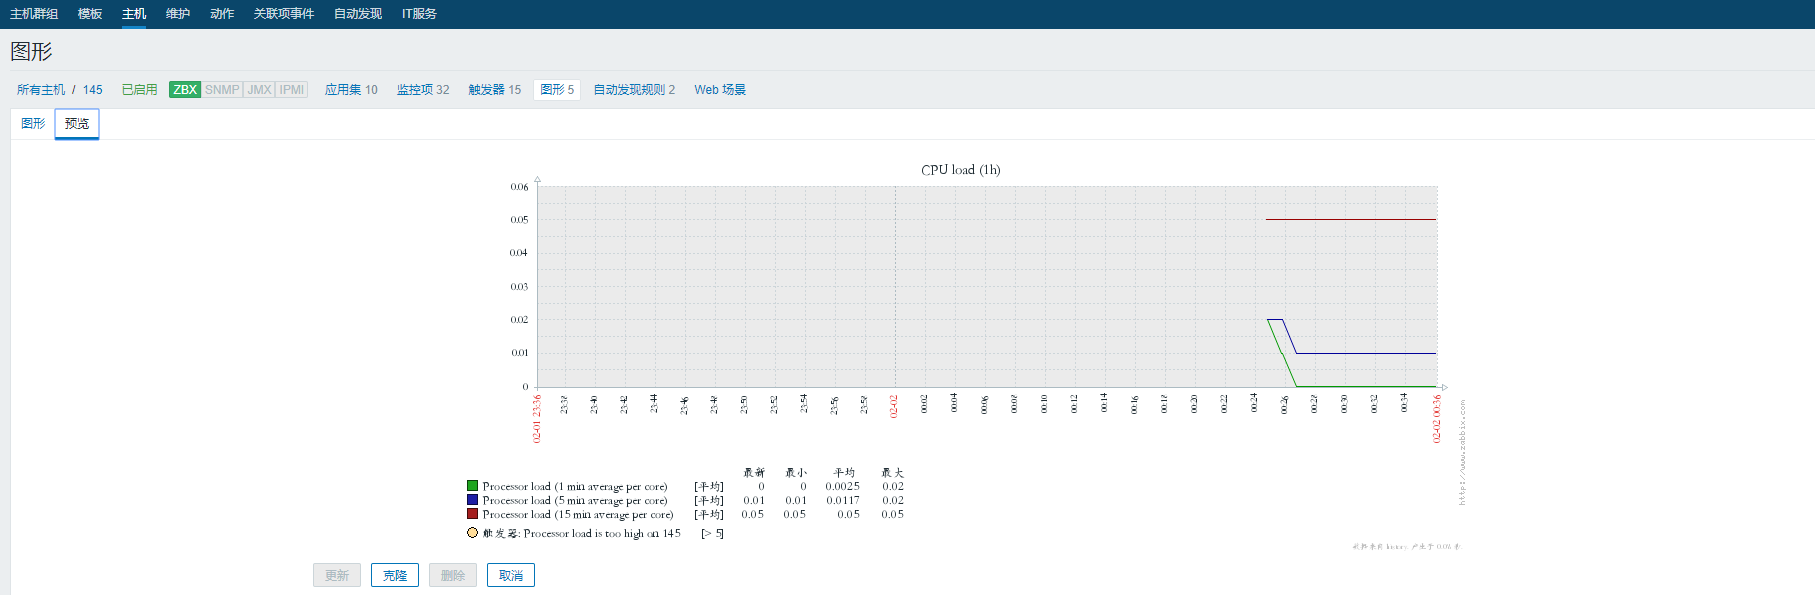
19.10 处理图形中的乱码
将自定义模板应用到监控主机adai-02中:
主机——模板——选择——添加——更新
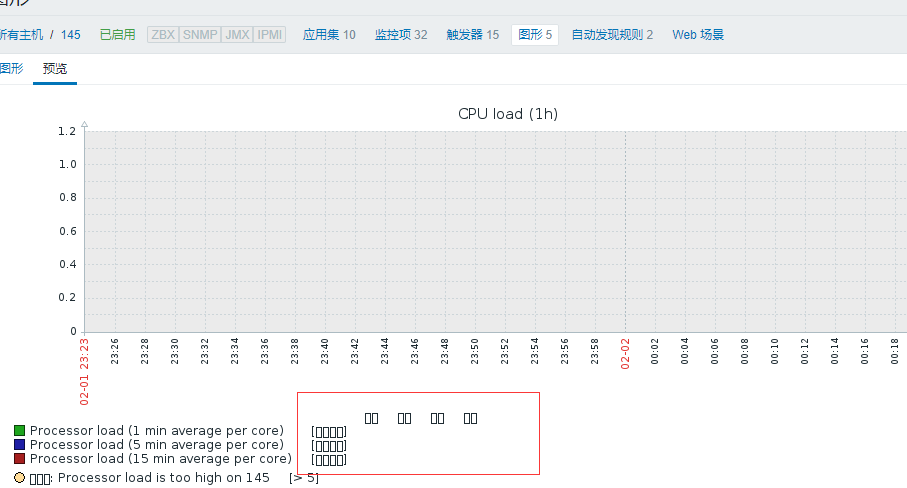
设置完成后查看图形——预览,发现图形界面下有乱码:
如何解决此问题呢?
- Why:字符集(已配置,排除该原因);像图中这种有规律的“乱码”不是字符集问题,而是缺少相应的字库(中文字库)。
- 解决办法:
编辑服务端配置文件:
[root@cham002 ~]# vim /usr/share/zabbix/include/defines.inc.php [1]+ 已停止 vim /usr/share/zabbix/include/defines.inc.php #在该文件下搜ZBX_FONTPATH #在参数“define 'ZBX_FONTPATH'”下定义的是相对/usr/share/zabbix/的相对路径 #相对路径下是指定的字库 graphfont.ttf 查看字库文件: [root@cham002 ~]# ls /usr/share/zabbix/fonts/ graphfont.ttf [root@cham002 ~]# ls -l !$ ls -l /usr/share/zabbix/fonts/ 总用量 0 lrwxrwxrwx 1 root root 33 1月 25 01:24 graphfont.ttf -> /etc/alternatives/zabbix-web-font [root@cham002 ~]# ls -l /etc/alternatives/zabbix-web-font lrwxrwxrwx 1 root root 38 1月 25 01:24 /etc/alternatives/zabbix-web-font -> /usr/share/fonts/dejavu/DejaVuSans.ttf [root@cham002 ~]# fg vim /usr/share/zabbix/include/defines.inc.php [1]+ 已停止 vim /usr/share/zabbix/include/defines.inc.php [root@cham002 ~]# ls /root/STKAITI.TTF /root/STKAITI.TTF [root@cham002 ~]# mv /root/STKAITI.TTF /usr/share/zabbix/fonts/ [root@cham002 ~]# cd !$ cd /usr/share/zabbix/fonts/ [root@cham002 fonts]# ls graphfont.ttf STKAITI.TTF [root@cham002 fonts]# mv graphfont.ttf graphfont.ttf.bak ; ln -s STKAITI.TTF graphfont.ttf [root@cham002 fonts]# ls -l 总用量 12440 lrwxrwxrwx 1 root root 11 2月 2 00:34 graphfont.ttf -> STKAITI.TTF lrwxrwxrwx 1 root root 33 1月 25 01:24 graphfont.ttf.bak -> /etc/alternatives/zabbix-web-font -rw-r--r-- 1 root root 12736196 2月 2 00:31 STKAITI.TTF
之所以图形界面显示乱码是因为该字库不支持中文字体,解决办法是将该字库软链接到一个支持中文的字库中,在此我们将其链接到Windows中文字库:
打开计算机字库文件目录C:\Windows\Fonts——复制一款中文字体到桌面——上传到虚拟机——将该文件移动到:/usr/share/zabbix/fonts/——然后更改该文件名为zabbix所链接的字库名称graphfont.ttf:
显示正常!!!
19.11 自动发现
更改自动发现规则监控时间间隔:
打开规则: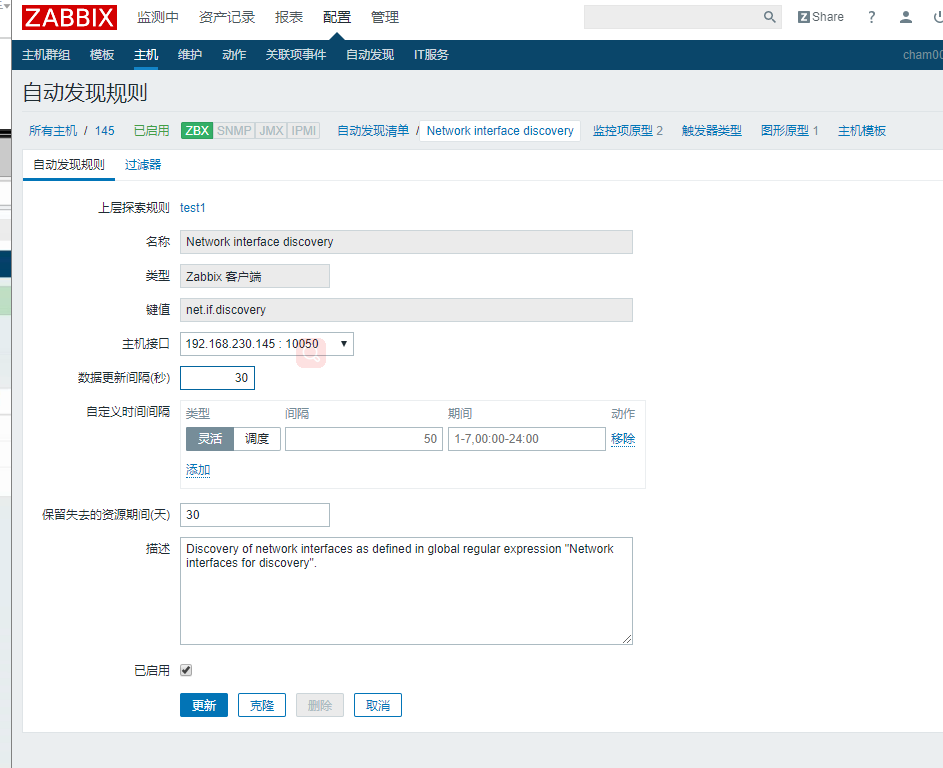
更改数据更新间隔,重启服务端和客户端zabbix服务,查看监控效果,也可以传一些数据看看:
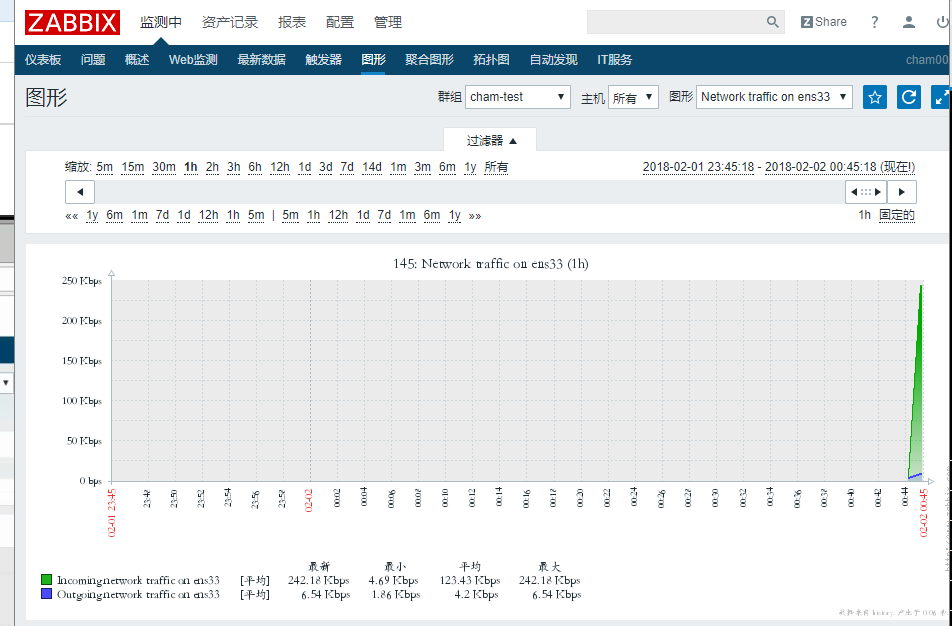
在实际应用中时间间隔不要设置太短,一面增加服务器压力。
更改图形界面颜色
在模板——自发现规则——图形原型中更改:

