目录:
1、搭建服务注册的服务端;
2、将Spring boot的一个项目做为服务注册进去;
一、搭建服务注册的服务端
1、首先通过IntelliJ IDEA或其它IDE创建一个spring boot 项目;
2、在pom.xml文件中添加spring cloud的版本依赖和Eureka的服务端依赖,具体代码如下:
<?xml version="1.0" encoding="UTF-8"?> <project xmlns="http://maven.apache.org/POM/4.0.0" xmlns:xsi="http://www.w3.org/2001/XMLSchema-instance" xsi:schemaLocation="http://maven.apache.org/POM/4.0.0 http://maven.apache.org/xsd/maven-4.0.0.xsd"> <modelVersion>4.0.0</modelVersion> <groupId>com.lyq.demo</groupId> <artifactId>eureka-server</artifactId> <version>0.0.1-SNAPSHOT</version> <packaging>jar</packaging> <name>eureka-server</name> <description>eureka-server project for Spring Boot</description> <parent> <groupId>org.springframework.boot</groupId> <artifactId>spring-boot-starter-parent</artifactId> <version>1.5.9.RELEASE</version> <relativePath/> <!-- lookup parent from repository --> </parent> <properties> <project.build.sourceEncoding>UTF-8</project.build.sourceEncoding> <project.reporting.outputEncoding>UTF-8</project.reporting.outputEncoding> <java.version>1.8</java.version> </properties> <dependencies> <dependency> <groupId>org.springframework.boot</groupId> <artifactId>spring-boot-starter-web</artifactId> </dependency> <dependency> <groupId>org.springframework.boot</groupId> <artifactId>spring-boot-starter-test</artifactId> <scope>test</scope> </dependency> <!-- 添加springcloud-erueka服务端依赖 --> <dependency> <groupId>org.springframework.cloud</groupId> <artifactId>spring-cloud-starter-eureka-server</artifactId> </dependency> </dependencies> <!-- spring-cloud版本依赖 --> <dependencyManagement> <dependencies> <dependency> <groupId>org.springframework.cloud</groupId> <artifactId>spring-cloud-dependencies</artifactId> <version>Dalston.SR1</version> <type>pom</type> <scope>import</scope> </dependency> </dependencies> </dependencyManagement> <build> <plugins> <plugin> <groupId>org.springframework.boot</groupId> <artifactId>spring-boot-maven-plugin</artifactId> </plugin> </plugins> </build> </project>
3、通过注解@EnableEurekaServer启动此为一个服务注册中心提供给其它应用进行对话,具体代码如下:
package com.lyq.demo; import org.springframework.boot.SpringApplication; import org.springframework.boot.autoconfigure.SpringBootApplication; import org.springframework.boot.builder.SpringApplicationBuilder; import org.springframework.cloud.netflix.eureka.server.EnableEurekaServer; /** * 通过@EnableEurekaServer开启此端为服务注册中心 */ @SpringBootApplication @EnableEurekaServer public class EurekaServerApplication { public static void main(String[] args) { SpringApplication.run(EurekaServerApplication.class, args); } }
4、在application.yml或者application.properties(格式自己去做对应的改变)文件中进行注册服务端的参数配置:
#配置端口 server: port: 1111 #配置为Eureka的服务端-服务注册中心 eureka: instance: hostname: localhost client: #因为自己是注册中心,设置为false,表示不向注册中心注册自己 register-with-eureka: false #因为自己是注册中心,设置为false,表示不需要去检索服务 fetch-registry: false #Eureka客户端将要注册的注册中心的地址 serviceUrl: defaultZone: http://${eureka.instance.hostname}:${server.port}/eureka/
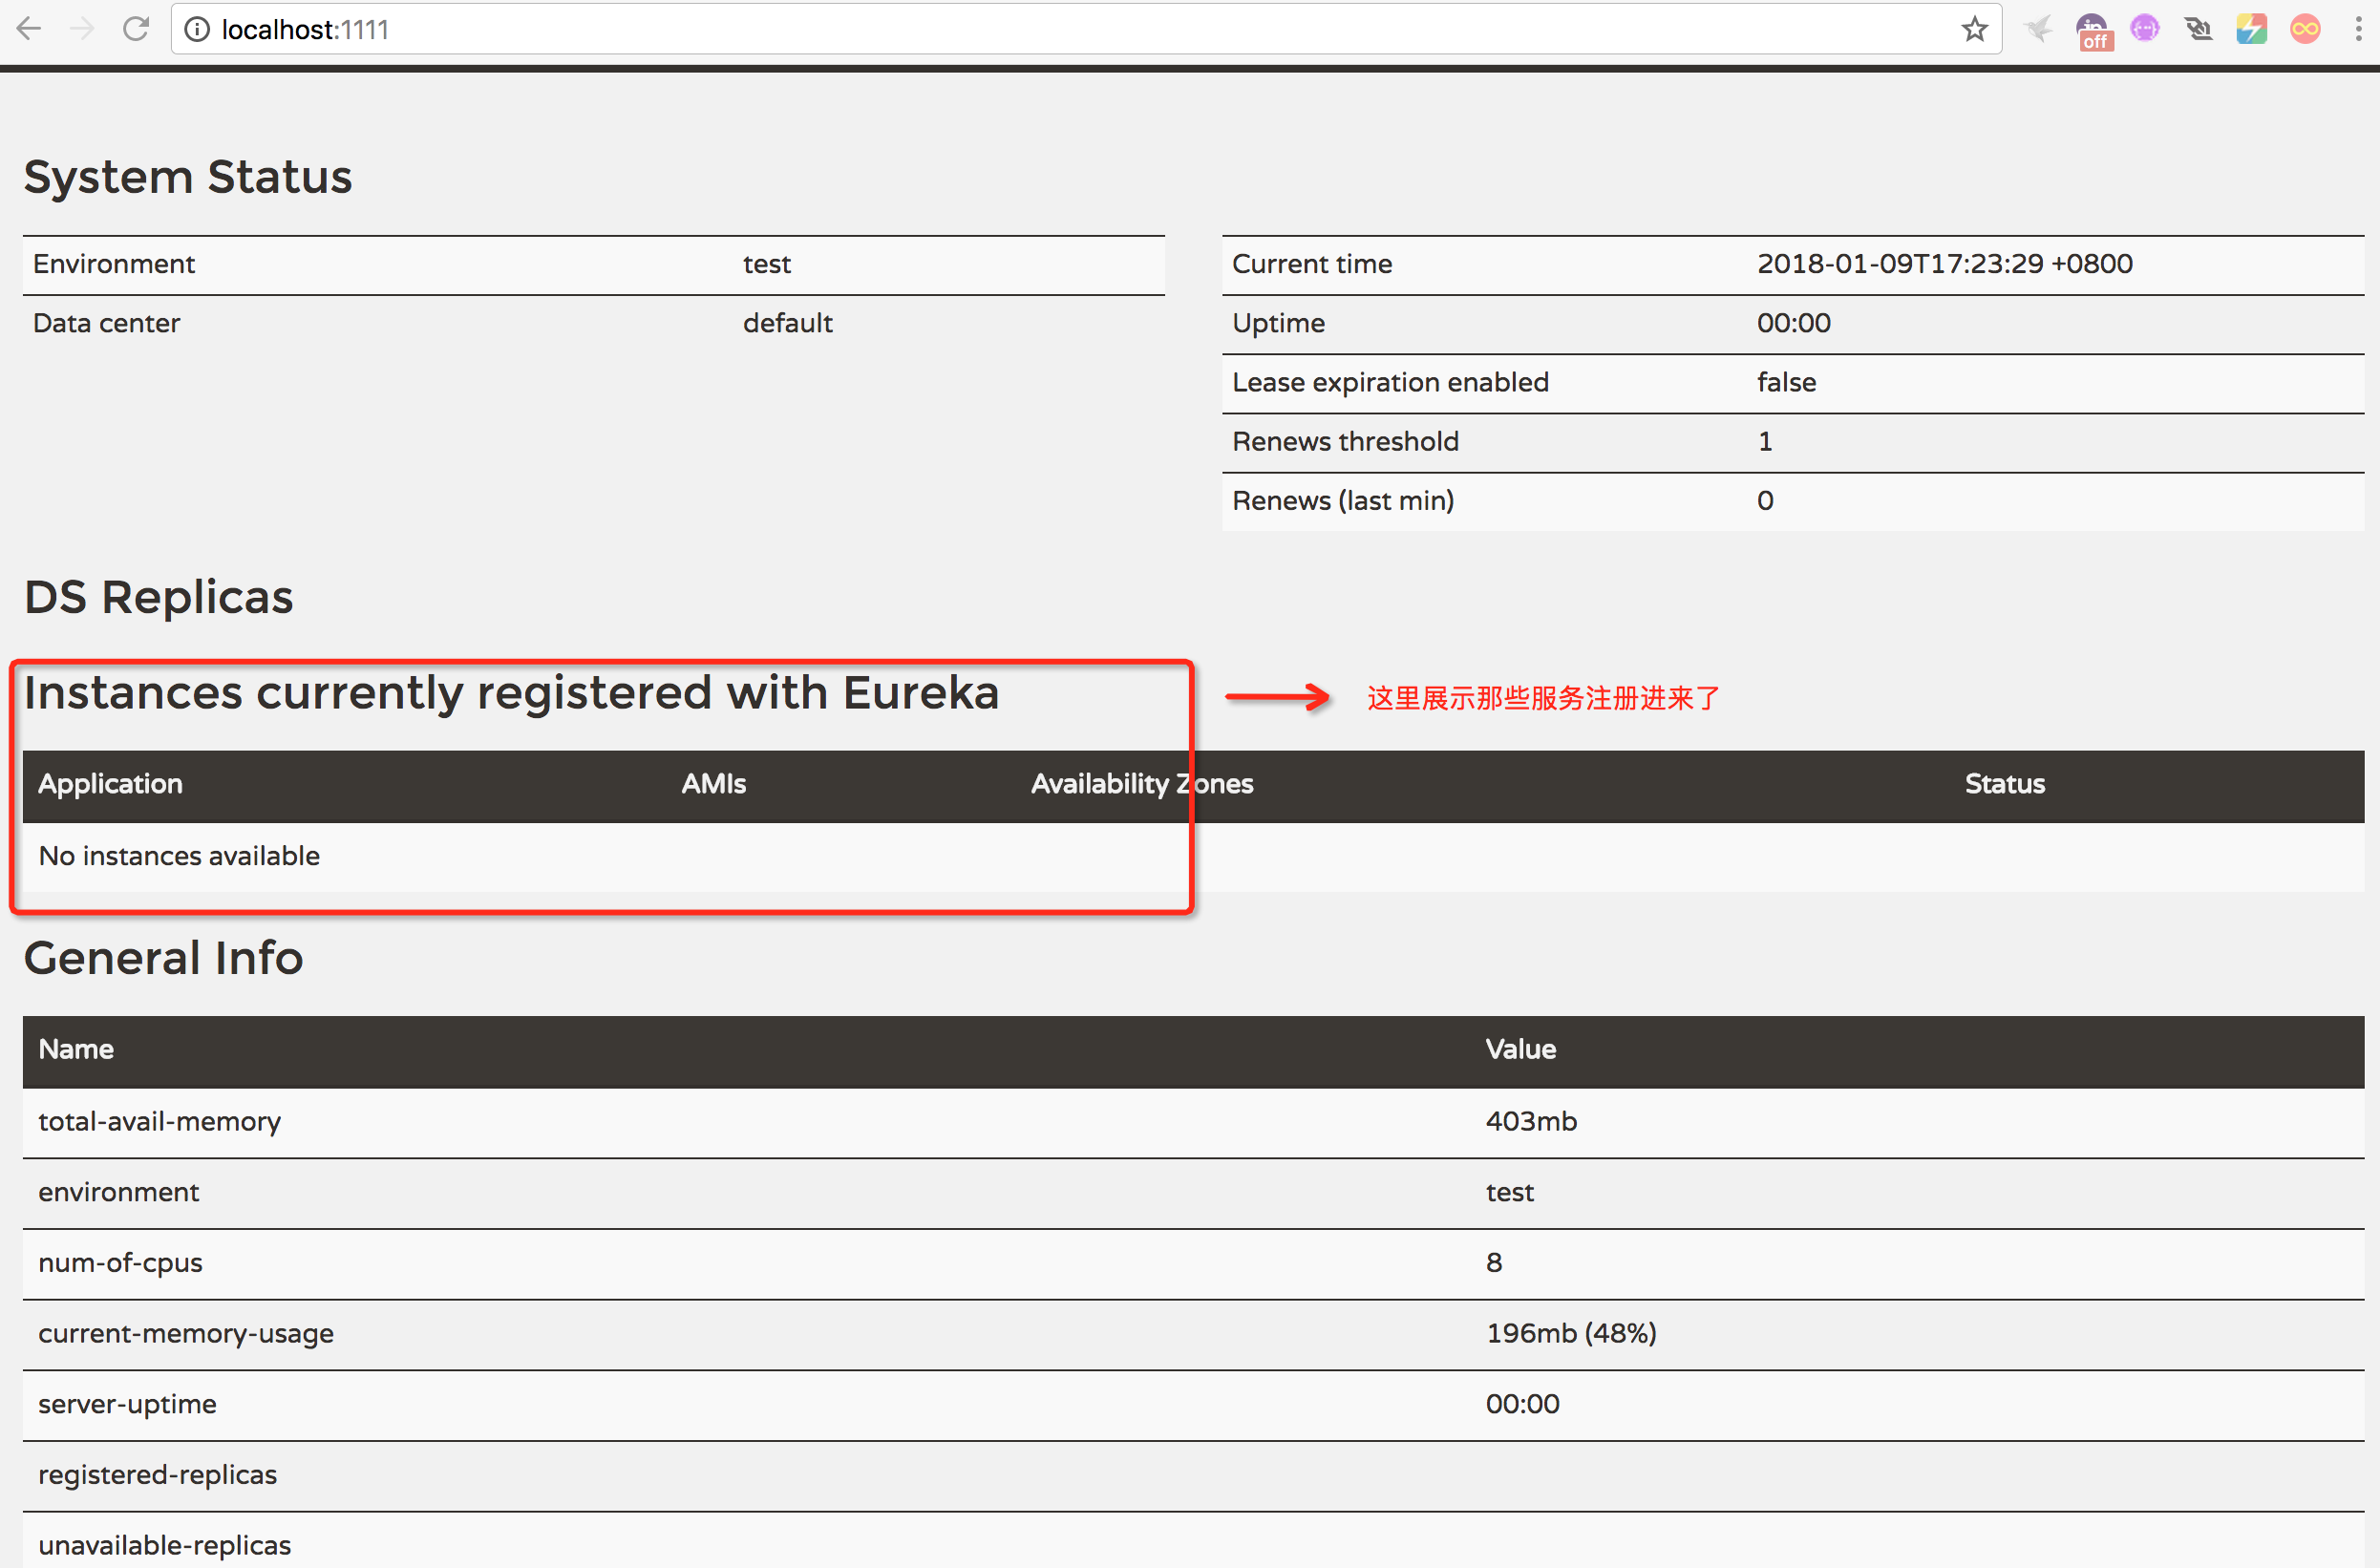
5、编译运行项目即可,在浏览器输入: http://localhost:1111出现Eureka信息面板
二、将Spring boot的一个项目做为服务注册进去
1、创建一个springboot项目eureka-clientone;
2、在pom.xml引入springcloud的依赖还有eureka-client的依赖,具体如下:
<?xml version="1.0" encoding="UTF-8"?> <project xmlns="http://maven.apache.org/POM/4.0.0" xmlns:xsi="http://www.w3.org/2001/XMLSchema-instance" xsi:schemaLocation="http://maven.apache.org/POM/4.0.0 http://maven.apache.org/xsd/maven-4.0.0.xsd"> <modelVersion>4.0.0</modelVersion> <groupId>com.lyq.demo</groupId> <artifactId>eureka-clientone</artifactId> <version>0.0.1-SNAPSHOT</version> <packaging>jar</packaging> <name>eureka-clientone</name> <description>eureka-clientone project for Spring Boot</description> <parent> <groupId>org.springframework.boot</groupId> <artifactId>spring-boot-starter-parent</artifactId> <version>1.5.9.RELEASE</version> <relativePath/> <!-- lookup parent from repository --> </parent> <properties> <project.build.sourceEncoding>UTF-8</project.build.sourceEncoding> <project.reporting.outputEncoding>UTF-8</project.reporting.outputEncoding> <java.version>1.8</java.version> </properties> <dependencies> <dependency> <groupId>org.springframework.boot</groupId> <artifactId>spring-boot-starter-web</artifactId> </dependency> <dependency> <groupId>org.springframework.boot</groupId> <artifactId>spring-boot-starter-test</artifactId> <scope>test</scope> </dependency> <!-- springcloud-eureka-client依赖 --> <dependency> <groupId>org.springframework.cloud</groupId> <artifactId>spring-cloud-starter-eureka</artifactId> </dependency> </dependencies> <!-- spring-cloud版本依赖 --> <dependencyManagement> <dependencies> <dependency> <groupId>org.springframework.cloud</groupId> <artifactId>spring-cloud-dependencies</artifactId> <version>Dalston.SR1</version> <type>pom</type> <scope>import</scope> </dependency> </dependencies> </dependencyManagement> <build> <plugins> <plugin> <groupId>org.springframework.boot</groupId> <artifactId>spring-boot-maven-plugin</artifactId> </plugin> </plugins> </build> </project>
3、通过注解@EnableEurekaClient开启注册功能,激活Eureka的DiscoveryClient实现,具体代码如下:
package com.lyq.demo; import org.springframework.boot.SpringApplication; import org.springframework.boot.autoconfigure.SpringBootApplication; import org.springframework.cloud.netflix.eureka.EnableEurekaClient; /** * 使用注解@EnableEurekaClient开启注册功能,激活Eureka的DiscoveryClient实现 * @author : lyq * @date : 2018/1/9 */ @SpringBootApplication @EnableEurekaClient public class EurekaClientoneApplication { public static void main(String[] args) { SpringApplication.run(EurekaClientoneApplication.class, args); } }
4、在application.yml或者application.properties(格式自己去做对应的改变)文件中进行注册服务端的参数配置:
# 配置注册到注册中心的服务名称 spring: application: name: hello-service # 配置服务注册中心的地址 eureka: client: serviceUrl: defaultZone: http://localhost:1111/eureka/
5、如果需要打印请求的日志,在HelloController里面注解DiscoveryClient对象来获取信息打印,具体如下:
package com.lyq.demo.controller; import org.apache.log4j.Logger; import org.omg.PortableInterceptor.SYSTEM_EXCEPTION; import org.springframework.beans.factory.annotation.Autowired; import org.springframework.cloud.client.ServiceInstance; import org.springframework.cloud.client.discovery.DiscoveryClient; import org.springframework.web.bind.annotation.GetMapping; import org.springframework.web.bind.annotation.RestController; /** * @author : lyq * @date : 2018/1/9 */ @RestController public class HelloController { private final Logger logger = Logger.getLogger(HelloController.class); @Autowired private DiscoveryClient discoveryClient; @GetMapping("hello") public String hello() { ServiceInstance instance = discoveryClient.getLocalServiceInstance(); System.out.println("********************************************"); System.out.println("* request path: "+instance.getUri() + " host: "+instance.getHost()+" serviceid: "+instance.getServiceId()); System.out.println("********************************************"); return "Eureka-clientone"; } }
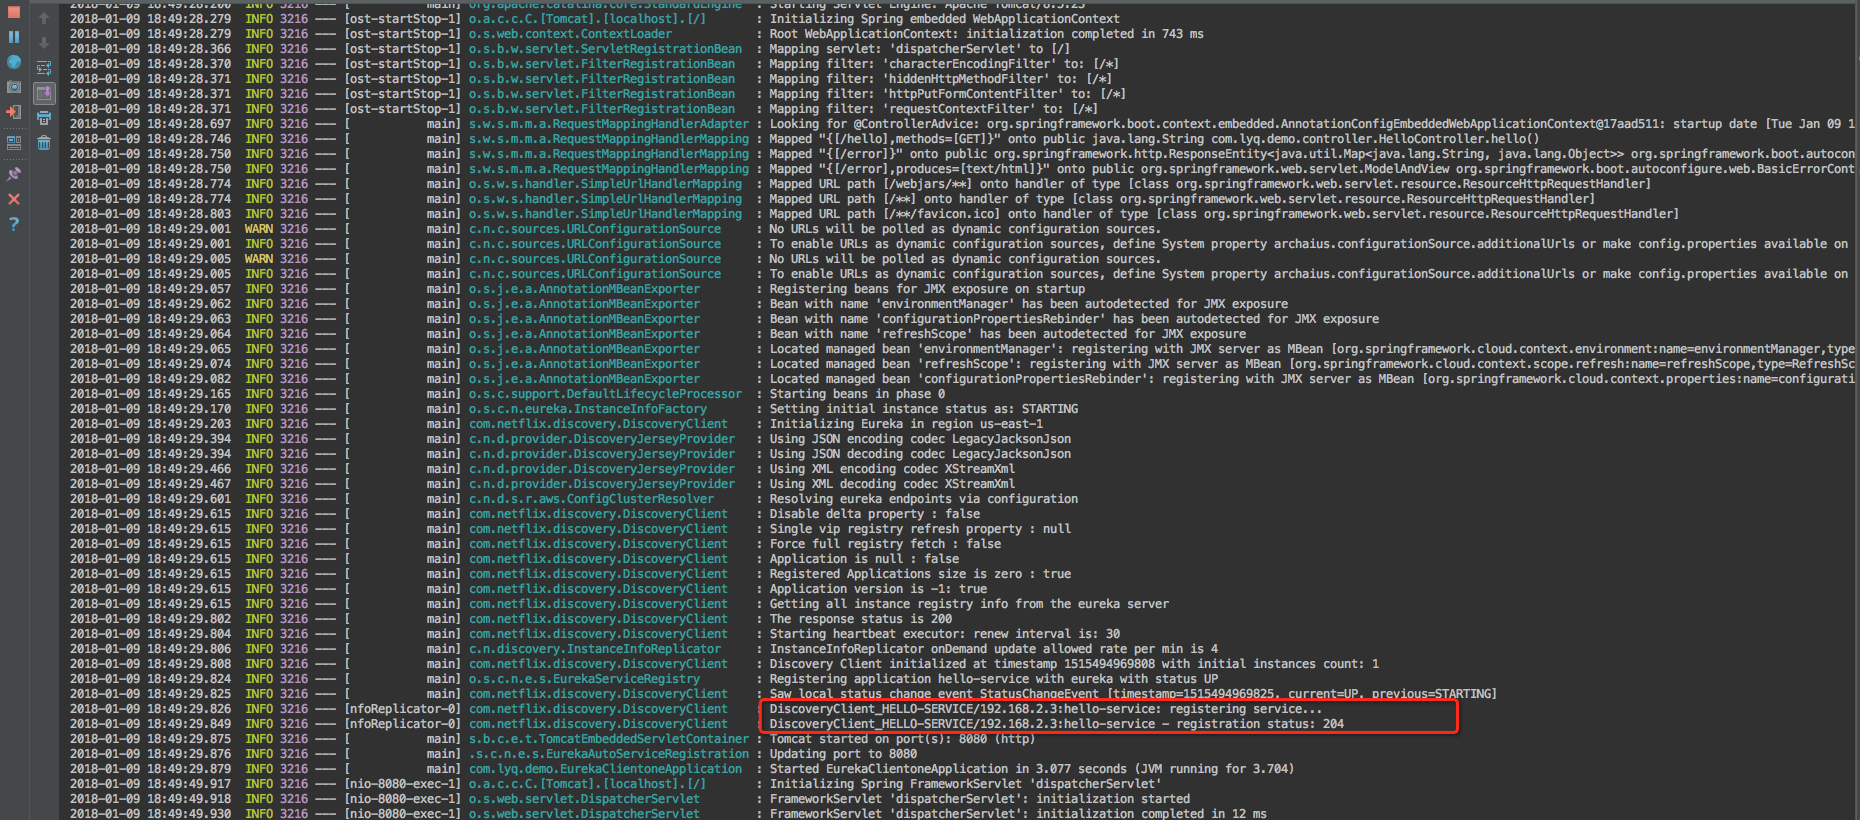
6、先运行服务端,然后在运行此需要注册的客户端在控制台可以见到如下注册信息:
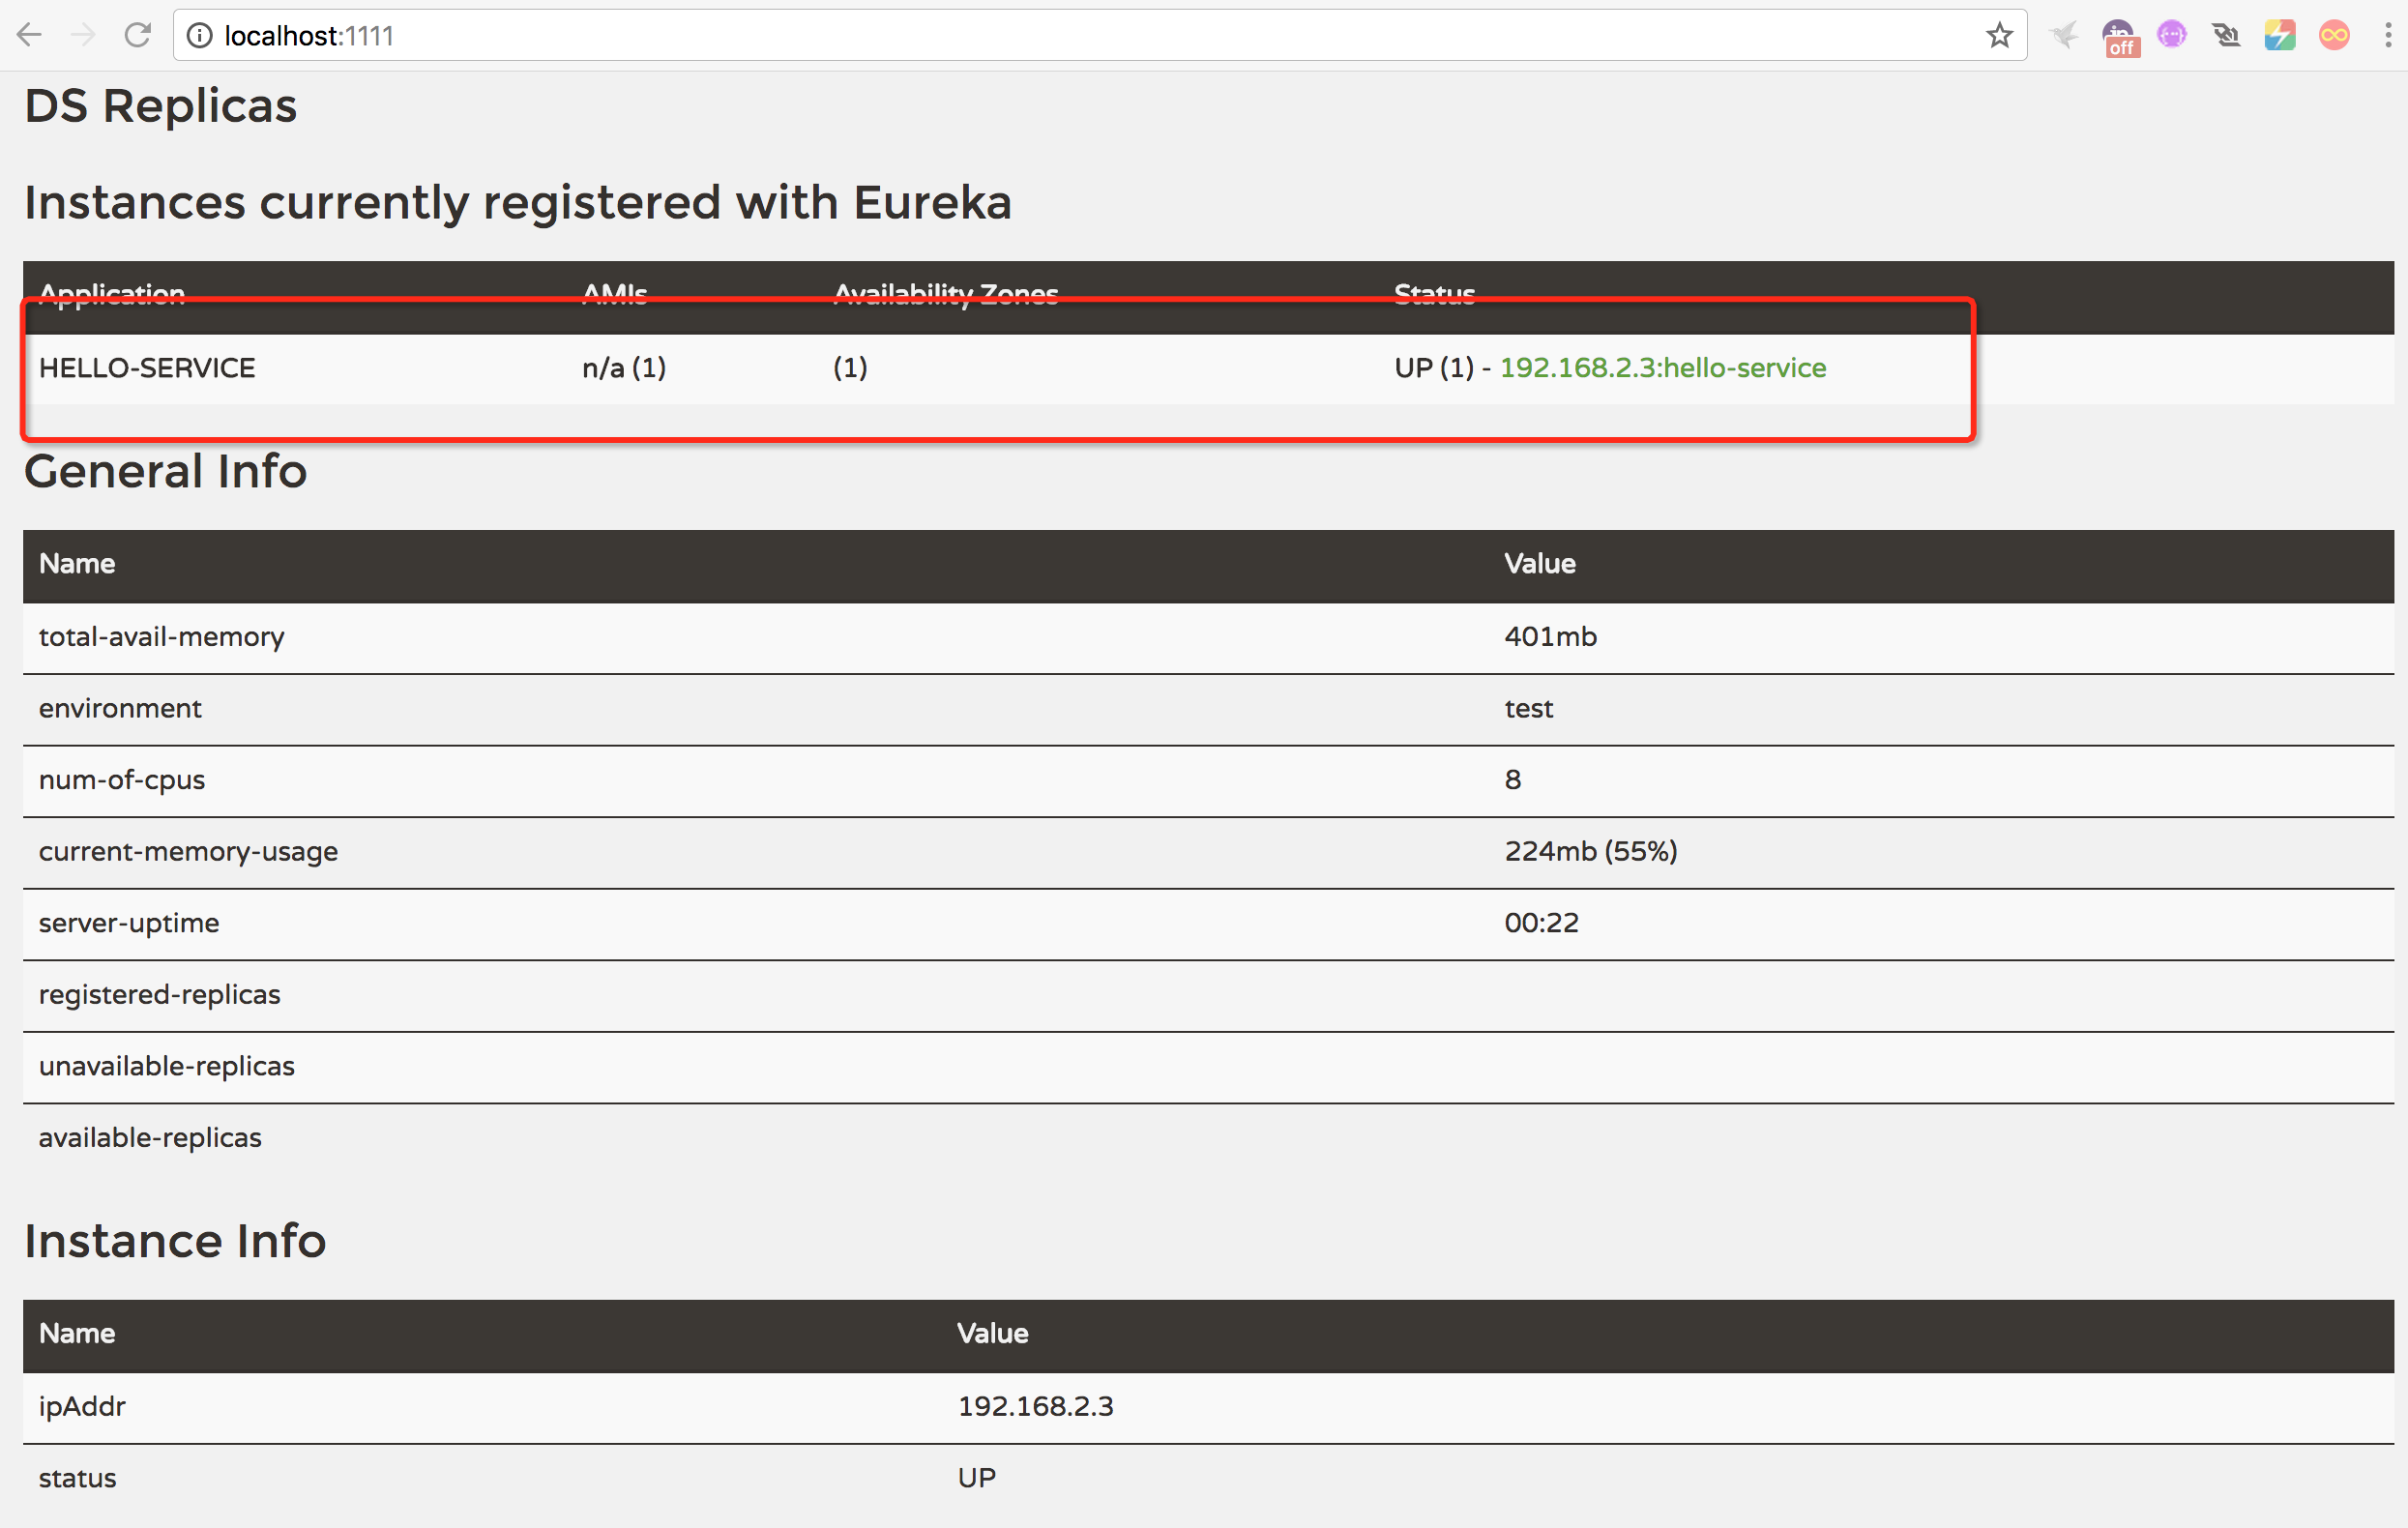
7、或者在浏览器输入:http://localhost:1111也可以看到注册信息
Summary:
到目前位置单点服务注册已经实现,接下来做集群,请见后续文章

